Delicious & Spooky Mini Pumpkin Bread Recipe: The Ultimate Fall & Halloween Treat
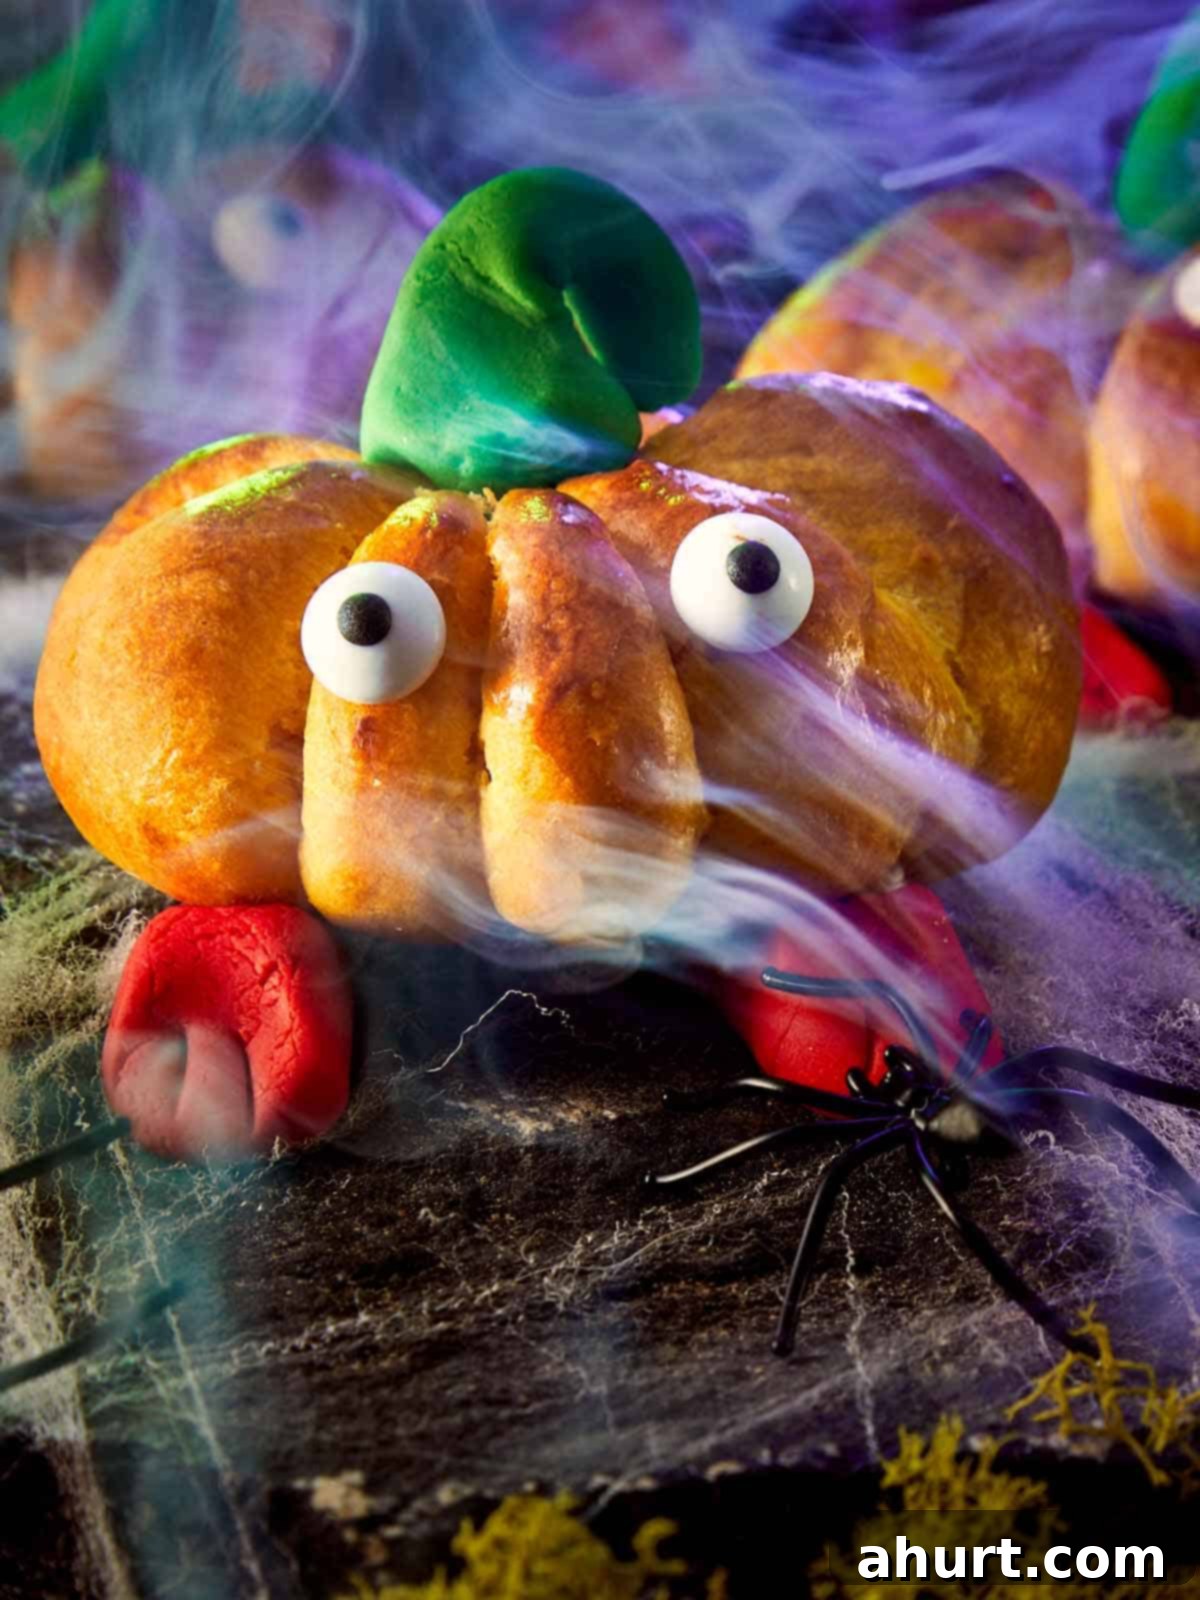
There’s something truly magical about the autumn season – the crisp air, the changing leaves, and of course, the comforting aroma of pumpkin spice filling the kitchen. Our Mini Pumpkin Breads encapsulate all this enchantment in one adorable package. Each golden-baked, soft, and slightly sweet pumpkin-shaped bun holds a delightful secret: a melted square of dark chocolate, creating a gooey surprise in every bite. Made with authentic pumpkin purée and a touch of rich butter, these breads are the epitome of cozy perfection, a genuine taste of fall that’s both whimsical and incredibly satisfying.
These charming little loaves don’t just taste good; they look absolutely irresistible. They prove beautifully, bake to a gorgeous golden-brown hue, and emerge from the oven shaped like the cutest mini pumpkins you’ve ever seen. While they might appear almost too adorable to eat, we promise you’ll want to dive right in! They are an ideal addition to your Halloween party spread, a delightful centerpiece for a festive brunch, or simply a wonderful way to infuse your home with the warm, inviting scents of autumn. Imagine the smiles they’ll bring to faces, young and old, as they discover the hidden chocolate treasure within.
Spooky-Cute and Seriously Delicious: Why You’ll Love This Pumpkin Bread
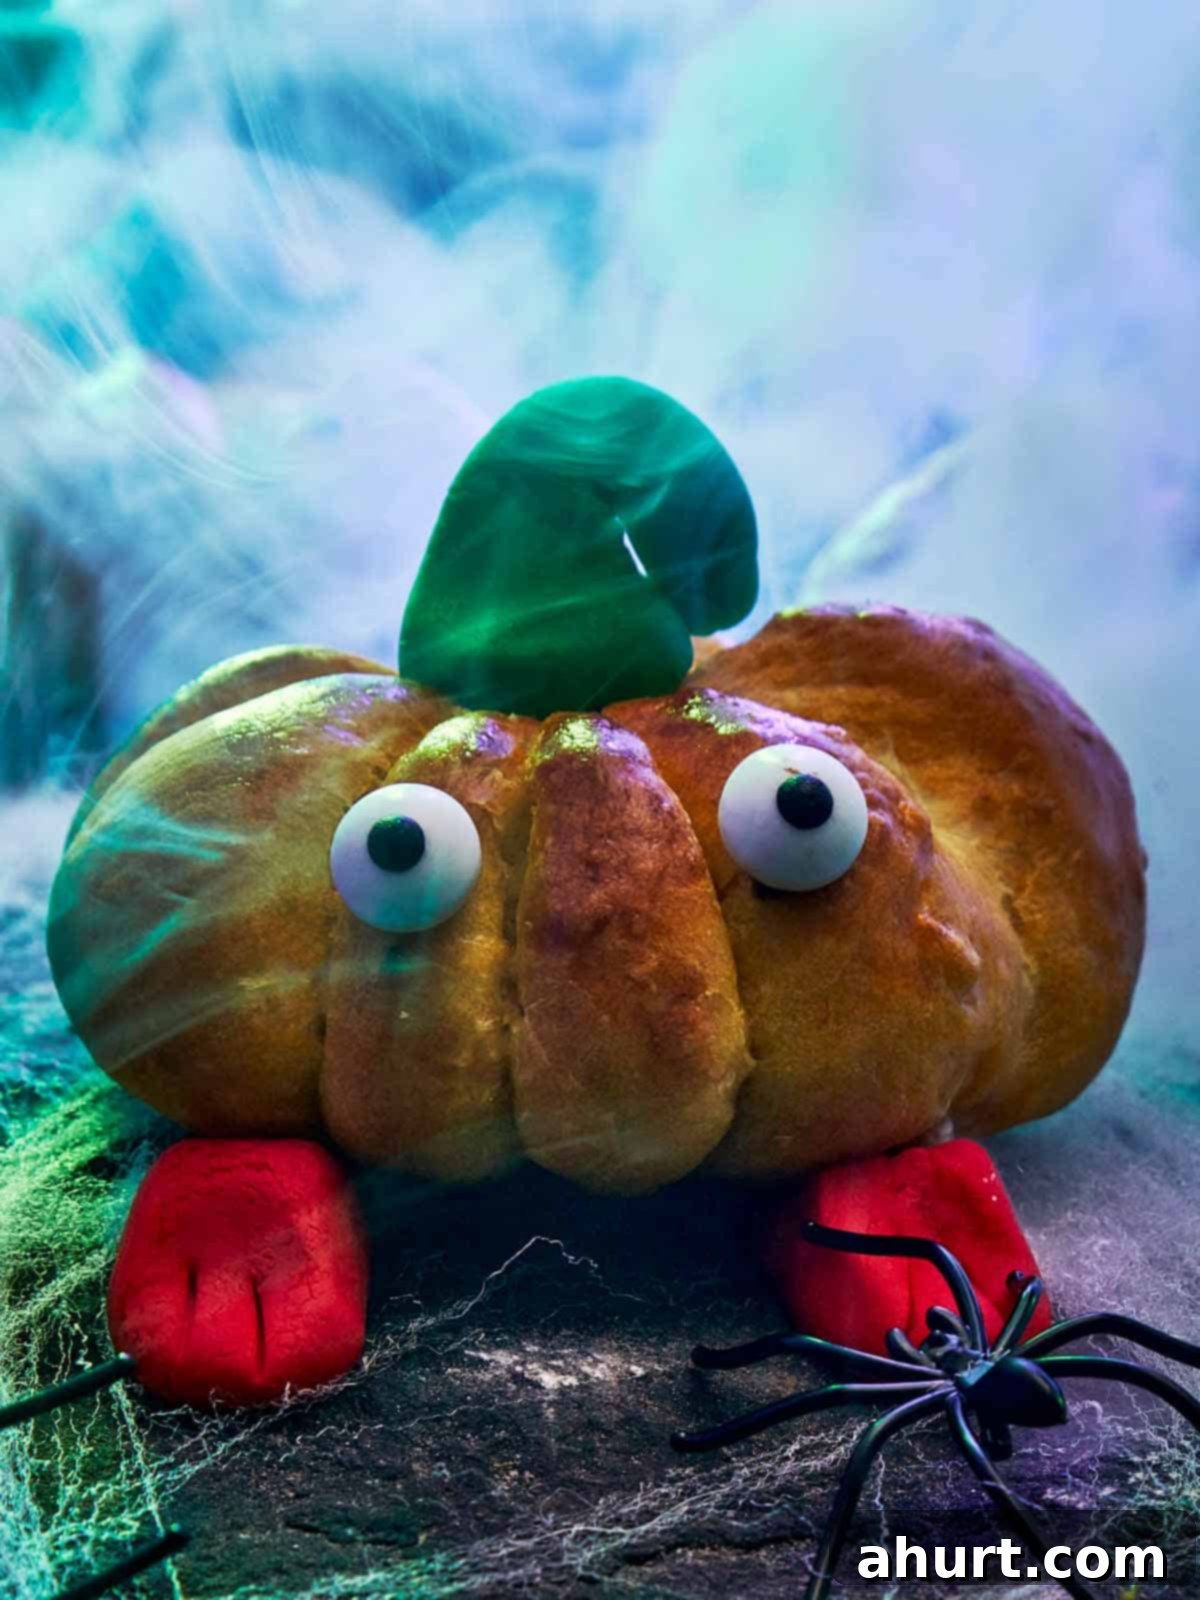
These aren’t just any pumpkin breads; they are a celebration of autumn, crafted to bring joy and a touch of spooky charm to your table. Each golden, soft, and perfectly sweetened mini bread combines all the elements we adore about the fall season: the cozy embrace of spice, the rich tenderness of buttery dough, and the irresistible gooey heart of melted dark chocolate. The secret to their incredible tenderness and vibrant color lies in the generous use of real pumpkin purée, which also infuses them with an authentic, earthy sweetness. Meanwhile, the addition of melted butter ensures a rich, melt-in-your-mouth texture that makes every bite feel like a warm hug.
Beyond their delightful taste, the visual appeal of these mini pumpkin breads is undeniable. Each one bakes up into a perfectly formed, cute little pumpkin, almost too adorable to eat – *almost*. Their charming appearance makes them a fantastic centerpiece for any autumnal gathering. For a truly unforgettable Halloween table, consider pairing these sweet treats with savory spooky delights. Imagine serving them alongside a vibrant Bloody Dip for a contrast of sweet and savory, or presenting them with spooky Witch Finger Grissini. This creates a Halloween party spread that is equal parts cute, creepy, and utterly delicious, ensuring your guests are both impressed and delighted.
These mini pumpkin breads are incredibly versatile. Serve them for breakfast with a cup of coffee or a spiced chai latte, offer them as a delightful snack throughout the day, or present them as a unique dessert after a comforting fall meal. Their individual portions make them perfect for grab-and-go treats, lunchbox surprises, or sharing with friends and family. The combination of classic fall flavors with a playful, spooky design ensures they will be a hit at any event, from a casual family dinner to a grand Halloween bash.
Key Ingredients That Bring the Magic to Life
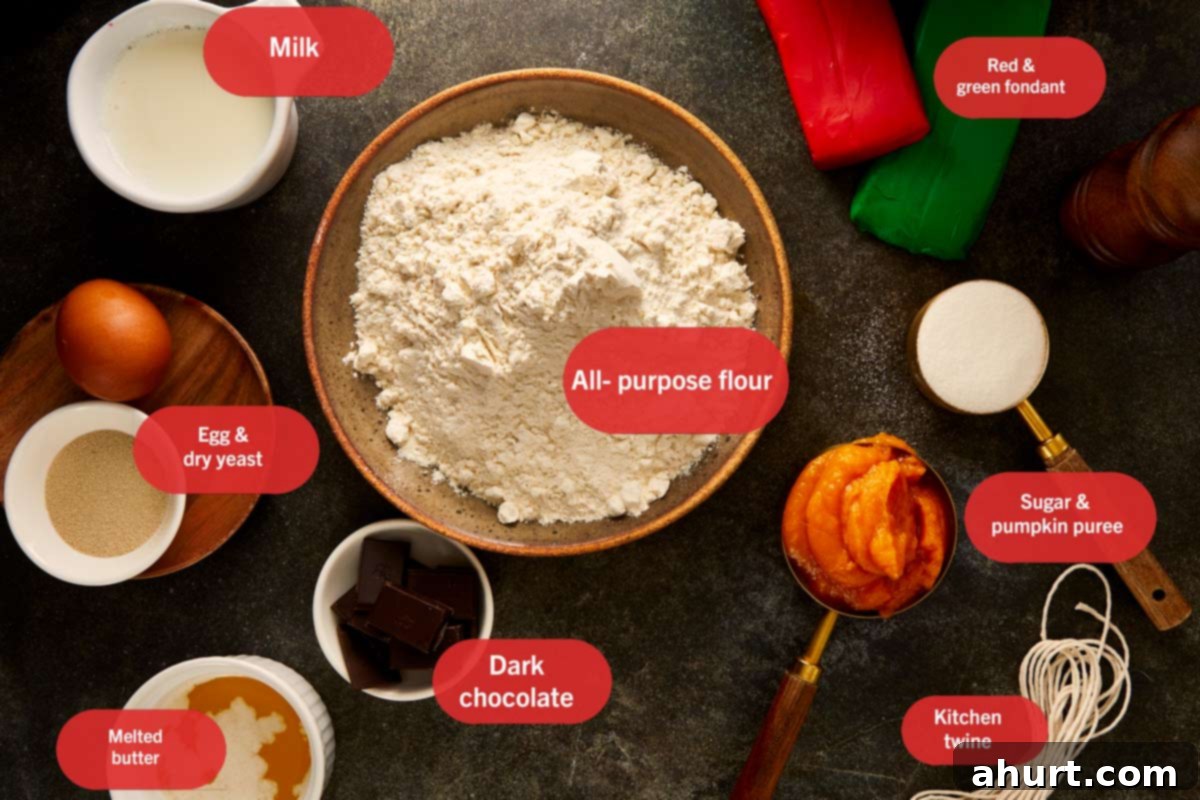
The soft, cozy, and vibrant fall flavor of these little pumpkin breads comes from a carefully selected blend of simple ingredients that work harmoniously together. Each component plays a crucial role in achieving the perfect texture, taste, and visual appeal:
- Pumpkin Purée: This is the star ingredient, responsible for the bread’s gorgeous golden-orange color, natural earthy sweetness, and that unmistakable, comforting autumn flavor. It also adds significant moisture, ensuring the breads remain incredibly tender and never dry. You can use canned 100% pure pumpkin purée (be sure it’s not pumpkin pie filling, which is pre-spiced and sweetened) or make your own fresh purée.
- Melted Butter: More than just adding flavor, melted butter contributes immensely to the richness of the dough and helps create that wonderfully soft and tender crumb. It makes the bread truly decadent and adds a depth of flavor that complements the pumpkin beautifully.
- Dark Chocolate Squares: Hidden like a delicious secret inside, these dark chocolate squares melt into a gooey, rich surprise. The slight bitterness of dark chocolate provides a wonderful contrast to the sweet pumpkin bread, elevating the flavor profile. While dark chocolate is recommended for this delightful balance, milk chocolate or even white chocolate chips can also be used for a sweeter filling.
- Milk: Essential for bringing the dough together, milk provides the necessary liquid to hydrate the flour and activate the yeast. Using lukewarm milk is crucial to ensure the yeast can work its magic effectively, leading to a perfectly moist and airy texture in the finished bread.
- Instant Dry Yeast: This is the leavening agent that makes these breads rise beautifully, creating their soft and fluffy texture. Instant dry yeast is convenient as it can be mixed directly with the dry ingredients without prior proofing, though warming it with milk ensures optimal activity.
- All-Purpose Flour: The structural foundation of the bread, all-purpose flour provides the necessary gluten development for a chewy yet tender crumb. Measuring it correctly (preferably by weight or by spooning into a measuring cup and leveling) is key to a consistent dough.
- Sugar & Salt: These essential pantry staples balance and enhance all the other flavors. Sugar not only adds sweetness but also aids in browning and provides food for the yeast. Salt balances the sweetness and brings out the deeper flavors of the pumpkin and butter.
- Beaten Egg: Half of a beaten egg is incorporated into the dough for richness, tenderness, and a slightly golden hue. The other half is reserved as an egg wash, which is brushed on top before baking to give the mini pumpkins a beautiful glossy, golden-brown crust.
Note: For the precise quantities and detailed measurements of all ingredients, please refer to the comprehensive Recipe Card located further down this page.
How to Make It: Step-by-Step Mini Pumpkin Bread Guide
Creating these soft, golden, and adorably shaped mini pumpkin breads is a rewarding process that brings the magic of fall into your kitchen. Follow these detailed steps to bring these cuties to life:
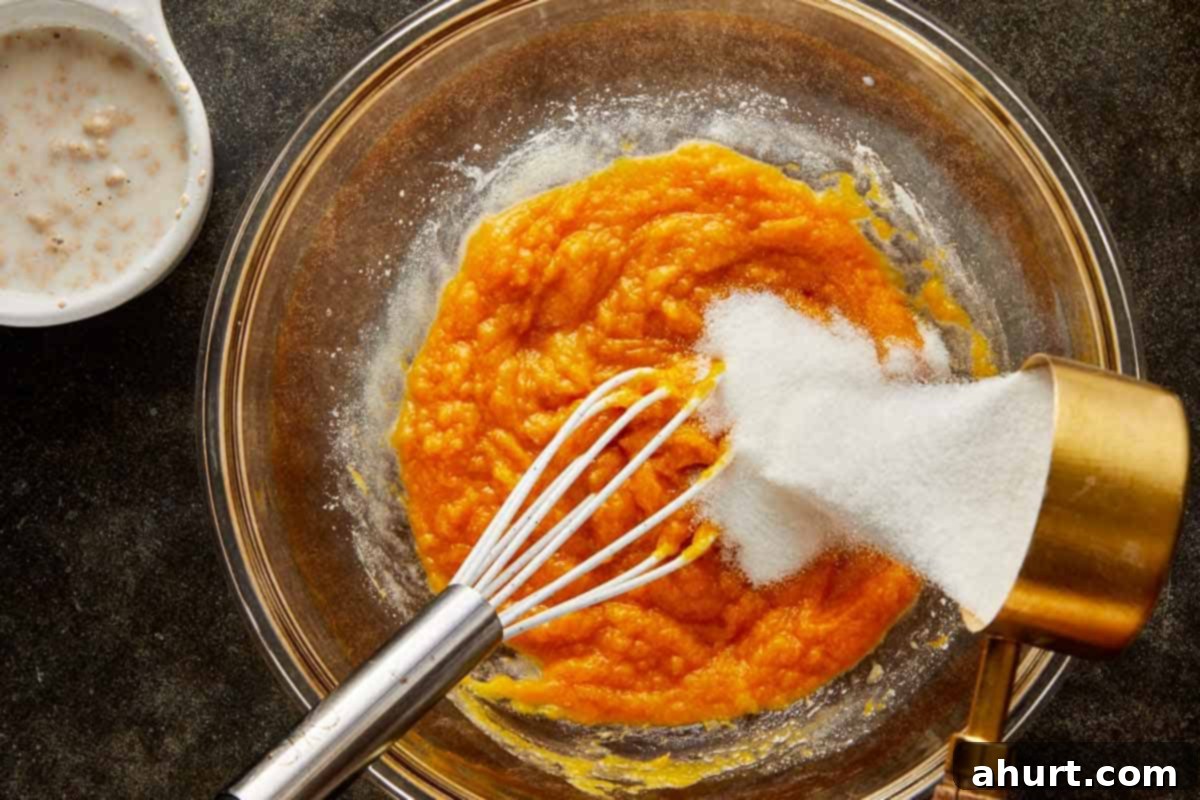
- Activate the Yeast & Prepare the Base. Begin by warming the milk until it is just lukewarm. It should feel comfortably warm to the touch, not hot (around 105-115°F or 40-46°C). If the milk is too hot, it will kill the yeast; if too cold, the yeast won’t activate properly. Stir in the instant dry yeast until it is fully dissolved. In a separate large mixing bowl, combine the pumpkin purée, the rich melted butter, and exactly half of the beaten egg (the other half will be saved for an egg wash later).
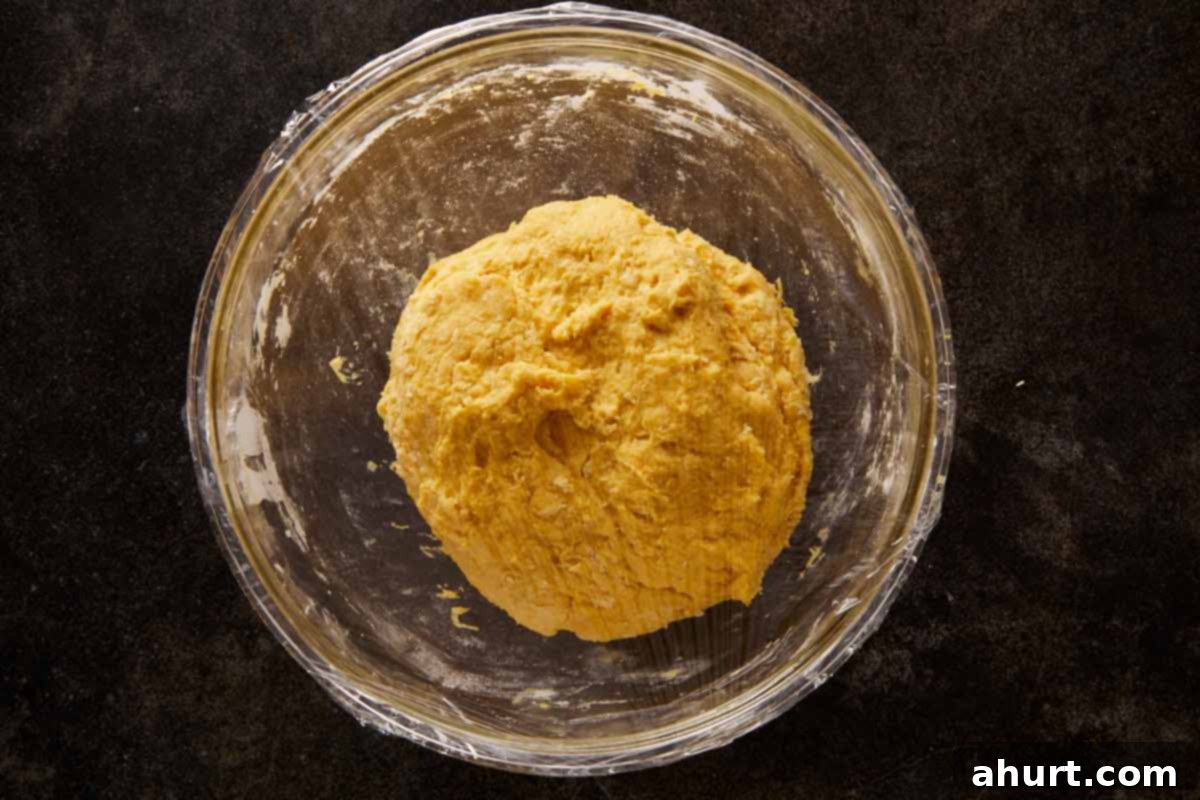
- Combine Dry Ingredients & Initial Rest. To the pumpkin mixture, add the sugar and salt, mixing thoroughly to combine. Now, pour in the activated milk-yeast mixture, stirring until all ingredients are well incorporated. Gradually add the all-purpose flour, mixing until a soft, shaggy dough begins to form. At this stage, the dough won’t be smooth yet. Cover the bowl with plastic wrap or a clean kitchen towel and let the dough rest for a crucial 15 minutes. This brief rest period, known as autolyse, allows the flour to fully hydrate and jumpstarts gluten development, making the subsequent kneading much easier and more effective.
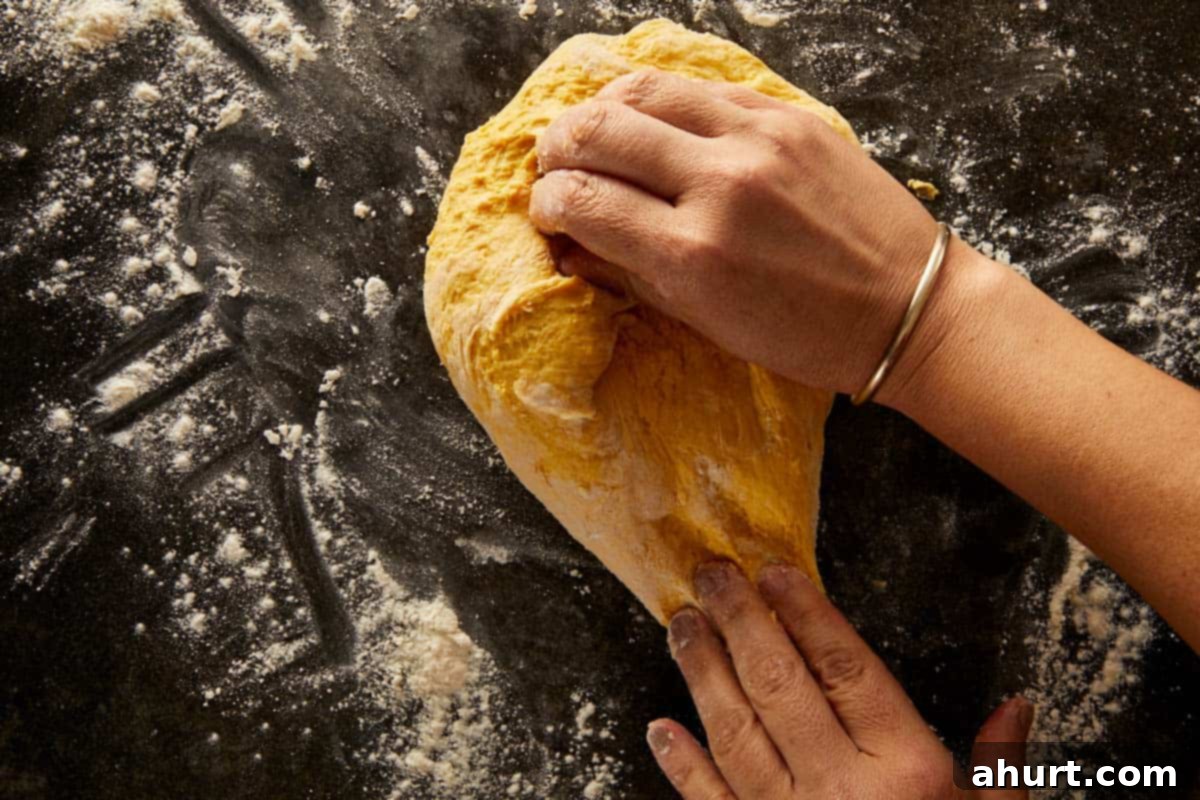
- Knead the Dough to Perfection. Transfer the rested dough to a lightly floured surface. Knead the dough for at least 10 minutes (or 7-8 minutes if using a stand mixer with a dough hook). The dough will initially be quite sticky, but resist the urge to add too much extra flour, as this can make the final bread tough. Work quickly and confidently, pushing, folding, and stretching the dough. You’ll notice it becoming smoother, more elastic, and less sticky as you knead. A well-kneaded dough should pass the “windowpane test”: you should be able to stretch a small piece of dough thinly enough that light passes through without it tearing. This ensures a wonderfully fluffy texture.
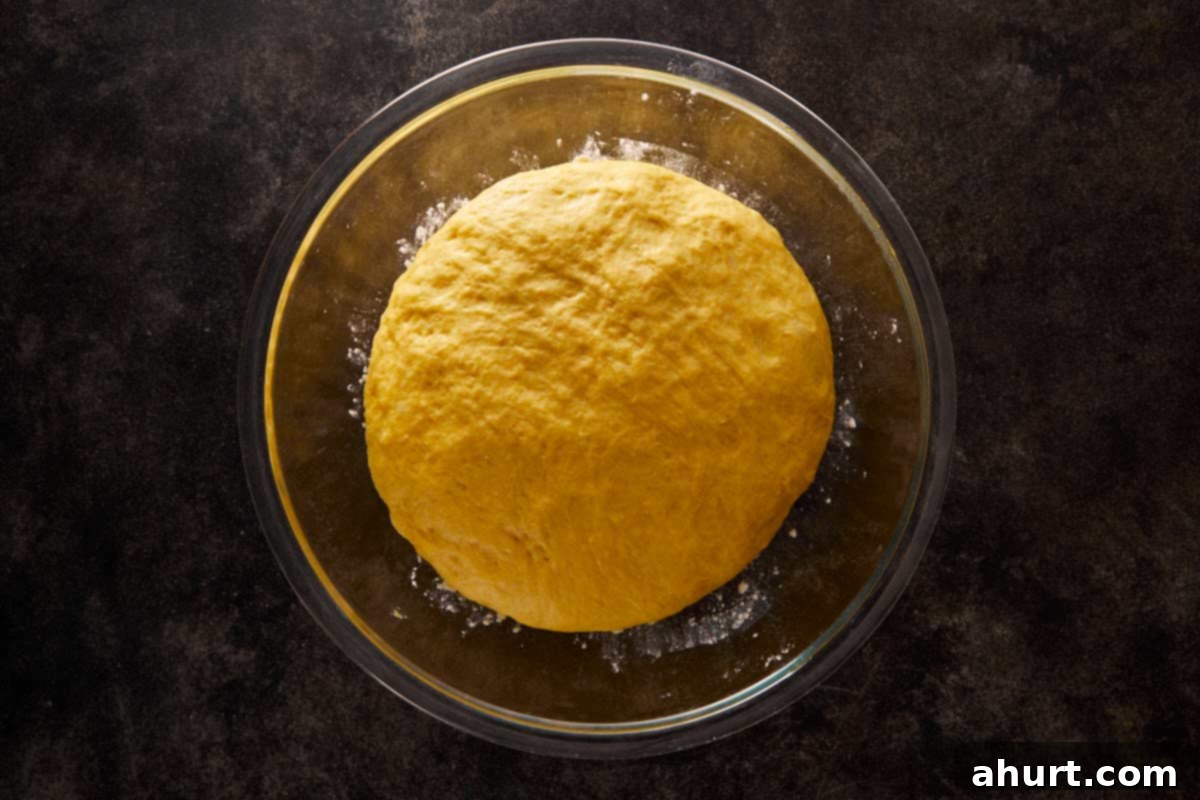
- First Rise: Developing Flavor and Texture. Lightly oil a clean bowl and place the kneaded dough inside, turning it once to coat. Cover the bowl tightly with plastic wrap or a damp kitchen towel. Let the dough rise in a warm, draft-free place for approximately 1 hour, or until it has visibly doubled in size. The warmth is essential for yeast activity, so a slightly warm oven (turned off, with just the light on) or a sunny spot can work well. When gently pressed with a finger, the dough should feel airy and spring back slowly. This first rise is crucial for developing the bread’s flavor and creating its airy structure.
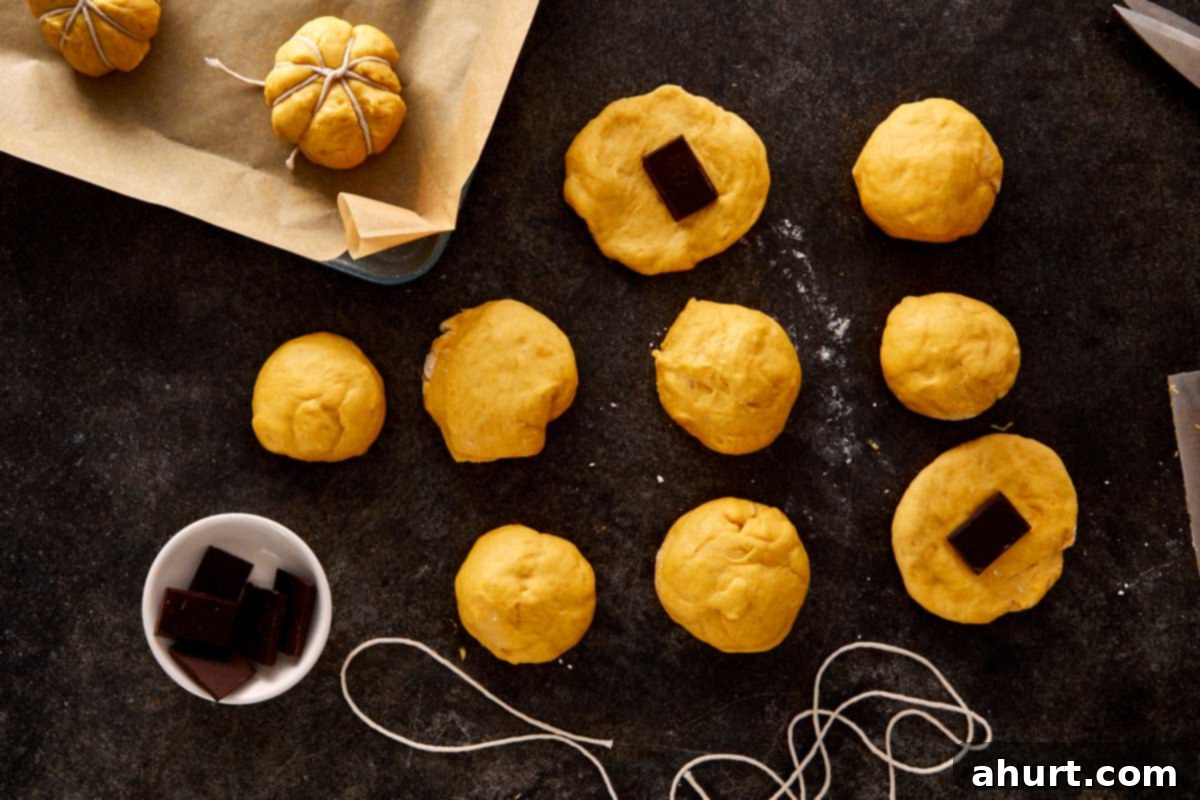
- Divide, Fill, and Seal the Chocolate Surprise. Gently deflate the risen dough by lightly punching it down, then transfer it back to a lightly floured surface. Knead it briefly for about a minute to release excess air. Divide the dough into 10 equal pieces, each weighing approximately 55 grams for uniform baking and appearance. Take one piece of dough and flatten it into a disc with your palm or a rolling pin. Place one square of dark chocolate (or your chosen filling) directly in the center of the flattened dough. Carefully bring the edges of the dough up and around the chocolate, pinching them firmly together to completely seal the chocolate inside. Roll the sealed dough into a smooth, tight ball, ensuring there are no visible seams or openings where the chocolate could escape during baking.
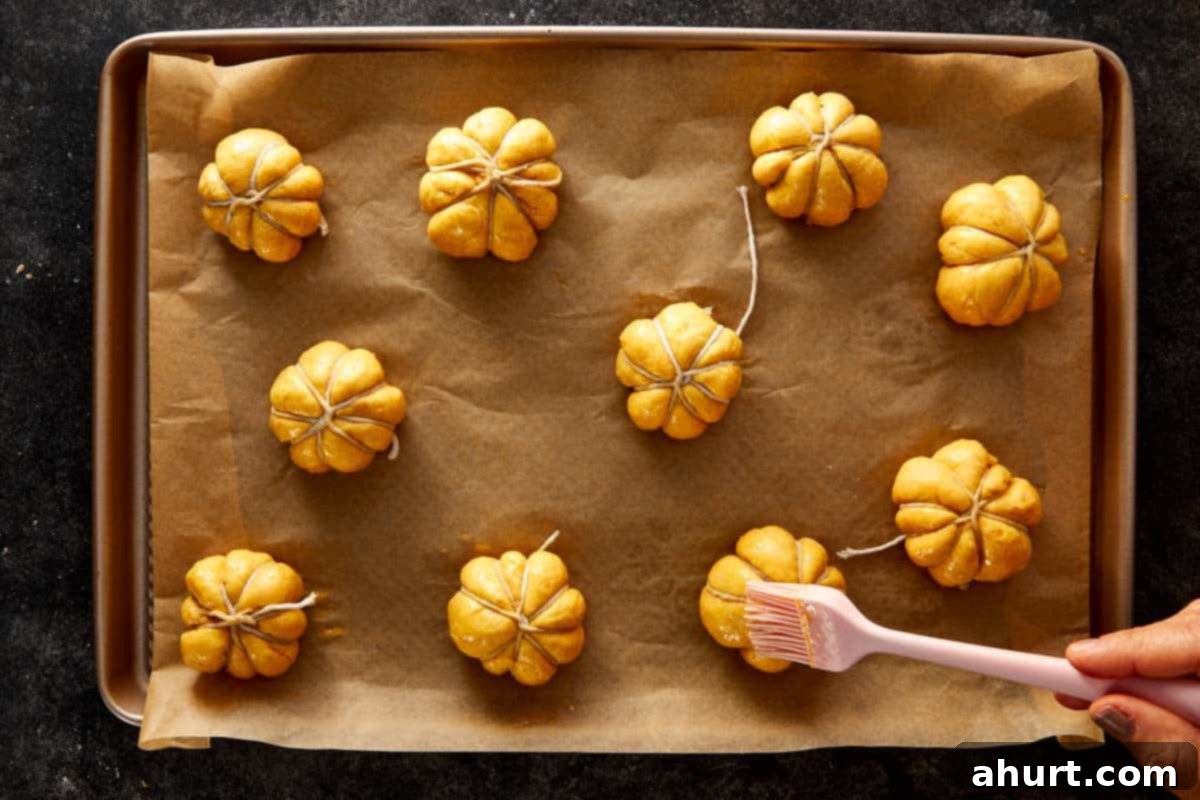
- Shape into Pumpkins, Second Rise, and Egg Wash. This is where the magic happens! Take a long piece of un-dyed, oven-safe kitchen twine (approximately 18-20 inches long). Place one filled dough ball in the center of the twine. Wrap the string around and under the ball to create 8 distinct pumpkin-like sections. Don’t tie the twine too tightly, as the dough needs space to rise, but ensure it’s snug enough to create definition. Place the shaped dough balls on a baking tray lined with parchment paper, leaving enough space between them for expansion. Cover them loosely with plastic wrap and let them undergo a second rise (proofing) for another 30 minutes in a warm spot. Just before baking, gently brush the tops of the risen pumpkin breads with the remaining half of the beaten egg. This egg wash will give them a beautiful golden, glossy finish and a slightly crisp crust.
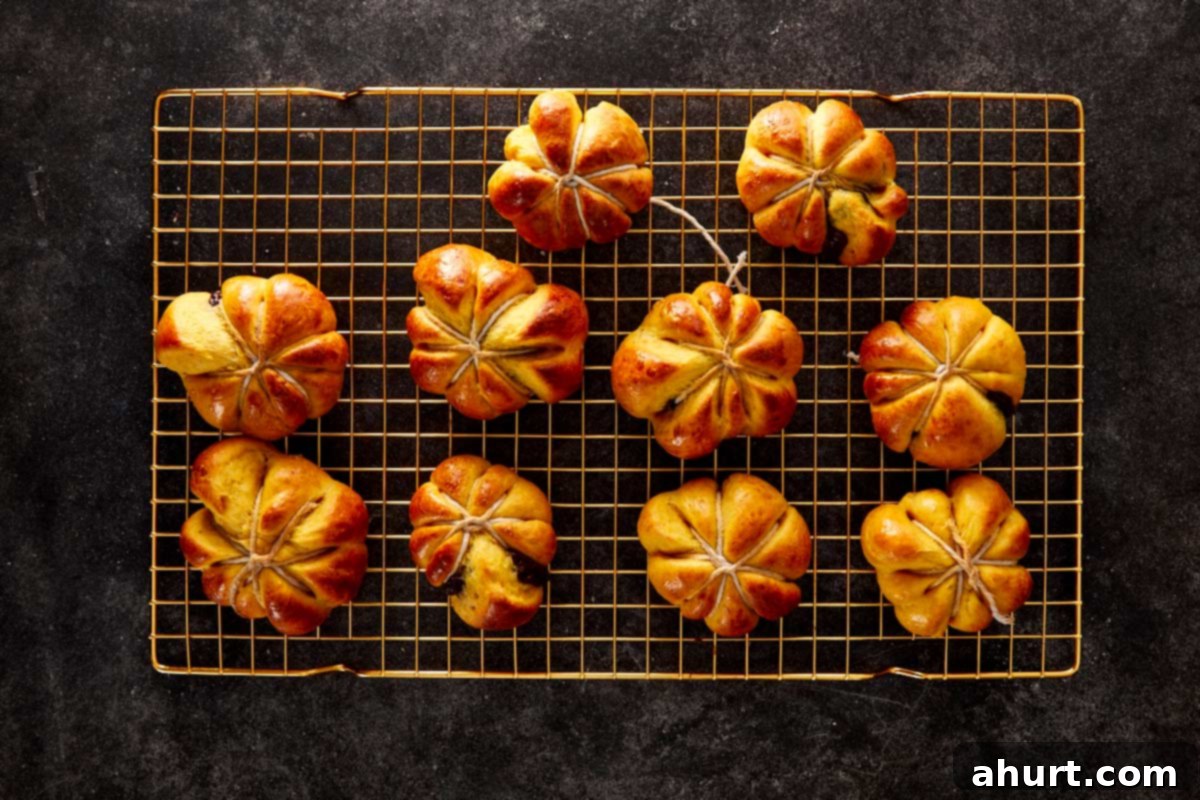
- Bake to Golden Perfection & Cool. Preheat your oven to 180°C (350°F). Bake the pumpkin breads for the recommended time (check the recipe card) or until they are beautifully golden brown on top and slightly firm to the touch. Your kitchen will be filled with the most intoxicating aroma of warm butter and sweet pumpkin, a true essence of autumn! Once baked, remove the tray from the oven and carefully transfer the hot breads to a wire rack to cool completely. Allowing them to cool on a rack prevents the bottoms from becoming soggy and helps maintain their tender texture.
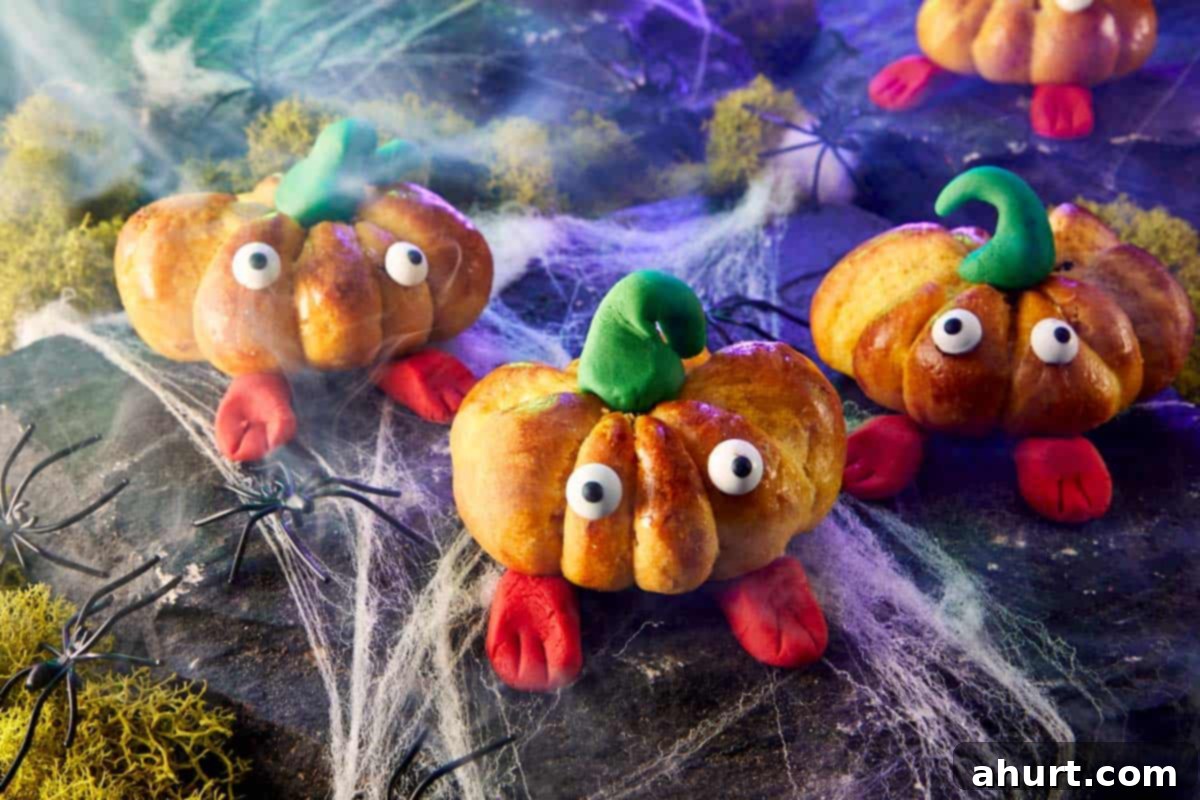
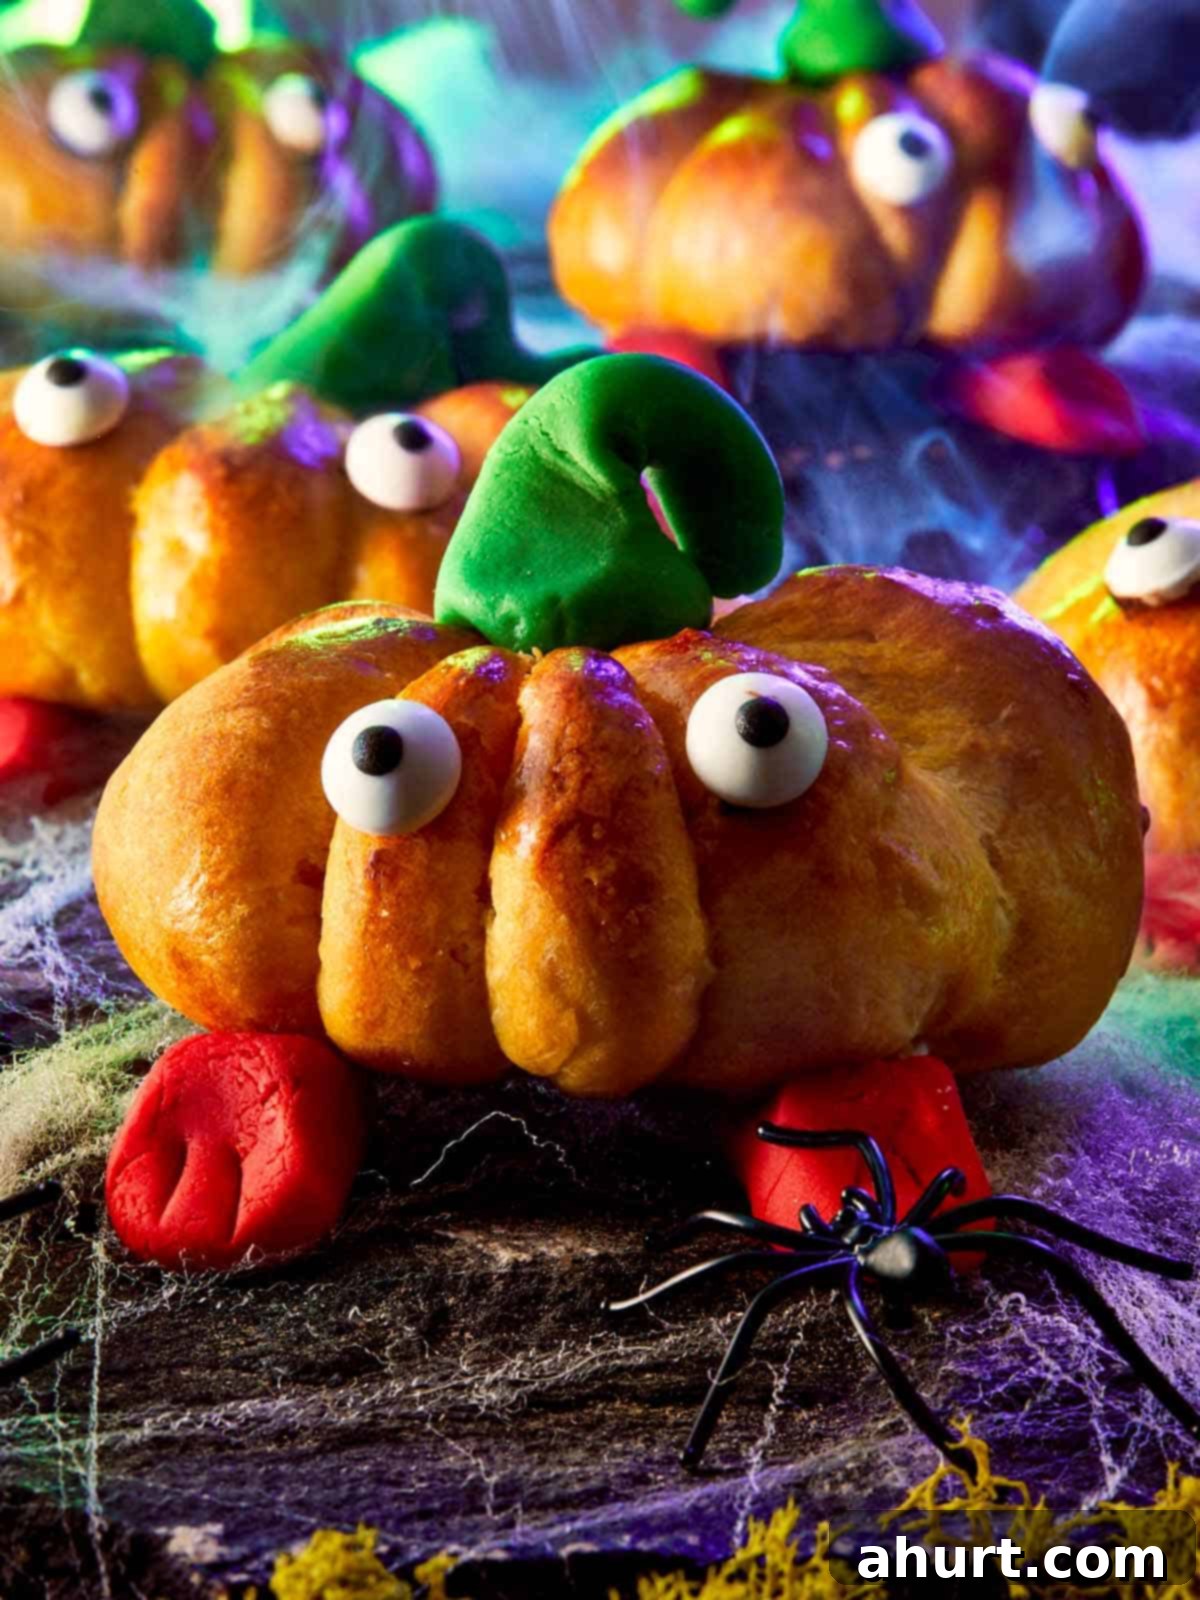
- Decorate & Serve Your Spooky-Cute Treats. Once the breads have cooled sufficiently (this is important so the fondant doesn’t melt!), carefully snip and remove the kitchen twine from each pumpkin bread. For the ultimate spooky-cute pumpkin look, add a small green fondant stem to the center top of each bread, and attach playful candy eyes. You can also add little red fondant “feet” for extra charm, as shown in the picture. These mini pumpkin breads are best enjoyed fresh from the oven, slightly warm, or at room temperature. The melted chocolate surprise is most delightful when warm!
Curious to see these steps in action? For a visual guide and to follow the full step-by-step process, you can See It In Action through the embedded video or link provided below. Watching the technique often clarifies details and helps achieve perfect results.
For a full-on Halloween feast or a lavish fall gathering, these Pumpkin Breads are just one component of a memorable spread. Serve them warm alongside other fall favorites to create an indulgent experience. Try them with a decadent Pumpkin Cheesecake for a double dose of pumpkin goodness, or alongside a sweet stack of fluffy Caramel Chip Pumpkin Pancakes for a truly autumnal brunch. If you’re seeking pure coziness, pair them with a steaming mug of rich Hot Chocolate, perhaps even spiced with a hint of cinnamon. To finish a perfect night, consider serving them with a warm Easy Apple Crumble or delightful Churro Apple Pie Bowls + Caramel Sauce for that extra touch of sweetness and warmth.
Frequently Asked Questions About Pumpkin Bread
Absolutely! Preparing the dough in advance is a great time-saver. You can prepare the dough up to the first rise, then cover it tightly with plastic wrap and refrigerate it overnight (for up to 24 hours). When you’re ready to bake, simply remove the dough from the refrigerator and let it come to room temperature for about 30-60 minutes before proceeding with shaping and the second rise.
Yes, store-bought pumpkin purée is perfectly fine and convenient! However, it’s crucial to make sure you’re using 100% pure pumpkin purée, not pumpkin pie filling. Pumpkin pie filling contains added spices and sweeteners, which would alter the flavor balance of this recipe. Always check the ingredients label to ensure it’s just pure pumpkin.
Dark chocolate squares are recommended for this recipe as they provide a lovely balance of sweetness and richness, with a subtle hint of bitterness that complements the pumpkin beautifully. However, you can certainly experiment with other types of chocolate! Milk chocolate will yield a sweeter, creamier center, while white chocolate can offer a different flavor profile. Chocolate chips (mini or regular) or even flavored chips like cinnamon chips can also be fun alternatives, though they might not create the same gooey “melted square” effect.
Not at all! Fondant is used for that specific, smooth, and vibrant decorative look, but it’s completely optional. You can skip it entirely and still have delicious pumpkin breads. For alternative decorations, get creative! Try a dusting of powdered sugar, a drizzle of chocolate glaze, or add edible glitter for a festive touch. Small chocolate chips can serve as “eyes,” or you can use slivered almonds or candy corn for fun, seasonal alternatives to the fondant stem and feet.
Absolutely! While the recipe focuses on the natural pumpkin flavor and chocolate, a touch of pumpkin pie spice would enhance the autumn feel. You can add 1-2 teaspoons of pumpkin pie spice blend along with the flour and other dry ingredients for an extra layer of warmth and flavor.
These mini pumpkin breads are best enjoyed fresh on the day they are made. However, if you have leftovers, store them in an airtight container at room temperature for up to 2-3 days. For longer storage, you can freeze the undecorated breads for up to 1 month. Thaw them at room temperature and warm gently in the oven before serving for a “freshly baked” taste.
See It In Action: Step-By-Step Video Guide
Sometimes, seeing is believing, and for baking, a visual guide can make all the difference. Watch our comprehensive step-by-step video below to see exactly how these delightful mini pumpkin breads come together. From activating the yeast to shaping the adorable pumpkins and adding the final decorative touches, this video will walk you through each stage of the process, ensuring you feel confident and achieve perfect results every time. Follow along and bring these soft, whimsical pumpkin breads to life in your own kitchen!

Pin
Pumpkin Bread Recipe
Equipment
-
Kitchen twine for shaping
Ingredients
- ½ cup milk
- 2 tsp instant dry yeast
- ⅝ cup pumpkin purée
- 3 tbsp melted butter
- 1 beaten egg reserve half for egg wash
- ¼ cup sugar
- ¼ tsp salt
- 2½ cups all-purpose flour
- 10 small squares of dark chocolate
For Decoration
- green fondant
- red fondant
- candy eyes
Instructions
-
Warm the milk until just lukewarm (not hot). Add the yeast and stir until dissolved.
-
In a large bowl, combine pumpkin purée, melted butter, and half of the beaten egg.
-
Add sugar and salt, and mix well. Pour in the milk–yeast mixture and stir to combine.
-
Add flour and mix until a soft dough forms. Cover with plastic wrap and let rest for 15 minutes.
-
Transfer dough to a floured surface and knead for at least 10 minutes. The dough will be slightly sticky — work quickly until smooth.
-
Place dough in a floured bowl, cover, and let rise for 1 hour at room temperature or until doubled in size.
-
Deflate the dough and knead lightly. Divide into 10 pieces (about 55 g each).
-
Flatten each piece and place 1 square of chocolate in the centre. Seal and shape into a smooth ball.
-
Place each ball in the centre of a long piece of string. Wrap the string around and under the ball to form 8 pumpkin-like sections.
-
Place shaped dough balls on a baking tray lined with parchment paper. Cover and let rise for 30 minutes.
To Bake
-
Preheat oven to 180°C (350°F).
-
Brush tops with remaining beaten egg.
-
Bake until golden brown
-
Cool on a wire rack.
To Decorate
-
Gently remove the string once cooled
-
Add a green fondant stem in the centre and a red fondant foot underneath.
-
Finish with candy eyes for a fun pumpkin look!
Notes
A few little secrets to help your pumpkins come out soft, golden, and picture-perfect every time:
- Don’t overheat the milk — warm is enough to activate the yeast. Too hot will kill it, too cold won’t activate it properly, resulting in dense bread.
- Knead until smooth and elastic; this vigorous kneading is essential for developing strong gluten, which in turn makes the breads extra fluffy, airy, and soft. Don’t skimp on this step!
- Lightly dust your hands with flour if the dough feels too sticky. Avoid adding excessive flour to the dough itself, as this can make the final product dry and tough. A light dusting on your hands or work surface is usually sufficient.
- Brush with egg wash just before baking for a glossy, beautifully golden-brown finish. This step adds a professional touch and a subtle richness to the crust.
- Let them cool completely before decorating so the fondant doesn’t melt or slide off. Patience here ensures your cute decorations stay perfectly in place.
- Measure flour correctly. For best results, spoon the flour into your measuring cup and level it off with a straight edge, rather than scooping directly from the bag. This prevents over-packing and ensures an accurate measurement.
- Use un-dyed kitchen twine for shaping. Ensure the twine is food-safe and won’t transfer color or chemicals to your bread during baking.
- Find a warm, draft-free spot for rising. A slightly warm (turned off) oven with the light on, or a sunny windowsill, can provide ideal conditions for yeast to thrive and for your dough to rise beautifully.
Nutrition
Nutrition information is automatically calculated, so should only be used as an approximation.
