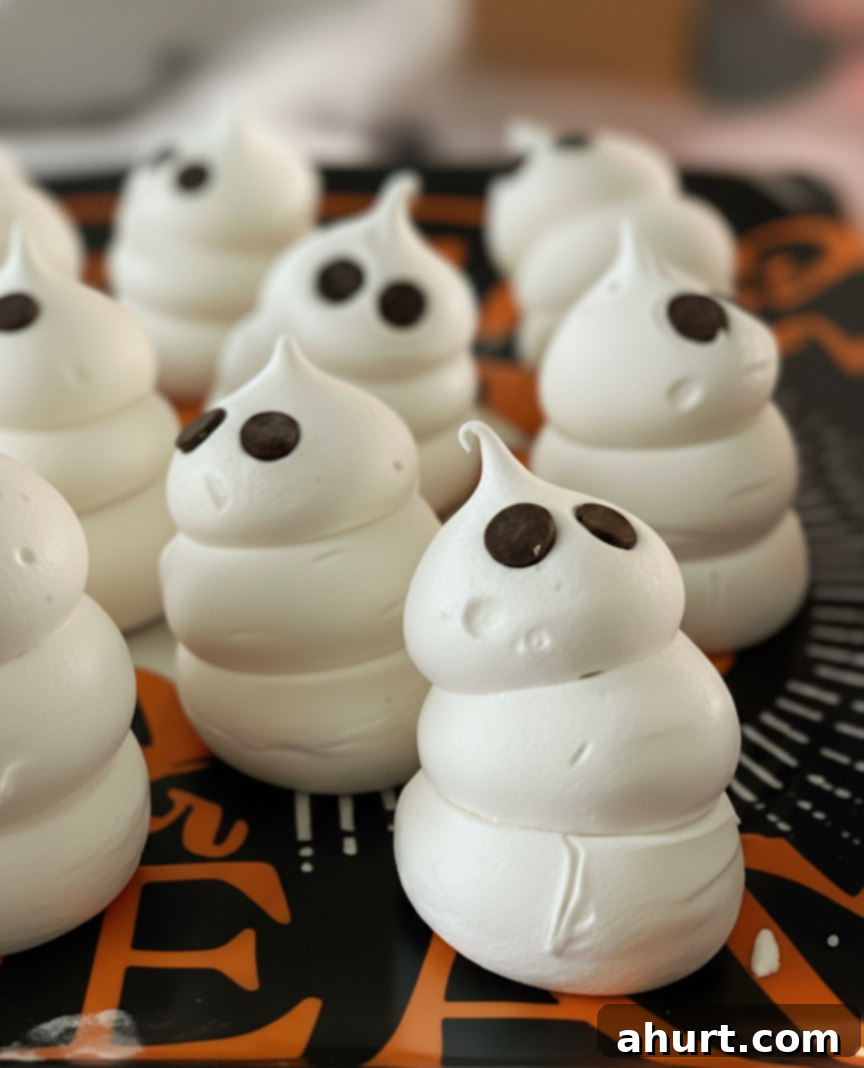
Spooky Sweetness: Crafting Adorable & Delicious Swiss Meringue Ghosts for Halloween
Get ready to add a touch of charming spookiness to your Halloween festivities with these delightful Swiss Meringue Ghosts! Picture this: light, impossibly crisp, and utterly melt-in-your-mouth confections that bring smiles and a hint of playful mischief. These ethereal treats are sweet, airy, and boast a perfect balance between cute and creepy, making them an ideal addition to any spooky season celebration. Whether you’re looking for the ultimate topper for your favorite Halloween desserts, a light bite to nibble while trick-or-treaters ring your doorbell, or simply a fun baking project, these ghostly delights are sure to vanish quickly. They’re not just a dessert; they’re an experience, transforming simple ingredients into something truly magical for your holiday table. This easy Halloween recipe is designed to bring joy to bakers of all skill levels, ensuring a successful and delicious outcome every time, perfect for a cozy fall afternoon in the kitchen.
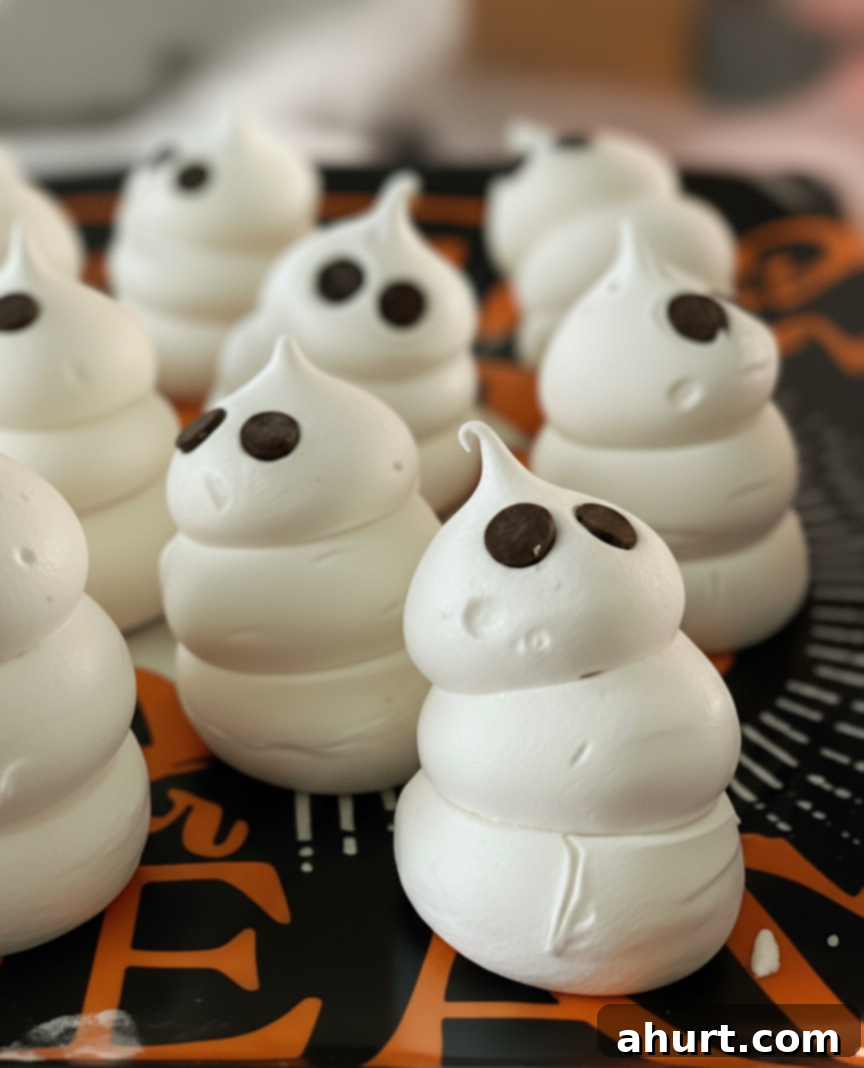
The Magic Behind Ghostly Meringues: A Sweet Kitchen Tale
There’s a special kind of enchantment in baking, especially when it comes to creating something as whimsical as these Swiss Meringue Ghosts. What truly makes this recipe a standout for your spooky season celebrations is its delightful simplicity combined with a touch of culinary patience. The secret lies in the Swiss meringue method: gently warming the egg whites with sugar creates an incredibly silky, stable, and strong meringue base. This meticulous process ensures your ghostly creations will be perfectly white, wonderfully crisp on the outside, and delightfully soft and chewy within—without any unsightly cracks or unwanted browning. Just pure, airy sweetness that literally melts on your tongue, leaving a hint of joy.
These ghostly meringues are more than just a treat; they’re a cozy activity that fills your kitchen with warmth and sweet aromas on a crisp autumn day. The slow bake isn’t just a step; it’s a testament to the care that goes into creating these flawless, weightless wonders. They emerge from the oven looking like delicate specters, ready to float onto your dessert table or straight into eager hands. If you’re looking to enhance the Halloween spirit, these meringues are incredibly versatile. Imagine them perched atop a rich, dark chocolate cake, floating in a cup of hot cocoa, or complementing other seasonal favorites. For a truly unforgettable pairing, try serving them alongside something warm and spiced, such as these Soft Pumpkin Chocolate Chip Cookies, with their comforting aroma and chewy texture, or go for a timeless classic like a slice of Pumpkin Pie. Both offer the perfect textural contrast and flavor harmony with your light and airy ghostly creations, making them an essential component of any festive gathering.
Essential Ingredients for Ghostly Perfection
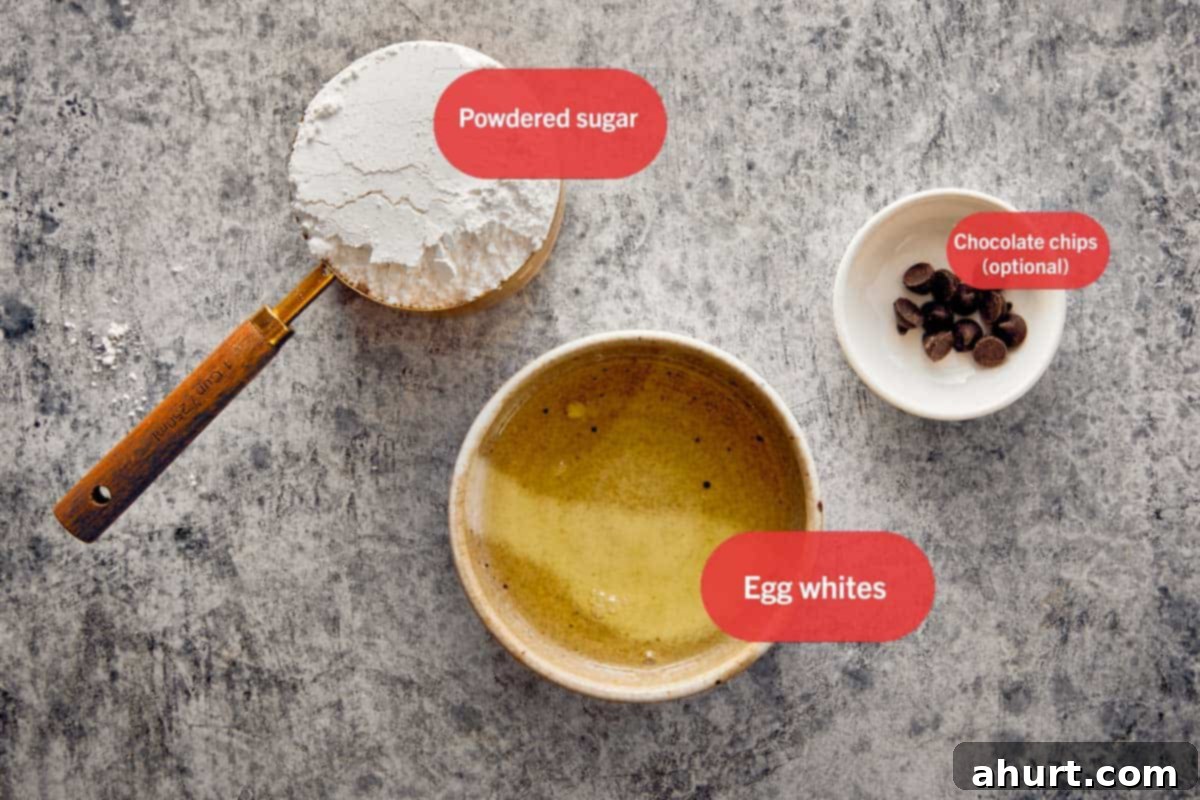
One of the most appealing aspects of this easy Halloween recipe is its reliance on just a handful of simple ingredients—items you likely already have stocked in your pantry and refrigerator. Yet, from these humble components, something truly extraordinary emerges: treats as light as air and impossibly sweet. It’s the kind of recipe that evokes feelings of nostalgia, comfort, and just a hint of delightful mischief, perfectly capturing the essence of Halloween.
- Egg Whites – These are the undisputed heart and soul of every successful meringue. When whipped to perfection, they transform into a glossy, cloud-like foam, providing your Swiss Meringue Ghosts with their signature weightless crunch and structural integrity. For best results, use large, fresh egg whites at room temperature, as they whip up with more volume and stability. Ensure absolutely no trace of yolk is present, as fat can prevent the whites from stiffening properly.
- Powdered Sugar – Unlike granulated sugar, powdered (or confectioners’) sugar dissolves beautifully and seamlessly into the egg whites during the Swiss meringue process. This fine texture contributes to the exceptionally smooth and stable meringue, ensuring it remains pure white and exquisitely crisp once baked. The fine granules prevent a gritty texture and help create that desirable melt-in-your-mouth quality.
- Mini Chocolate Chips – These tiny dark morsels are the finishing touch that brings your ghostly meringues to life. Pressed into the freshly piped meringue, they become the playful eyes of your little spirits, giving them personality that almost winks back at you. If you prefer, a food-safe edible marker or a tiny dab of melted dark chocolate can also be used for drawing on the eyes, offering an alternative for a slightly different look.
Pro Tip: Ensure your mixing bowl and whisk are impeccably clean and grease-free. Even a tiny bit of fat can deflate your meringue and prevent it from reaching its desired volume and stiffness. This small but crucial step is key to perfectly crisp and stable ghostly meringues.
Note: Find the full list of ingredients and precise measurements for this delightful meringue recipe in the Recipe Card below.
Crafting Your Ghostly Meringues: A Step-by-Step Guide
Bringing these beautiful, ethereal ghosts to life is a journey of soft peaks, glossy swirls, and just the right amount of patience. Follow these steps for perfect DIY Halloween treats that will impress everyone.
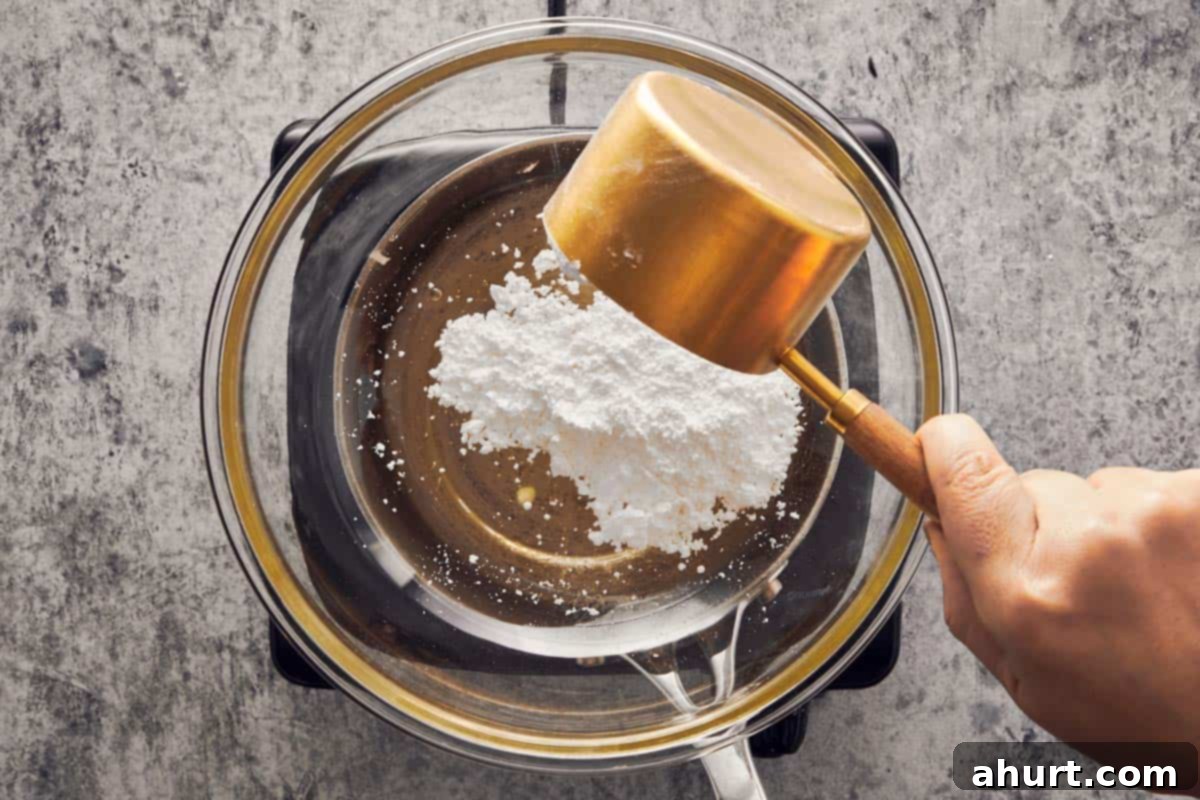
- Prepare the Meringue Base.
In a heatproof bowl, combine your egg whites and powdered sugar. Place this bowl over a saucepan of gently simmering water, ensuring the bottom of the bowl does not touch the water (this is known as a double boiler). Whisk continuously and gently until the sugar completely dissolves and the mixture feels warm and smooth to the touch. This heating process is crucial for stabilizing the meringue, giving it strength and a beautiful sheen. It also gently pasteurizes the egg whites, making them safer to consume.
- Whip to Glossy, Stiff Peaks.
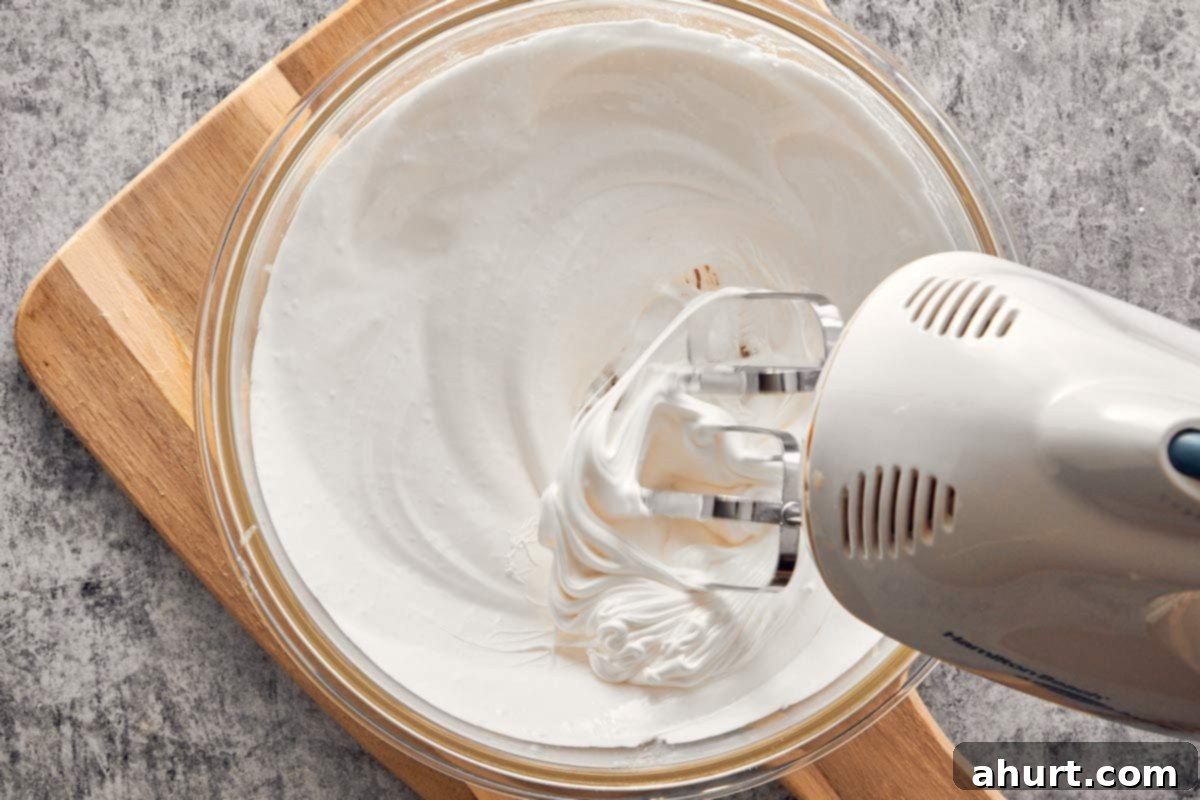
Once the sugar has dissolved and the mixture is warm, remove the bowl from the heat. Using an electric mixer (stand mixer with a whisk attachment is ideal), begin beating the meringue on high speed. Continue to whip vigorously until the mixture has cooled completely and transformed into a thick, incredibly glossy, and firm meringue that holds stiff peaks. When you lift the whisk, the meringue should stand up firmly without flopping over. This stage is key for the airy texture of your crisp meringue.
- Pipe the Spooky Shapes.
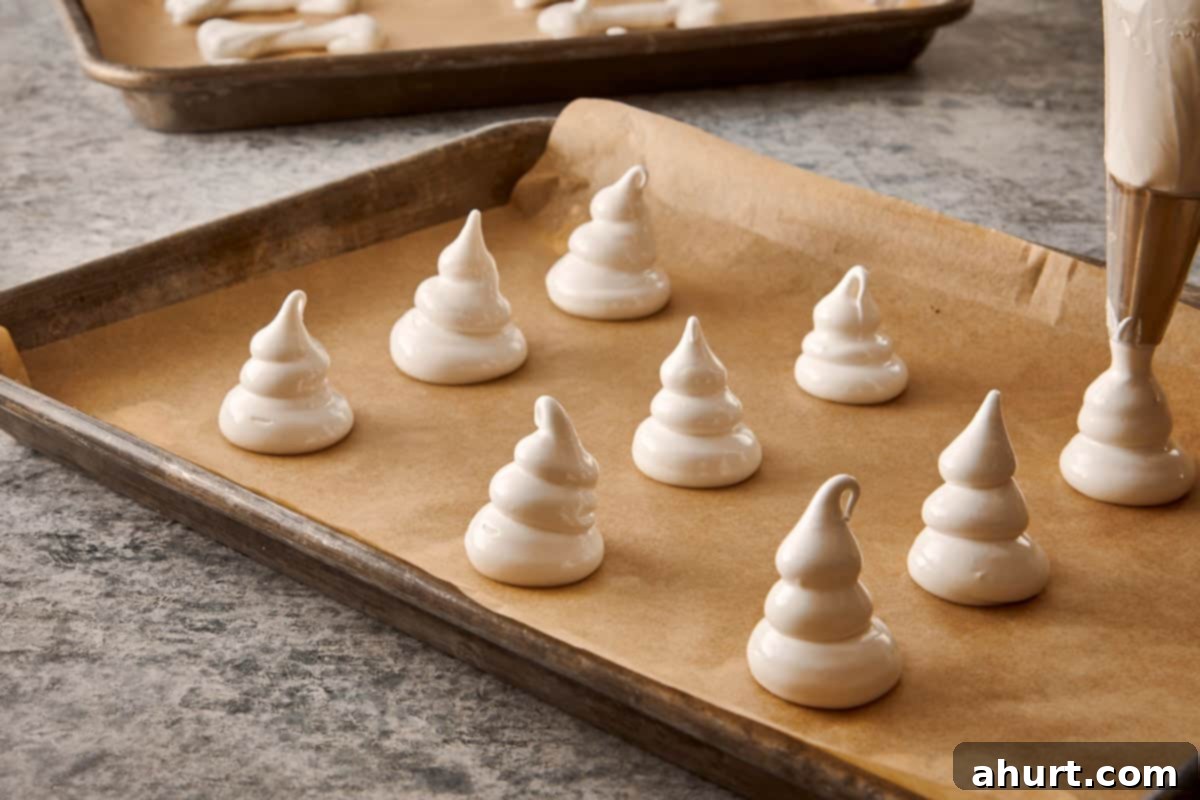
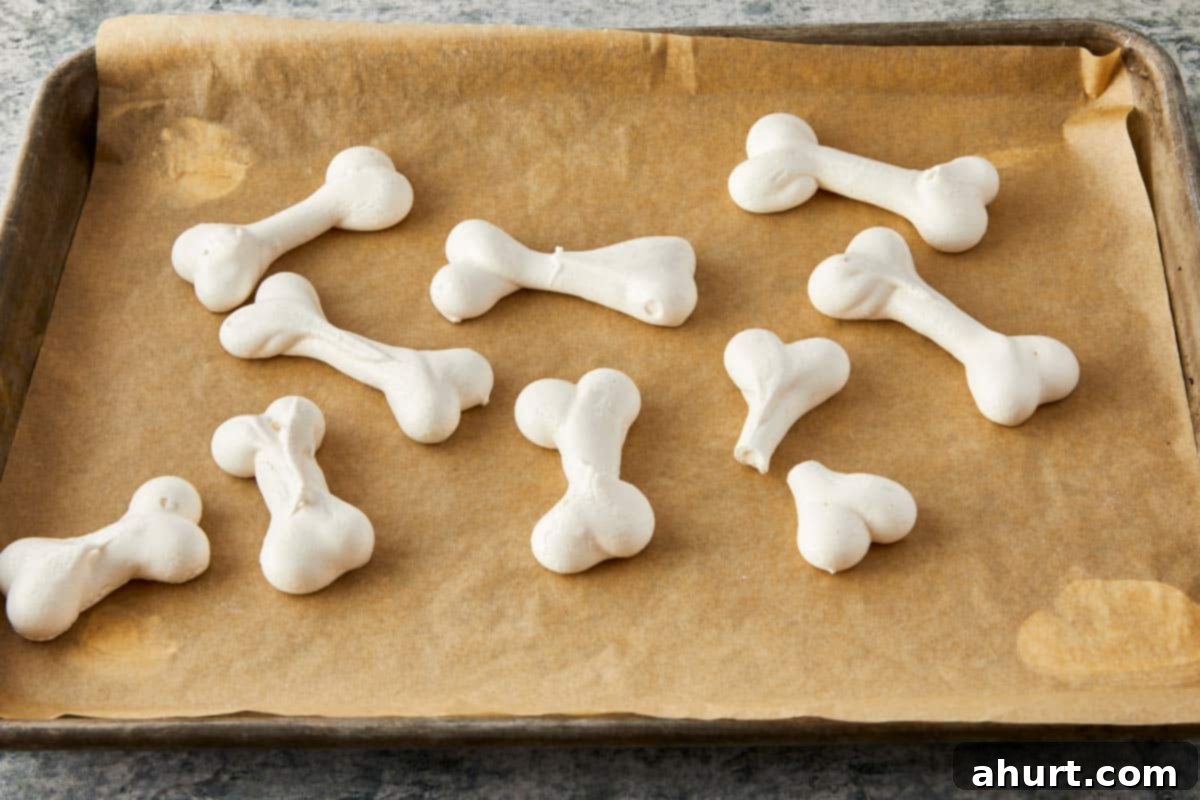
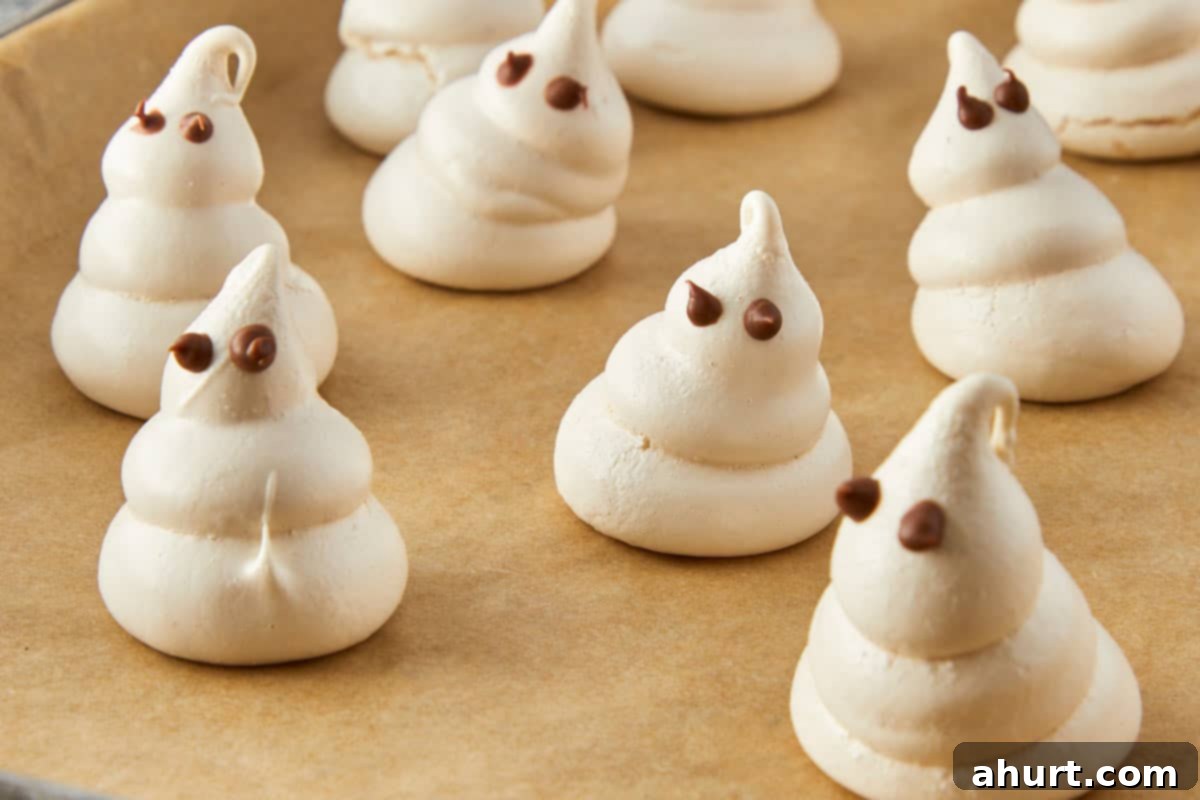
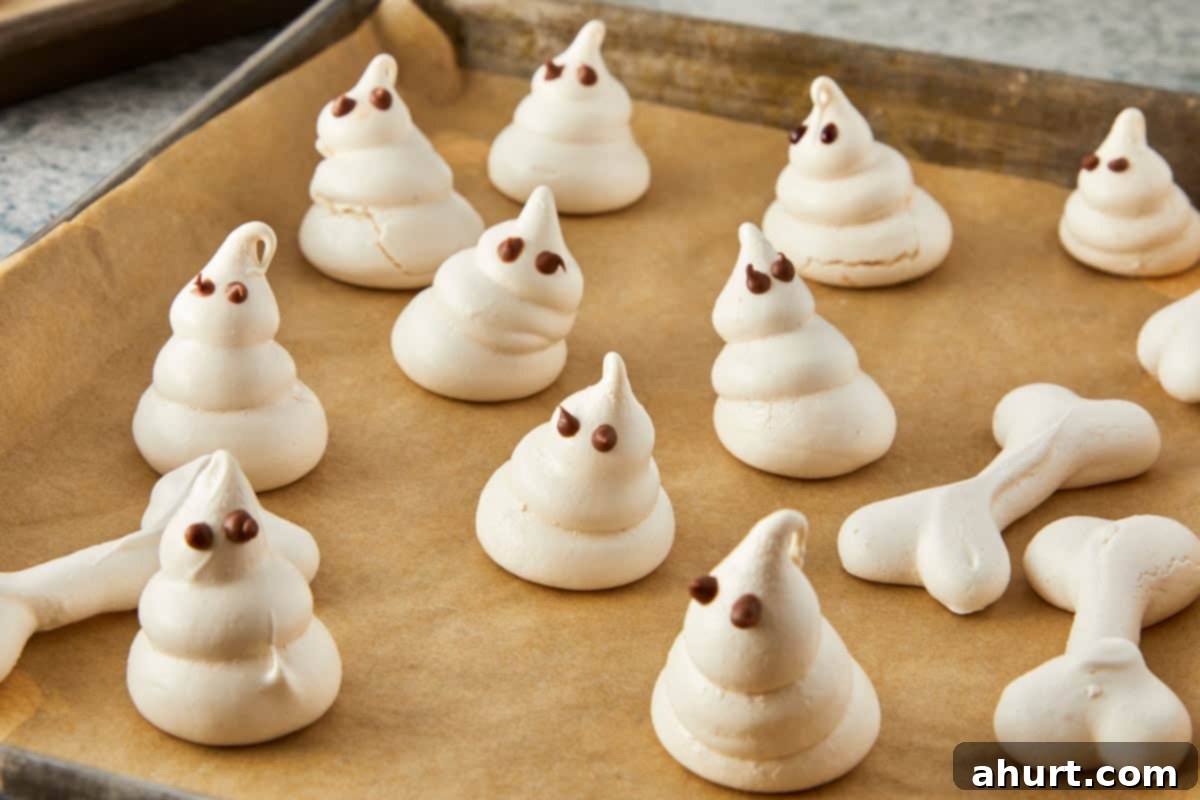
Carefully transfer your stable Swiss meringue into a piping bag fitted with a round tip. Prepare a couple of baking trays by lining them with parchment paper. On one tray, you can pipe fun bone shapes by creating a thin line with small circles at each end. On the other tray, create your charming little ghosts by stacking three small mounds of meringue on top of each other, starting with a wider base and tapering slightly for the body and head. A good guide for the base is about 1.5 inches in diameter. Immediately after piping, gently press two mini chocolate chips into each ghost to form their adorable, mischievous eyes.
- Bake Low and Slow.
Preheat your oven to a very low temperature, typically around 195°F (90°C), ideally using a convection (fan-forced) setting for even drying. Arrange your piped meringues on the prepared baking sheets. Bake them for an extended period, allowing them to dry out slowly. For the bones, this might take about 1½ hours, while the slightly larger ghosts will need approximately 2½ hours. Crucially, open the oven door a crack every 20-30 minutes to release any accumulated steam. This method prevents browning and ensures your Halloween treats stay perfectly white and achieve that coveted crisp texture.
- Check for Crispness and Cool Completely.
Your meringues are perfectly baked when they lift easily and cleanly from the parchment paper without sticking, and they feel wonderfully dry and crisp to the touch. Once baked, turn off the oven but leave the meringues inside with the door slightly ajar. Allow them to cool completely within the oven for at least an hour, or even overnight. This gradual cooling process helps prevent cracking and ensures they retain their crispness. Resist the urge to move them too soon!
- Enjoy the Spooky Magic.
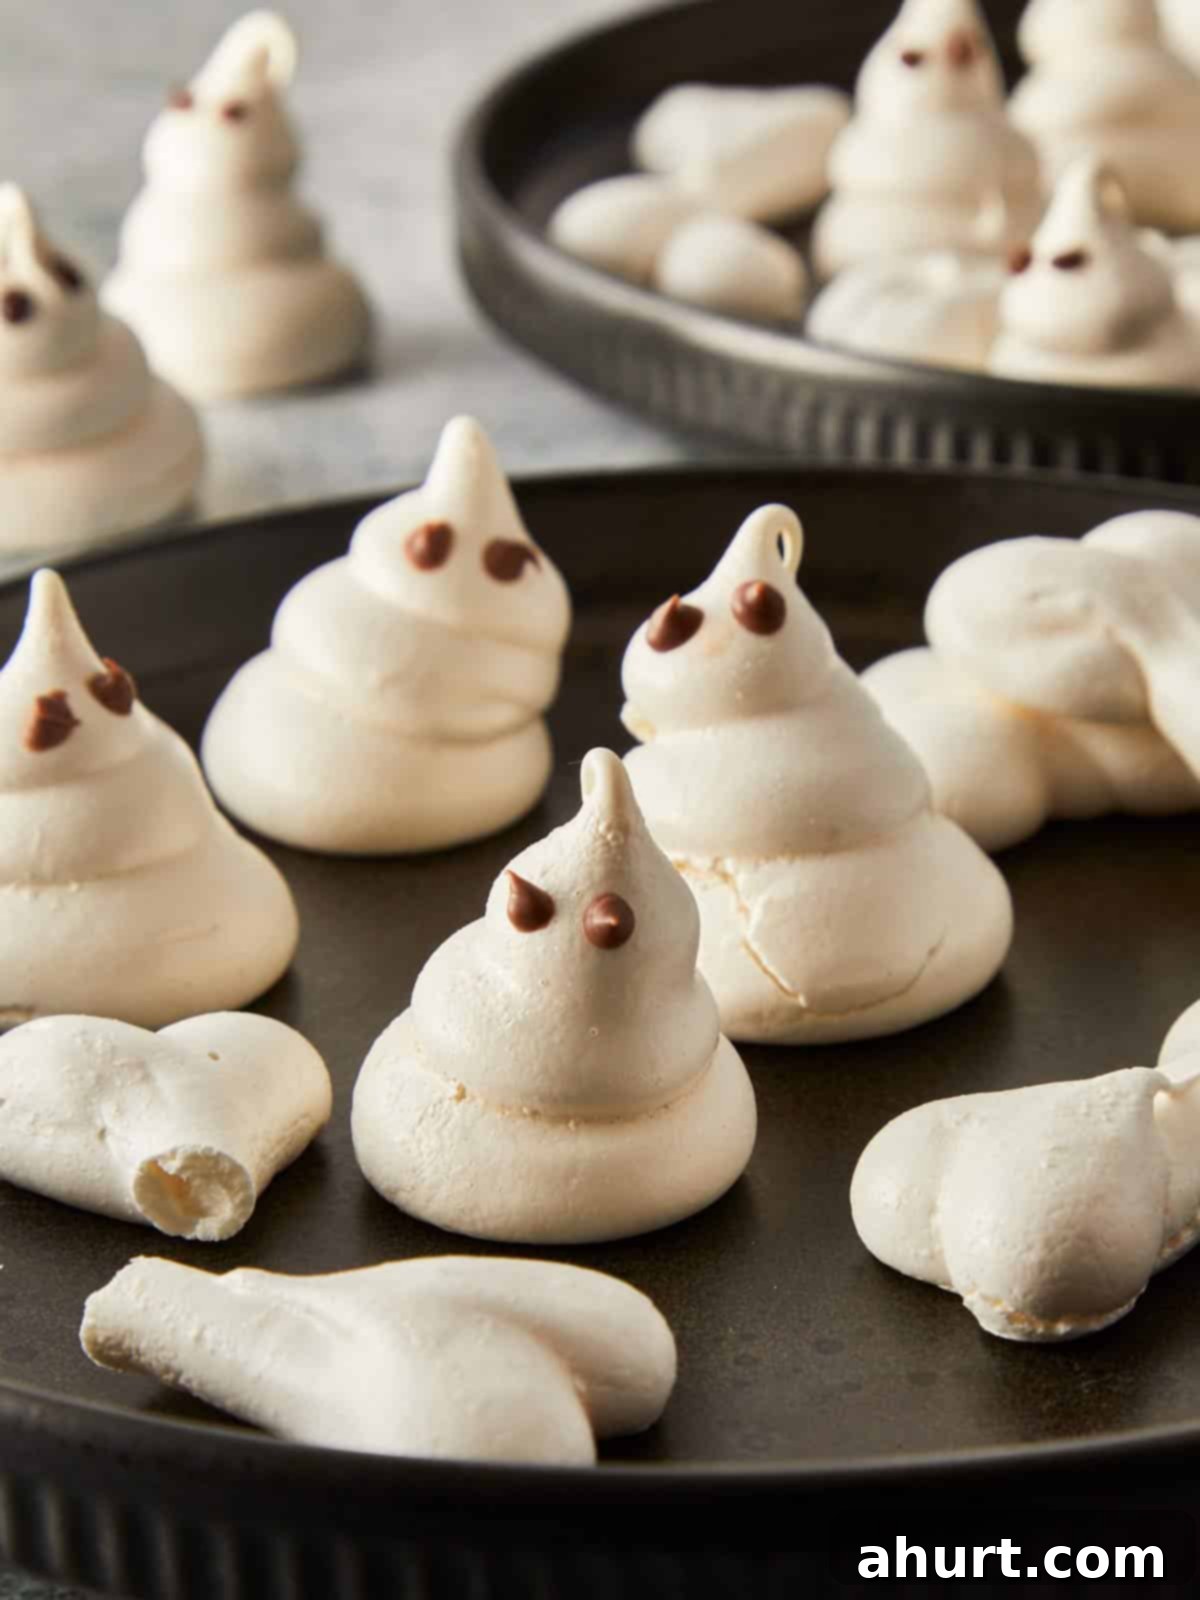
Once fully cooled, your Swiss Meringue Ghosts are ready to bring joy! Serve them as adorable, light, and crisp standalone treats. They also make fantastic edible decorations, elevating any Halloween dessert table. Arrange them on platters, use them to top cupcakes, cakes, or even a spooky Halloween punch. Either way, these charming little spirits are so irresistible, they’re guaranteed to vanish fast!
For a visual guide that brings these instructions to life, be sure to check out the detailed video in the See It In Action section for the full step-by-step process.
These Ghostly Meringues are undeniably delightful on their own, but they truly shine when thoughtfully paired with other warm and cozy autumn desserts. Imagine serving them alongside Churro-apple pie bowls, where crisp churro shells cradle a warmly spiced apple filling—a harmonious blend of sweetness, crunch, and comforting flavors. Alternatively, introduce a touch of decadent richness with Nutella-stuffed salted caramel blondies. These soft, buttery squares boast gooey Nutella centers and a hint of sea salt that makes every bite utterly irresistible. The contrasting textures and complementary flavors of these rich, autumn-inspired treats create a perfect balance with your sweet, airy meringue ghosts—a match truly made for magical Halloween nights. You could also serve them with a comforting mug of homemade hot chocolate or a spiced latte for an extra cozy touch.
Frequently Asked Questions About Swiss Meringue Ghosts
Once your Swiss Meringue Ghosts are completely cool and dry, the key to maintaining their crispness is airtight storage. Place them in an airtight container at room temperature, away from any humidity. Properly stored, they will remain wonderfully crisp and fresh for up to a week. Avoid refrigerating meringues, as the moisture can make them soft and sticky.
Meringues cracking or browning typically indicates that the oven temperature was too high, or that steam was trapped inside. To achieve perfectly white and smooth meringues, it’s crucial to keep the oven heat very low (around 195°F/90°C) and to open the oven door every 20-30 minutes during baking. This allows steam to escape, which helps them dry evenly without cooking too quickly or developing a golden hue. Patience and a low, slow bake are your best friends here!
Absolutely! You can easily customize your meringues. To add color, use gel food coloring. Add a small amount after the meringue has reached stiff peaks, gently folding it in until you achieve your desired shade. For flavor, incorporate a few drops of extract, such as vanilla, peppermint, almond, or even a spooky “ghostly” berry flavor, after the whipping stage. It’s important to avoid liquid food colorings or large amounts of liquid extracts, as they can compromise the meringue’s stability and make it too soft.
Yes, the prepared meringue mixture can be piped onto baking sheets and kept covered with plastic wrap at room temperature for up to 1-2 hours before baking. For best results in terms of crispness and purity of color, it’s always ideal to bake your ghostly meringues on the same day you pipe them. However, if you need to plan ahead, you can make the meringue mix up to a day in advance, store it in an airtight container in the fridge, and then whip it briefly again before piping.
If your meringue isn’t whipping up as expected, the most common culprits are grease or traces of egg yolk. Even a tiny amount of fat can prevent egg whites from achieving their full volume and stability. Ensure your bowl and whisk are immaculately clean and completely dry before you start. Using room temperature egg whites also helps them whip more effectively, yielding higher, stiffer peaks for your perfect spooky treats.
See It In Action: Step-By-Step Ghostly Meringue Video Guide
Sometimes, seeing is believing, especially when it comes to mastering delicate baking techniques like Swiss meringue. Watch our comprehensive video guide below to see every step of this meringue recipe in action. From whisking the egg whites over the double boiler to piping those adorable ghost shapes and achieving that perfect low-and-slow bake, this visual walkthrough ensures you’ll create flawless Swiss Meringue Ghosts with confidence for your Halloween desserts.
Pin
Swiss Meringue Ghosts Recipe
Ingredients
- 2 large egg whites about 2 oz
- 1 cup powdered sugar
Optional
- Mini Cholate chips for the eyes
Instructions
-
In a heatproof mixing bowl, combine the egg whites and powdered sugar. Ensure your bowl and whisk are perfectly clean and free of any grease.
-
Place the bowl over a saucepan of gently simmering water (creating a double-boiler). Continuously whisk the mixture for about 5-7 minutes until the sugar has completely dissolved and the mixture feels warm to the touch (around 160°F or 71°C if using a thermometer). It should be smooth, not grainy.
-
Remove the bowl from the heat and immediately begin beating the mixture with an electric mixer (stand mixer with whisk attachment recommended) on high speed. Continue beating until the meringue cools completely, becomes incredibly thick and glossy, and forms very stiff peaks that hold their shape when the whisk is lifted. This will take approximately 8-12 minutes.
Pipe the Shapes
-
Transfer the perfectly whipped meringue into a piping bag fitted with a medium-sized round tip.
-
On a baking tray lined with parchment paper, pipe playful bone shapes. Start with a small circle, extend with a short line, and finish with another small circle at the end.
-
On a second parchment-lined tray, pipe your charming ghosts. Achieve this by stacking three small, slightly decreasing mounds of meringue on top of each other. As a guide, the bottom mound should be about 1.5 inches in diameter, gradually getting smaller as you pipe upwards to form the body and then the head of the ghost.
-
Immediately press two mini chocolate chips into each ghost’s “face” to form their characteristic eyes, adding to their adorable, mischievous look.
Bake
-
Preheat your oven to a very low temperature: 195°F (90°C). For best results and even drying, use the convection (fan-forced) mode if available.
-
Carefully place your baking trays in the preheated oven. Bake the bone meringues for approximately 1½ hours, and the slightly larger ghost meringues for about 2 ½ hours.
-
During the baking process, it is vital to open the oven door a crack every 20-30 minutes. This action releases trapped steam, preventing the meringues from browning and ensuring they dry out evenly, resulting in that desirable pure white, crisp finish.
-
Meringues are perfectly baked and dried when they easily peel off the parchment paper without any resistance and feel completely dry and crisp to the touch.
To Serve
-
Once baked, turn off the oven but leave the meringues inside with the door slightly ajar. Allow them to cool completely in the oven, ideally for at least an hour or even overnight, before removing them from the tray. Enjoy these light, crisp treats as delightful snacks or use them for truly spooky and adorable Halloween decorations!
Notes
Making delicate meringue can seem daunting, but with a few crucial tips, you’ll achieve those perfectly white, crisp, melt-in-your-mouth ghosts effortlessly. The tiniest details can make all the difference in this delicious meringue recipe. Here’s how to ensure success with your spooky treats every time:
- Keep it Impeccably Clean: Any trace of grease, oil, or even a speck of egg yolk can be detrimental to your meringue. It prevents the egg whites from whipping up properly. Always ensure your mixing bowl and whisk attachments are spotless and completely dry before you begin. A quick wipe with lemon juice or vinegar on your equipment can help eliminate any unseen greasy residue.
- Embrace the Low and Slow Bake: Patience is truly a virtue when baking meringues. Baking at the lowest temperature possible (around 195°F/90°C) and allowing them to dry gently over an extended period is paramount. This slow drying process prevents browning, cracking, and ensures that desired smooth, snow-white finish and wonderfully crisp texture. Don’t rush it!
- Perfect Peak Check: When whipping your Swiss meringue, stop as soon as you achieve glossy, firm, and stiff peaks. The meringue should hold its shape rigidly when you lift the whisk. Overbeating can cause the meringue to become grainy, crumbly, and less stable, which can lead to a less desirable final product for your ghostly meringues.
- Humidity is the Enemy: Meringues are highly susceptible to moisture. Avoid making them on very humid or rainy days, as the excess moisture in the air can prevent them from drying out properly. Instead of becoming crisp, they might turn sticky and chewy. Opt for a dry, low-humidity day for the best results when making these Halloween treats.
- Cool Completely for Stability: After baking, it’s essential to let your Swiss Meringue Ghosts cool completely within the oven (with the door ajar). This gradual cooling helps them set fully, prevents them from cracking due to sudden temperature changes, and ensures they maintain their crispness and delicate structure before you handle them.
Nutrition
Nutrition information is automatically calculated, so should only be used as an approximation.
