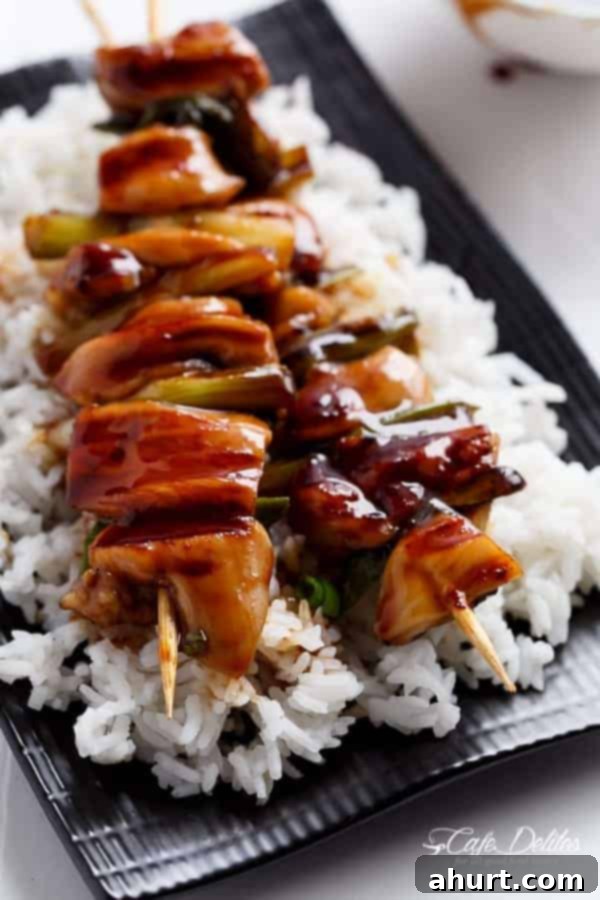
Easy Homemade Chicken Yakitori: Your Guide to Perfect Japanese Grilled Skewers
Imagine sinking your teeth into tender, juicy pieces of chicken, perfectly charred and glistening with a rich, sweet, and savory glaze. This isn’t just any grilled chicken; this is Easy Japanese Chicken Yakitori – a beloved street food classic that once seemed reserved for your favorite Japanese restaurant or bustling street stalls. But what if we told you that creating this culinary masterpiece at home is not just possible, but surprisingly simple?
For many, Yakitori is a cherished weekly ritual, often enjoyed alongside other Japanese favorites like Teriyaki Chicken Stir Fry. The good news? You no longer need to rely on takeout to satisfy those cravings. With this comprehensive guide, you’ll learn how to craft Yakitori that’s just as good, if not superior, right in your own kitchen. Prepare to impress your family and friends, all while saving a significant amount of money and enjoying the satisfaction of homemade perfection.
I absolutely adore Yakitori. Its enduring allure lies in the deceptive simplicity of something so profoundly delicious and satisfying. The true magic, however, happens with the exceptional caramelised Yakitori sauce – known as tare in traditional Japanese cuisine. This recipe brings you an authentic Japanese Yakitori experience, elevated with a slight, yet impactful, twist that makes it even more accessible and rewarding for home cooks.

Unlocking the Secrets of Restaurant-Quality Yakitori at Home
The journey to homemade Yakitori perfection began with an invaluable conversation with my local Japanese takeout owner. She generously shared some simple yet crucial tips that completely transformed our weekly dining experience and significantly reduced our takeout expenses – from around $70 down to less than $20 for the same delicious meal! It’s truly amazing how a few insider secrets can make such a profound difference in both flavor and your household budget.
One of her brilliant, albeit slightly non-traditional, recommendations was to incorporate brown sugar into the Yakitori sauce instead of standard white sugar. With a knowing smile, she explained her personal preference, and after trying it, I became an instant convert. Brown sugar imparts a deeper, more complex caramel note to the sauce, profoundly enhancing its richness, stickiness, and overall depth of flavor. While some Yakitori recipes might suggest using cornflour as a thickening agent, it’s genuinely unnecessary in this version. The natural sugars, particularly brown sugar, caramelize beautifully as the sauce simmers, creating a naturally thick, glossy, and syrupy glaze that adheres perfectly to the chicken without any need for artificial thickeners.
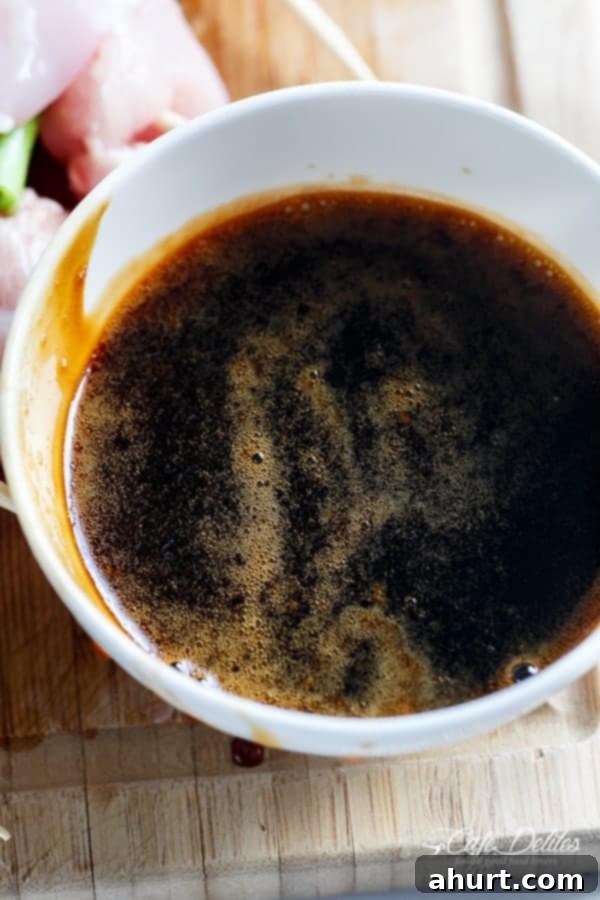
Crafting the Irresistible Yakitori Tare (Sauce)
The tare is undeniably the most crucial component of any truly great Yakitori. It represents a delicate and harmonious balance of sweet, savory, and umami flavors that truly defines the dish’s character. Our carefully developed recipe expertly combines high-quality soy sauce, sake (Japanese rice wine), mirin (sweet rice wine), the star ingredient brown sugar, a touch of water, and a single smashed garlic clove. Each ingredient is thoughtfully chosen for its vital role in creating that signature, complex Yakitori taste profile.
- Soy Sauce: Provides the fundamental savory foundation and rich umami depth.
- Sake: Adds a layer of sophisticated flavor, subtly tenderizes the chicken, and crucially helps the sauce to penetrate and infuse the meat.
- Mirin: Contributes a delicate, nuanced sweetness and a desirable glossy sheen to the finished sauce.
- Brown Sugar: Our “secret weapon” for an elevated experience! It caramelizes exquisitely, generating a richer, stickier, and far more complex glaze compared to ordinary white sugar. This is absolutely key to achieving that authentic, restaurant-quality finish.
- Garlic: Infuses a subtle yet essential aromatic warmth that complements the other flavors without overpowering them.
To prepare this essential sauce, simply combine all the specified ingredients in a small saucepan and bring the mixture to a gentle boil over medium-high heat. Once boiling, reduce the heat to a low simmer and allow it to cook, uncovered, for approximately 10-15 minutes. This slow simmering process is where the true transformation occurs: the liquids gradually reduce, and the sugars caramelize, naturally thickening the sauce into a luxurious, clingy syrup. It’s imperative to monitor the sauce closely during this stage, as it can thicken quite quickly and potentially overflow. Once it has achieved the desired consistency, remove it from the heat and allow it to cool to room temperature – it will continue to thicken as it cools. Before serving, carefully remove the smashed garlic clove. And most importantly, remember to reserve about a quarter of this finished sauce specifically for final dipping, ensuring maximum flavor impact when your Yakitori is served!
Preparing Your Chicken and Skewers for Optimal Grilling
The selection and preparation of your chicken are paramount for achieving perfectly juicy and flavorful Yakitori. For this dish, skinless and boneless chicken thigh fillets are highly recommended due to their inherent tenderness and higher fat content, which acts as a natural safeguard against drying out during the grilling process. Ensure you dice your chicken into uniform 1-inch (approximately 2.5 cm) cubes; this consistency is vital for even cooking across all pieces. Don’t overlook the aromatic and textural contribution of shallots or spring onions, cut into complementary 2-inch pieces. These not only provide a delightful crunch but also a mild, sweet onion flavor that perfectly complements the savory chicken.
Before you begin the exciting process of assembling your skewers, an essential preparatory step is to soak your wooden skewers in cold water for at least 30 minutes. This simple yet critical action helps prevent the skewers from charring, splintering, or even catching fire on the hot grill, thereby allowing your chicken to cook thoroughly and evenly without the inconvenience of a disintegrating skewer. Once soaked, alternately thread the chicken cubes and shallot pieces onto the skewers. This alternating pattern creates an aesthetically appealing visual and, more importantly, ensures that each delicious bite offers a balanced and harmonious mix of both flavors and textures.

The Art of Grilling: Achieving That Perfect Charred Flavor
The true hallmark of exceptional Yakitori is that irresistible charred flavor and tender, succulent interior. This coveted characteristic can be achieved through various cooking methods, each offering fantastic outcomes. While an outdoor grill often provides the most authentic smoky results, your oven’s broiler (grill function) or even a sturdy stovetop grill pan can yield deliciously satisfying Yakitori. The paramount elements across all methods are high heat and diligent, continuous basting.
Begin by preheating your chosen grilling apparatus – be it an outdoor grill or an oven broiler – to high heat until it’s sizzling hot and ready. Just before placing the skewers, brush them generously with your prepared homemade Yakitori sauce. As the chicken cooks, typically for about 3-4 minutes per side, maintain a continuous rhythm of brushing or basting the skewers with more sauce. This crucial step not only deeply infuses the chicken with savory-sweet flavor but also actively contributes to building that beautiful, sticky, caramelized crust. Each time you meticulously turn the skewers, ensure you apply another layer of sauce. This progressive layering of flavor is precisely what makes homemade Yakitori so incredibly addictive. You’ll know you’ve truly achieved Yakitori gold when the chicken is thoroughly cooked through, boasts an enticing golden-brown hue, and showcases those delightful, perfectly charred edges.
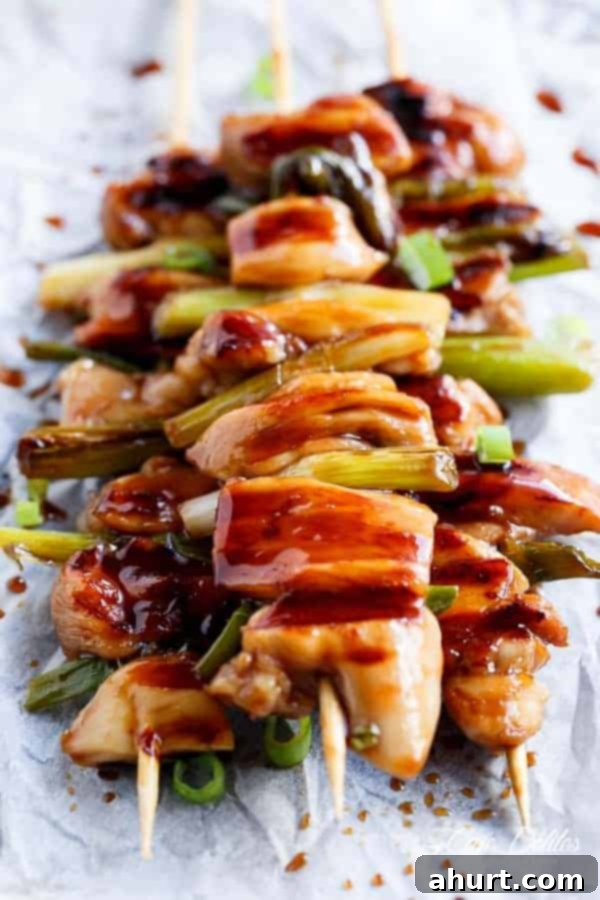
After carefully removing the perfectly grilled Yakitori from the heat, give them one final, indulgent brush with the reserved dipping sauce. This last layer of glaze adds an extra burst of flavor and a beautiful shine. Because let’s be honest, when it comes to the rich, sticky, and utterly delicious Yakitori tare, there’s truly no such thing as enough sauce to go around!
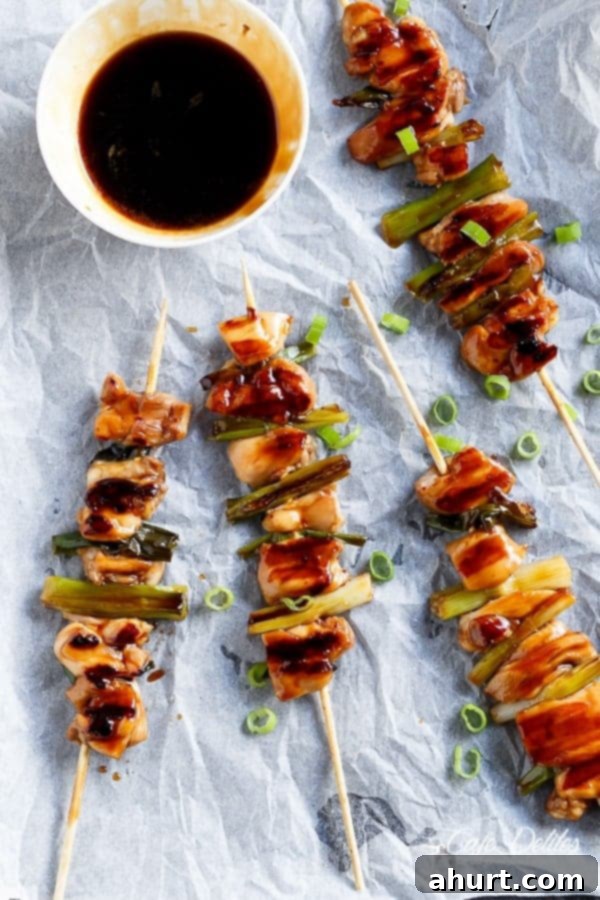
Serving Your Homemade Yakitori Feast
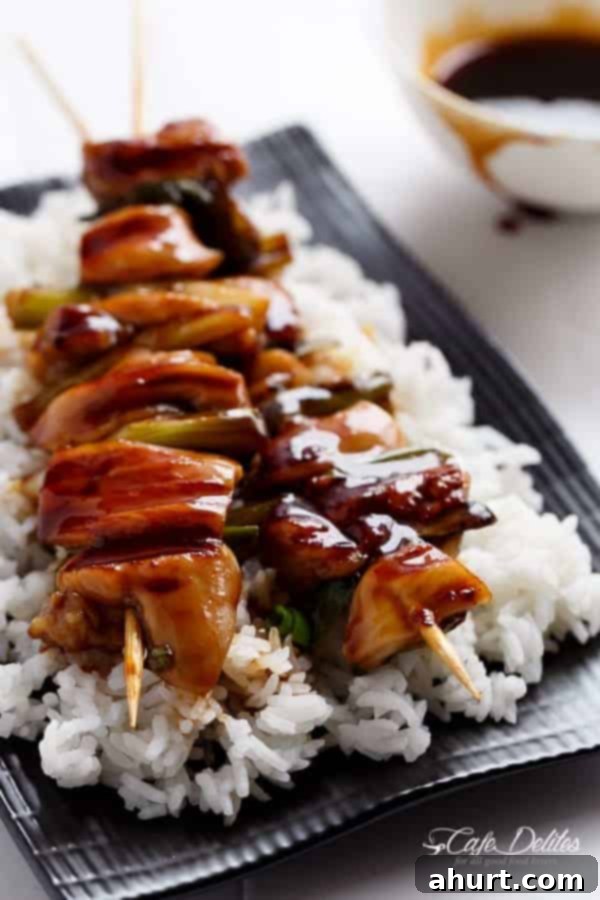
The most authentic and satisfying way to enjoy your freshly grilled Easy Chicken Yakitori is over a comforting bed of fluffy, steaming hot rice. The rice serves as the perfect canvas, subtly absorbing any extra savory-sweet sauce that drips from the skewers, beautifully complementing the rich flavors of the chicken and balancing the meal. To enhance the experience, be sure to offer the reserved dipping sauce on the side for those who, like me, believe an extra dip is always welcome!
For a final touch of freshness and visual appeal, garnish your homemade Yakitori with thinly sliced green parts of the spring onions (scallions) that you wisely reserved from your preparation. This simple addition provides a vibrant pop of color and a delightful, mild, peppery bite that contrasts wonderfully with the sweet and savory chicken. With these straightforward steps, you’ve not only mastered the art of making delicious Japanese Chicken Yakitori but also created a meal that is truly on par with, if not superior to, your favorite Japanese takeout. Savor the incredible taste and the immense satisfaction of preparing such an impressive dish from scratch!
Expert Tips for Yakitori Perfection at Home
To ensure your homemade Yakitori reaches its full potential and truly rivals any restaurant offering, consider these expert tips:
- Choose the Right Chicken Cut: Chicken thighs are undeniably superior for Yakitori. Their higher fat content ensures the meat remains incredibly moist and tender during the high-heat grilling process, preventing the dryness often associated with breast meat. If you must use chicken breast, consider a quick brine beforehand.
- Ensure Uniform Chicken Cubes: Precision in cutting your chicken into even 1-inch (approximately 2.5 cm) cubes is not just for aesthetics. It’s crucial for ensuring that all pieces cook at precisely the same rate, avoiding undercooked or overcooked sections.
- Always Soak Wooden Skewers: This seemingly minor step is incredibly critical. Soaking wooden skewers in cold water for at least 30 minutes prevents them from burning, splintering, or disintegrating on the hot grill, allowing your chicken to cook without hindrance.
- Allow the Sauce to Develop: Resist the urge to rush the Yakitori tare. Allowing it to simmer gently until it naturally thickens and caramelizes over 10-15 minutes deeply concentrates and develops its complex sweet and savory flavors. While the cornflour trick in the notes is a valid shortcut, the slow reduction truly yields the best, most authentic results.
- The Importance of Continuous Basting: This is arguably the most vital technique for flavor development. Continuous basting throughout the grilling process builds successive layers of delicious flavor and contributes significantly to the formation of that beautiful, sticky, and shiny glaze.
- Master High Heat Grilling: Whether you’re utilizing an outdoor barbecue, an indoor grill pan, or your oven’s broiler, high heat is absolutely essential. It allows you to achieve that coveted char on the exterior of the chicken quickly, without overcooking the interior and preserving its juiciness.
- Give Your Yakitori a Rest: Like any grilled meat, allowing the cooked Yakitori skewers to rest for a few minutes off the heat after grilling enables the internal juices to redistribute. This results in noticeably more tender and flavorful chicken.
- Explore Flavorful Variations: While chicken and shallots form the classic combination, feel empowered to experiment! Delicious variations include adding bell peppers, mushrooms, cherry tomatoes, or even different cuts of chicken like chicken meatballs (tsukune) or chicken wings, for a diverse Yakitori experience.
FOR MORE MOUTH-WATERING FLAVORS:
If you’ve loved mastering this Easy Chicken Yakitori, we’re confident you’ll enjoy exploring other tantalizing Asian-inspired recipes that bring incredible, authentic flavors directly to your home kitchen. Expand your culinary repertoire with these top recommendations:
- Sticky Chinese Barbecue Pork Belly (Char Siu): Indulge in the rich, sweet, and intensely savory flavors of traditional Char Siu, featuring perfectly roasted pork belly ribs, ideal for a hearty and memorable meal.
- Honey Garlic Butter Shrimp Pineapple Skewers: Experience a vibrant and fresh combination of succulent, perfectly cooked shrimp, sweet caramelized pineapple chunks, all coated in an irresistible honey-garlic butter glaze – a perfect summer grilling option.
- Skinny Satay Turkey Skewers: A lighter, healthier take on the beloved classic satay. These turkey skewers are bursting with aromatic flavors and make for a guilt-free yet utterly delicious option for any meal.
- Simple Hoisin Chicken and Broccoli Stir-fry: A quick, easy, and incredibly flavorful weeknight meal featuring tender pieces of chicken and crisp, vibrant broccoli florets, all generously coated in a rich, savory hoisin sauce.

Pin
Easy Chicken Yakitori
Ingredients
- 1/2 cup Soy Sauce
- 1/4 cup Sake
- 1/4 cup Mirin
- 1/4 cup brown sugar
- 2 tablespoons water
- 1 clove garlic smashed with the back of your knife
- 8 large shallots/spring onions cut into 2-inch length pieces (whiter ends only. Reserve the darker green parts for final garnish.)
- 17 oz skinless and boneless chicken thigh fillets diced into 1-inch cubes
- 8 wooden skewers
Instructions
-
Soak skewers in cold water for 30 minutes.
-
While skewers are soaking, combine soy sauce, sake, mirin, sugar, water and garlic in a small saucepan over medium-high heat. Bring to the boil; reduce heat down to low, and simmer uncovered for 10-15 minutes or until sauce has reduced and thickened (keep your eye on the sauce as it can over flow once thickened). Once thickened, remove from the heat and allow to cool to room temperature. Remove the garlic clove with a small spoon. Reserve 1/4 of the sauce for final dipping. *See Notes
-
Thread chicken cubes and onion pieces alternately onto skewers; brush over with sauce. Preheat grill on high heat until hot. Place skewers on your grill, glazing with sauce again just before turning (after about 3-4 minutes). Glaze the other side with sauce once turned, and again before removing off the heat.
-
Serve with rice and reserved dipping sauce. Garnish with the extra shallots/scallions, thinly sliced.
Notes
Nutrition
Nutrition information is automatically calculated, so should only be used as an approximation.
