Creepy & Delicious: Easy Witch Finger Grissini Recipe for a Haunting Halloween Party
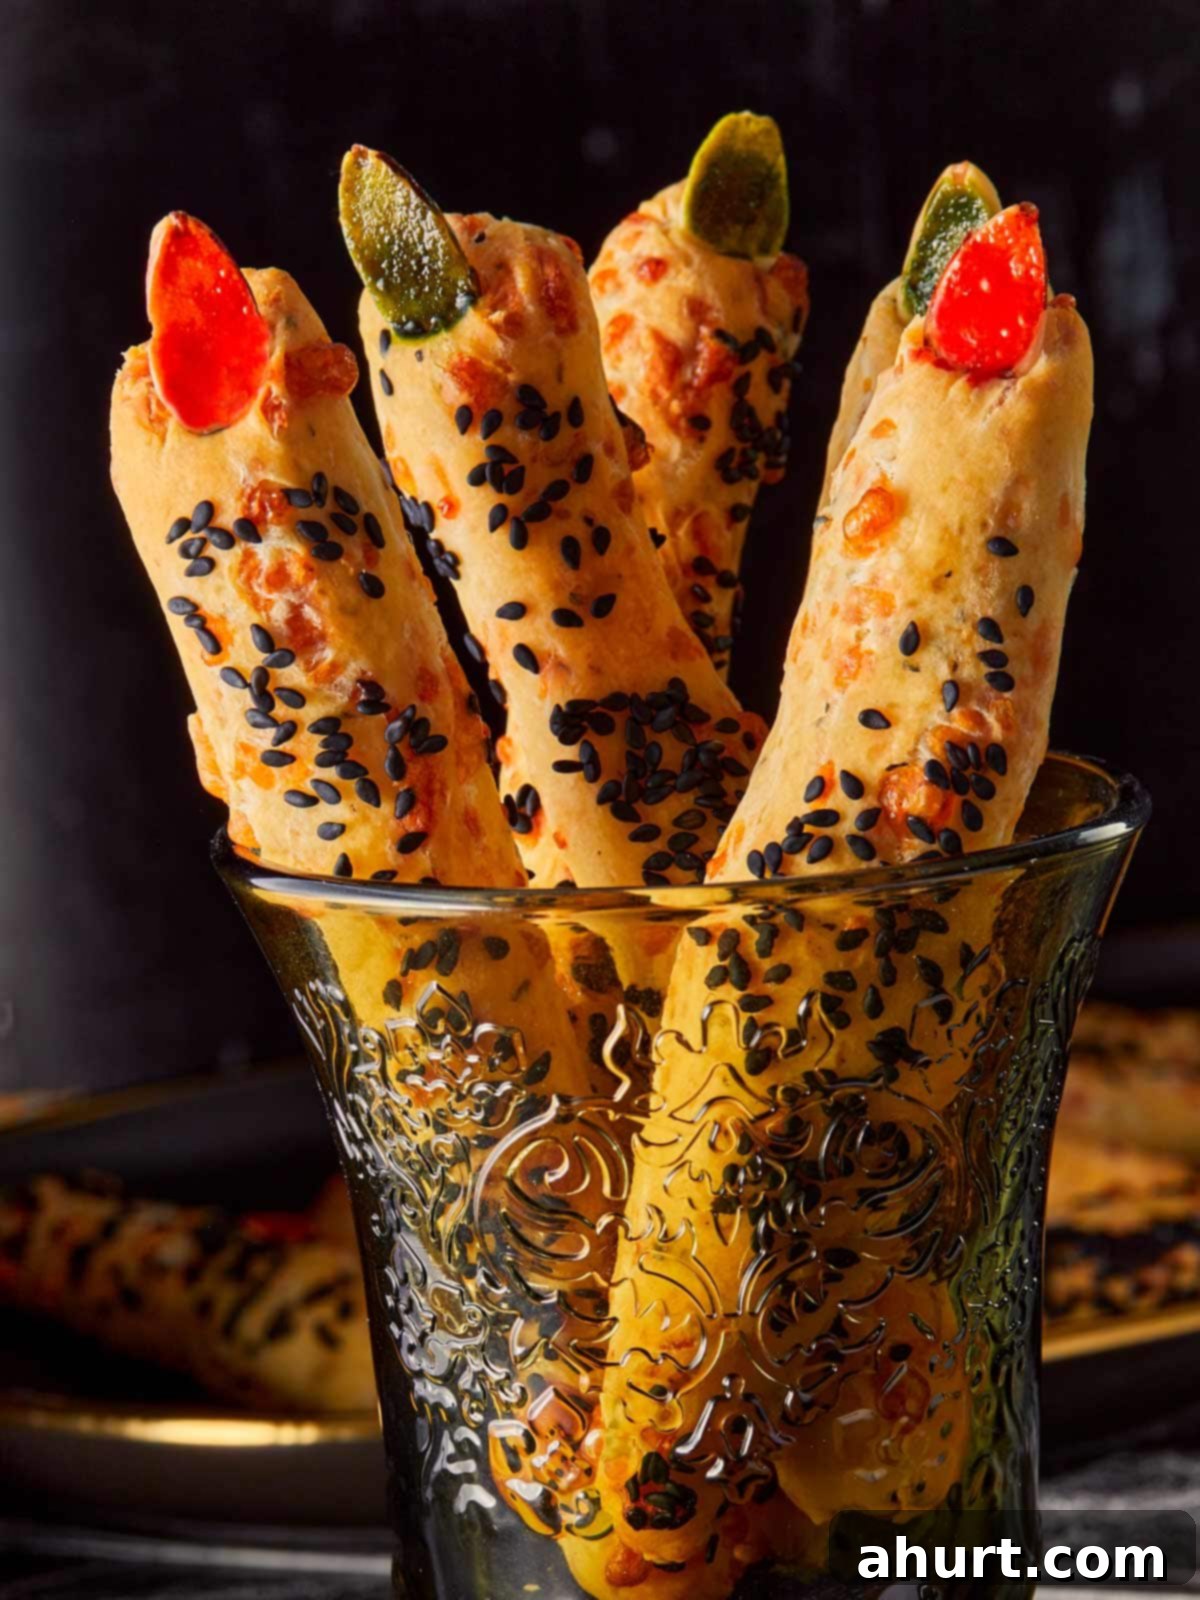
This Halloween, move beyond the usual sugary sweets and dive into the world of *sinister gourmet* with our irresistible Witch Finger Grissini. Forget pumpkin spice — these savory breadsticks are the ultimate spooky snack that promises to both delightfully creep out and utterly satisfy your guests. Each grissino is crisp, wonderfully buttery, and boasts a hint of melted cheese in every crunchy bite, making them just creepy enough to cause a moment of hesitation before everyone *devours them whole*.
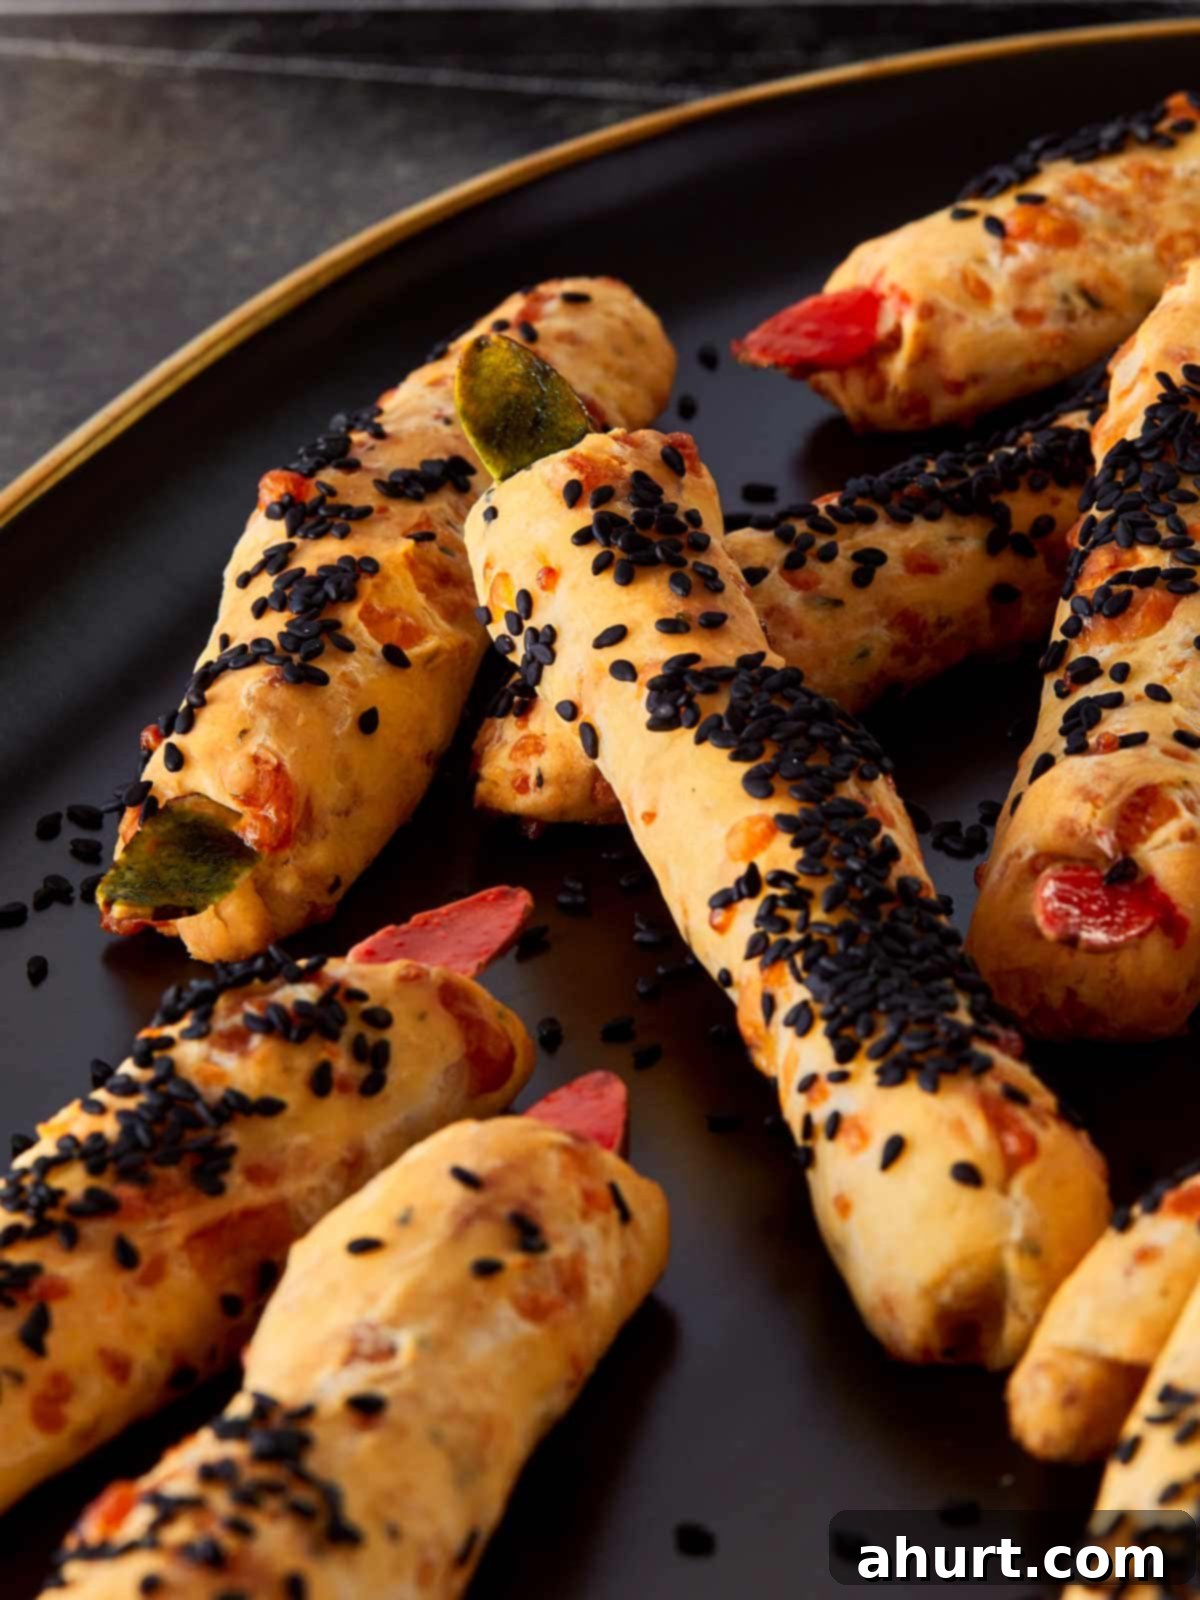
Crafted to perfection, these golden, flaky breadsticks masterfully walk the delicious line between eerie and elegant. Dusted generously with black sesame seeds to mimic ghoulish skin and finished with glossy, vibrant “nails,” they are a Halloween treat that looks wonderfully wicked and disappears at a supernatural speed. Perfect for any Halloween gathering, from a casual family fright night to an elaborate costume party, these Witch Finger Grissini will undoubtedly be the talk of the night, leaving a lasting impression long after the last crumb is gone.
Unveiling the Magic: Why These Witch Finger Grissini Are a Must-Have
These enchanting Witch Finger Grissini aren’t just a snack; they’re a culinary spectacle, striking the perfect balance between *spooky charm and gourmet sophistication*. Imagine a breadstick that’s gloriously crisp on the outside, yielding to a tender, buttery interior, all infused with a rich, cheesy flavor that makes it impossible to stop at just one. The ingenious design, featuring sliced almond “nails” and a textured “skin” of black sesame seeds, transforms simple breadsticks into hauntingly realistic witch fingers, adding an unforgettable visual element to your Halloween spread.
Their savory appeal ensures they stand out amidst a sea of sugary Halloween desserts, offering a much-welcomed counterpoint that keeps guests coming back for more. The versatility of these spooky breadsticks means they can anchor an entire Halloween menu. For a truly immersive and delightfully eerie spread, consider pairing them with whimsical sweet treats like Swiss Meringue Ghosts or vibrant Red Velvet Monster Cake Pops. This combination of creepy and sweet creates a dynamic and irresistible Halloween feast that will be remembered long after the pumpkins are put away. These grissini aren’t just food; they’re an experience, a playful deception that delights both the eyes and the palate.
The Enchanting Ingredients Behind the Spell
Crafting these creepy, crunchy perfection-infused breadsticks requires just a few pantry staples, elevated with a touch of witchy flair. Each ingredient plays a crucial role in achieving the desired taste, texture, and haunting visual appeal.
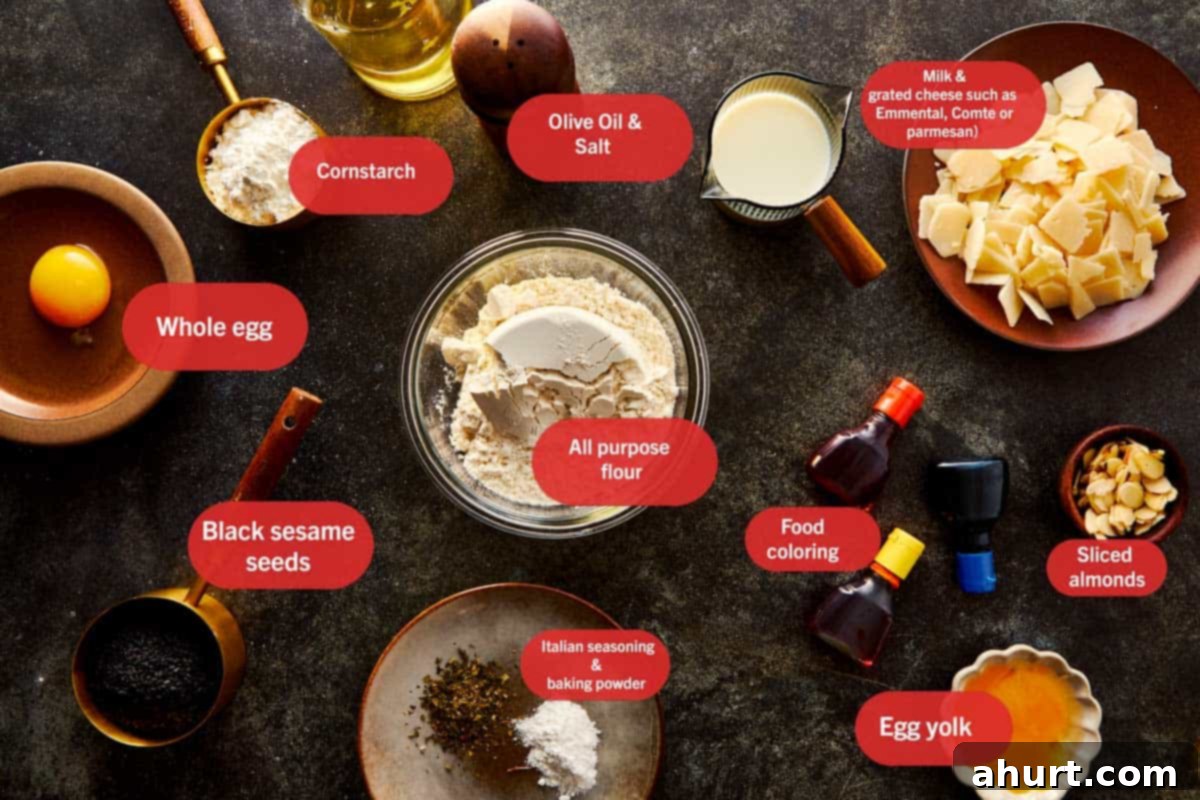
- Flour & Cheese: The very foundation of our edible enchantment. All-purpose flour provides the structural integrity for a perfectly crisp exterior and a delightfully soft, tender interior. When combined with rich, grated cheese (like Emmental, Comté, or Parmesan for their melting properties and robust flavor), it creates a deeply savory dough that’s full of character. This cheesy base is what makes these grissini so addictive.
- Olive Oil: More than just a binder, a good quality olive oil imparts that desirable golden sheen to the baked grissini and contributes significantly to their buttery texture and rich flavor with every single bite. It’s key to achieving that luxurious mouthfeel.
- Black Sesame Seeds: The secret ingredient for the truly authentic, spooky aesthetic. These tiny seeds aren’t just for show; they provide a fantastic visual texture, mimicking eerie, aged “skin,” while also adding a subtle nutty crunch and depth of flavor that complements the cheesy dough beautifully.
- Sliced Almonds: The essential component for your witchy finishing touch. Carefully selected sliced almonds are pressed into the tips to form the ghastly “nails,” giving each grissino an unsettlingly realistic and perfectly edible detail. Their slightly crisp texture contrasts nicely with the breadstick.
- Egg, Milk, Salt, Italian Seasoning, Baking Powder & Cornstarch: These supporting actors bind the dough, add moisture, seasoning, leavening, and help achieve that signature crispness. The final egg yolk and food coloring are what give those “nails” their vibrant, eerie polish.
Note: For the precise quantities and a complete breakdown of all the ingredients needed to cast this delicious spell, please refer to the detailed Recipe Card below.
Mastering the Art of Witch Finger Grissini: A Step-by-Step Guide
Creating a tray of crispy, spooky perfection is simpler than you might think. With a few straightforward steps and a little culinary magic, you’ll have these hauntingly delicious breadsticks ready to serve in no time. Follow these detailed instructions to bring your Witch Finger Grissini to life.
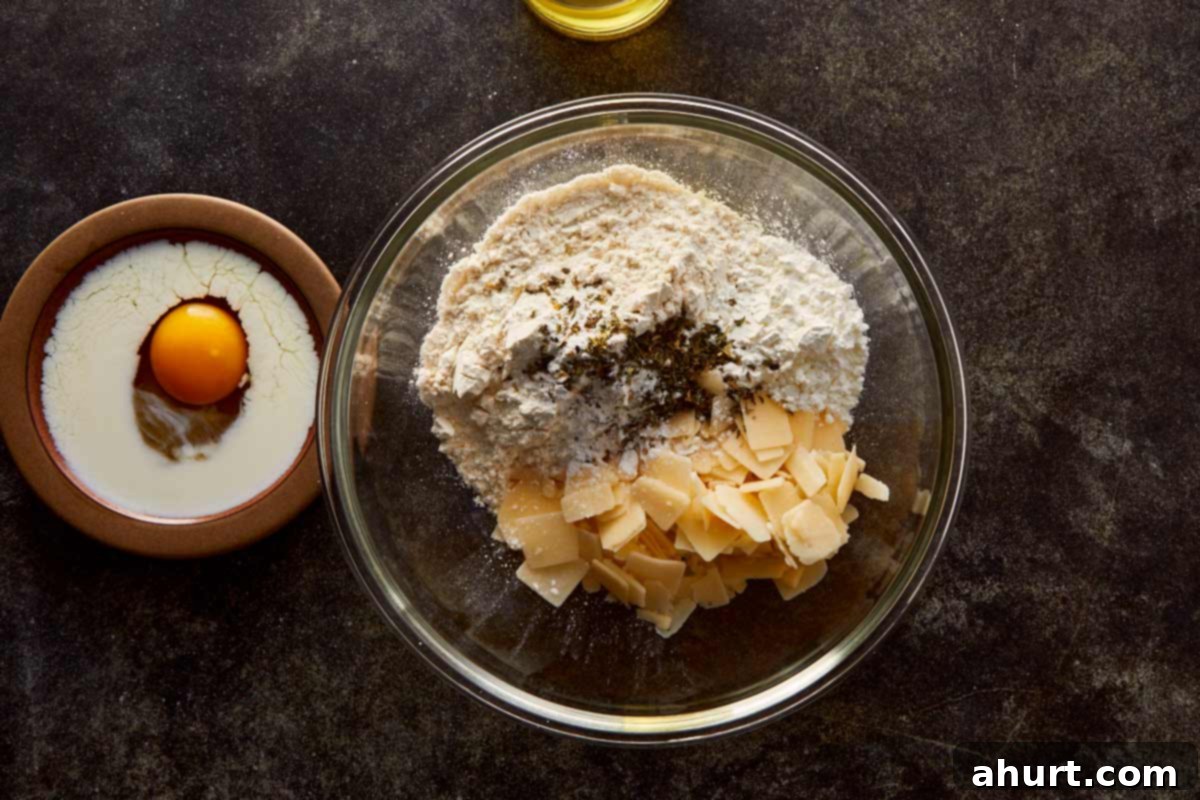
- Make the Dough. In a spacious bowl, combine the egg, olive oil, milk, salt, Italian seasoning, baking powder, flour, cornstarch, and grated cheese. Whisk these ingredients together thoroughly until a smooth, soft, and pliable dough forms. Be careful not to overmix; just combine until uniform to ensure tender grissini. The dough should not be excessively sticky.
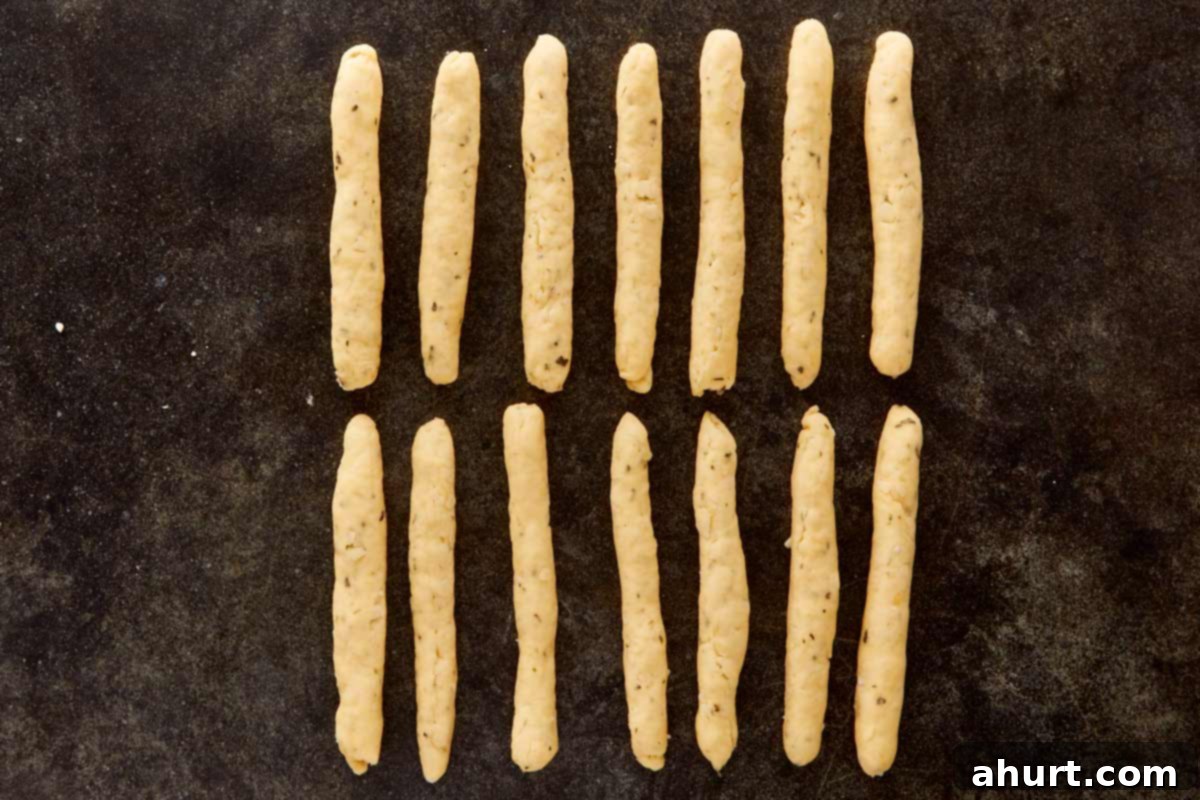
- Shape the Fingers. Take small, even portions of the prepared dough and roll them into thin, elongated sticks that resemble fingers. Aim for roughly ½ inch (1 cm) in width and about 5 inches (12 cm) in length. For an authentic “witchy” look, gently pinch and indent areas to create knobbly knuckles and bend them slightly to give them a natural, slightly creepy, gnarled appearance. Ensure they are relatively uniform in thickness for even baking.
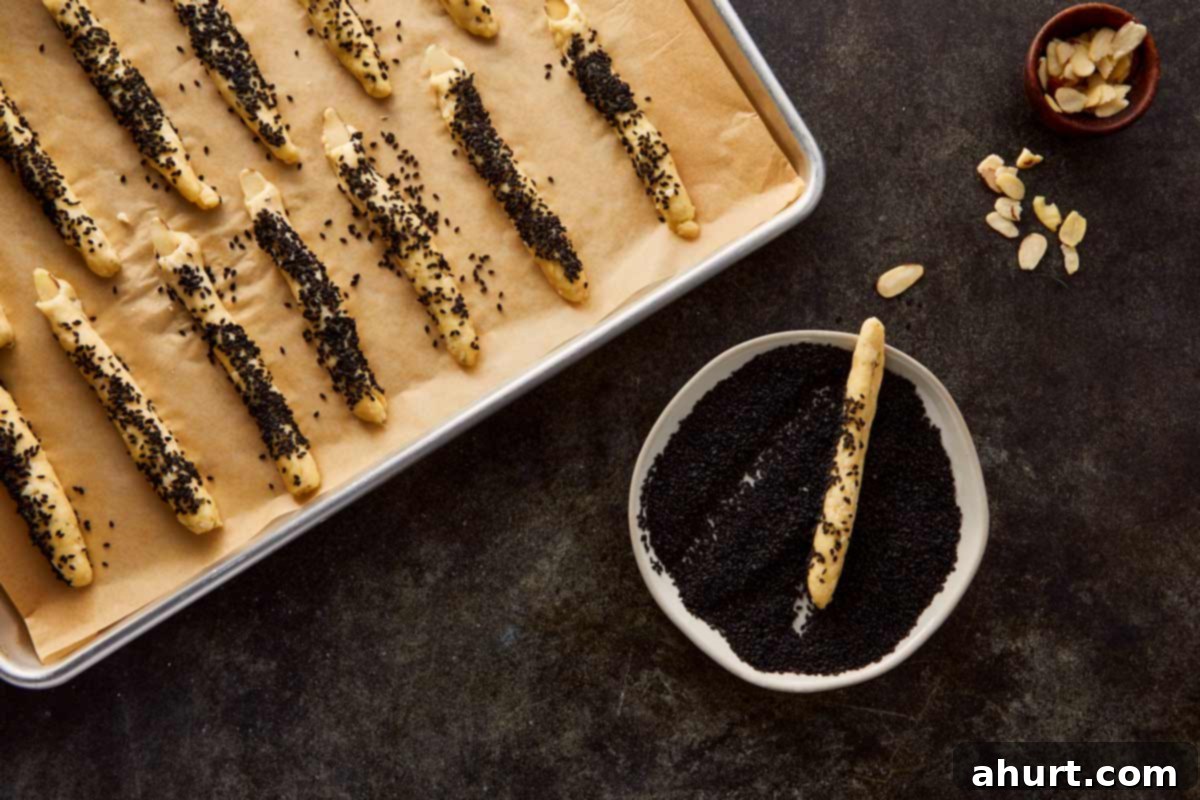
- Add the Texture. Prepare a shallow dish with your black sesame seeds. Carefully roll about three-quarters of each shaped dough “finger” in the black sesame seeds, pressing gently to ensure they adhere well. Leave the very tips bare; this clean section is where the “nails” will be attached, making them stand out strikingly against the dark, textured “skin.”
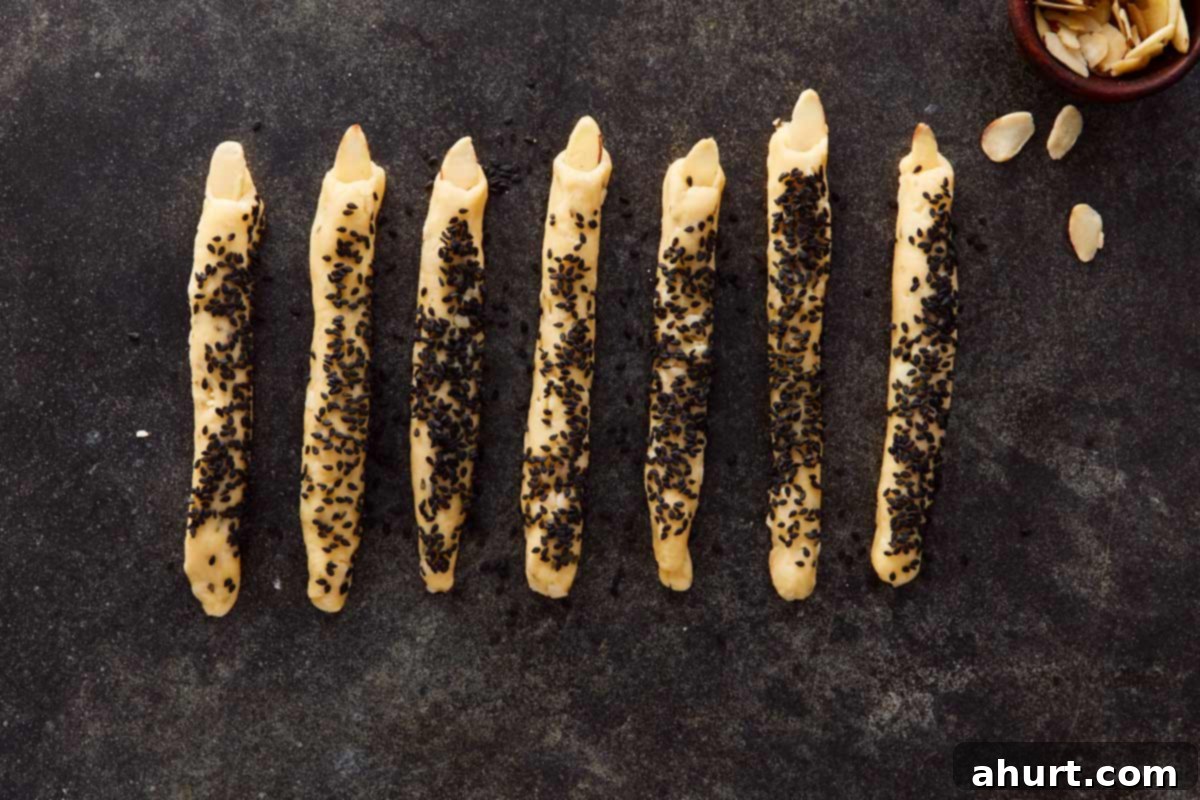
- Give Them Nails. Select a sliced almond for each grissino, choosing pieces that can be shaped to look suitably sharp and witchy. Gently press one almond firmly into the bare tip of each finger, ensuring it is securely embedded in the dough. This creates the illusion of a realistic fingernail, adding a crucial layer of eerie detail.
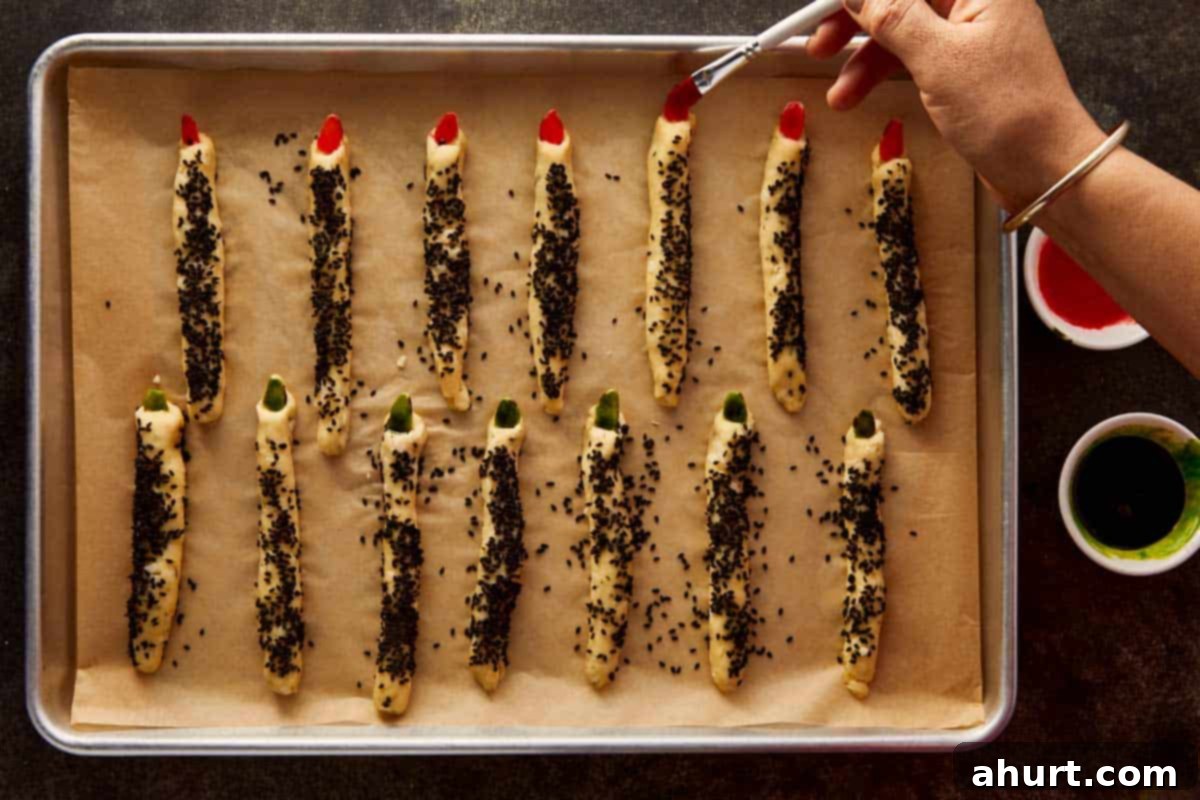
- Add the Final Touch. In a small bowl, mix an egg yolk with a few drops of red or green food coloring (or both, for a variety of haunting hues). Using a small, clean pastry brush, carefully paint each almond “nail” with the colored egg wash. This creates a glossy, vibrant, and utterly convincing “witchy polish” effect, bringing your spooky creations to life.
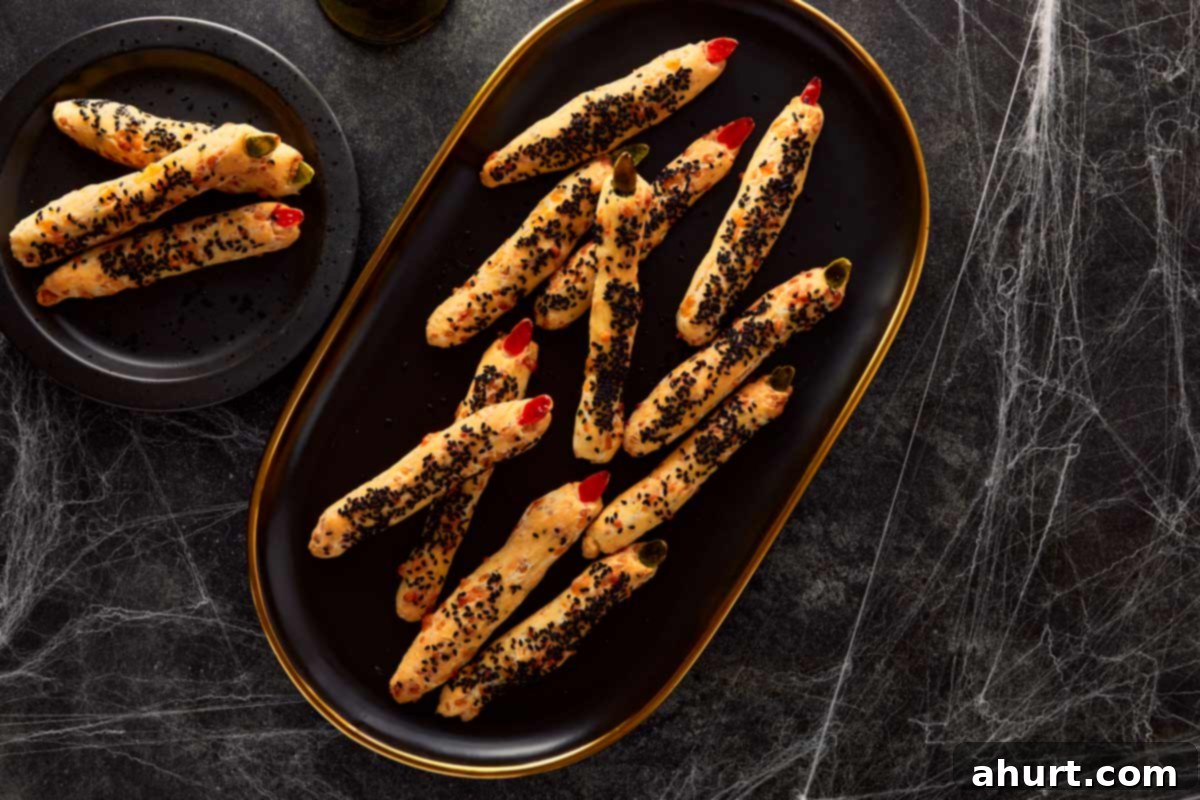
- Bake to Perfection. Carefully arrange the witch fingers on a baking tray lined with parchment paper, ensuring there’s a little space between each one for even air circulation. Bake in a preheated oven at 350°F (180°C) for approximately 20 minutes, or until they achieve a beautiful golden-brown color, are firm to the touch, and just slightly eerie. Their crispness will intensify as they cool.
To truly visualize the entire process and ensure your Witch Finger Grissini turn out perfectly horrifying (and delicious!), you can See It In Action with a full step-by-step video tutorial.
Once baked, these Witch Finger Grissini are a star on their own, but they truly shine when paired with other Halloween delights. Serve them alongside a *terrifyingly* rich Bloody Dip (perhaps a creamy tomato or roasted red pepper dip) for an extra gruesome touch, or balance their savory crunch with a warm, comforting bowl of Pumpkin Soup. For a heartier spread, consider adding a side of Garlic Parmesan Roasted Potatoes or a vibrant fall salad. To conclude your Halloween feast on a sweet (and still slightly spooky) note, offer delightful desserts like a luscious Chocolate Pumpkin Cheesecake or soft, chewy Soft Pumpkin Chocolate Chip Cookies. This combination of textures and flavors guarantees a Halloween party menu that will impress every ghoul and goblin at your table.
Frequently Asked Questions About Witch Finger Grissini
Absolutely! Preparing the dough in advance can be a huge time-saver for your Halloween party planning. Simply prepare the dough as instructed, then wrap it tightly in plastic film and store it in the refrigerator for up to 24 hours. When you’re ready to bake, allow the dough to come to room temperature for about 20-30 minutes before shaping, as this will make it much more pliable and easier to work with.
While the black sesame seeds are highly recommended for their authentic “witchy skin” texture and subtle nutty flavor, you can certainly adjust if needed. If black sesame seeds are unavailable or not to your taste, you could try poppy seeds for a similar textural effect, or even a generous dusting of freshly ground black pepper for a spicier, more rustic look. Just be aware that skipping them will alter the visual appeal and some of the intended flavor profile.
The key to firmly attaching the almond “nails” is to press them gently but securely into the dough *before* baking. The warmth and expansion of the dough during baking will help to naturally bind the almonds in place, creating a stable and cohesive “finger.” Ensure the dough is soft enough to allow the almond to embed without tearing the grissini. If they seem loose after baking, a tiny dab of melted cheese or a drop of the egg wash can act as edible “glue” once cooled.
Absolutely! This recipe is wonderfully adaptable to different savory flavor profiles. For an added layer of dark magic and savory depth, consider incorporating a pinch of smoked paprika or garlic powder into the dough alongside the Italian seasoning. You could also experiment with a sprinkle of cayenne pepper for a subtle fiery kick, or finely chopped fresh rosemary for an aromatic twist. Always taste a small piece of raw dough (without egg) to gauge the seasoning before baking.
These Witch Finger Grissini are best enjoyed fresh, warm, and crisp straight out of the oven. However, if you have leftovers, they can be stored in an airtight container at room temperature for up to 3 days. To restore their crispness, you can briefly reheat them in a toaster oven or a regular oven at a low temperature (around 250°F / 120°C) for 5-7 minutes. This will bring back their witchy crunch and deliciousness.
While this specific recipe uses all-purpose flour, you can experiment with a 1:1 gluten-free all-purpose flour blend. Be aware that gluten-free doughs can sometimes be a bit more delicate or require slight adjustments to liquid content. You might need to add a touch more milk to achieve the right consistency or allow the dough to rest longer to hydrate properly. The texture might vary slightly, but the spooky aesthetic will remain!
Witness the Transformation: See It In Action (Step-By-Step Video)
Sometimes, seeing is believing! To ensure your Witch Finger Grissini are perfectly ghoulish and delicious, we’ve prepared a comprehensive step-by-step video. This visual guide walks you through every stage of the recipe, from mixing the dough to adding those final, eerie touches. Watch closely to master the techniques for shaping, texturing, and painting your way to the ultimate Halloween appetizer. You’ll be surprised how easy it is to create such an impressive and spooky snack.

Pin
Witch Finger Grissini Recipe
Ingredients
- 1 egg
- 2 tbsp olive oil
- ¼ cup milk
- ½ tsp salt
- 1 tsp italian seasoning
- ½ tsp baking powder
- 1 cup all-purpose flour
- ⅓ cup cornstarch
- ⅔ cup grated cheese such as emmental, comté, or parmesan
- ½ cup black sesame seeds
- sliced almonds for fingernails
- 1 egg yolk
- ⅛ tsp food colouring optional
Instructions
-
In a large mixing bowl, combine the egg, olive oil, milk, salt, Italian seasoning, baking powder, all-purpose flour, cornstarch, and grated cheese. Whisk all the ingredients together thoroughly until a smooth, cohesive dough forms. Ensure there are no dry pockets of flour and the dough is soft and pliable. Avoid overmixing, as this can lead to tough grissini.
-
Lightly flour your work surface. Divide the dough into approximately 18 equal portions. Take each portion and roll it out into a thin, finger-like stick, aiming for about ½ inch (1 cm) in width and 5 inches (12 cm) in length. For an authentic witch finger look, gently pinch areas along the length to create “knuckles” and slightly bend the dough to give it a gnarled, realistic shape.
-
Pour the black sesame seeds into a shallow dish. Carefully roll about three-quarters of each shaped dough finger through the sesame seeds, pressing gently to ensure an even coating. Leave the very tip (about ¼ of the length) bare; this creates a distinct area for the “fingernail” and enhances the creepy effect.
-
Take a sliced almond and gently press it onto the bare tip of each grissino, forming the “fingernail.” Make sure it is securely embedded in the dough so it won’t fall off during baking. You can gently shape the almond to enhance its sharp, witchy appearance.
-
In a small bowl, whisk the egg yolk with a few drops of food coloring (red and/or green work wonderfully for a spooky manicure). Using a small, clean pastry brush, carefully paint each almond “nail” with the colored egg wash. This gives them a glossy, freshly polished look, adding to the eerie realism.
-
Preheat your oven to 350°F (180°C). Arrange the prepared witch fingers on a baking tray lined with parchment paper, leaving a small space between each one. Bake for approximately 20 minutes, or until the grissini are lightly golden brown, firm to the touch, and wonderfully crisp. The internal cheese will be melted and gooey, making them even more delicious. Allow them to cool slightly on the tray before serving.
Notes
Keep these essential Witch Finger Grissini tips in mind before you head into the kitchen cauldron to ensure your batch is spooktacular:
– Don’t overwork the dough. Mix until just combined to keep the fingers tender and flaky, not dense or tough. Overworking develops gluten excessively, which can make the breadsticks chewy rather than crisp.
– Use chilled dough. If your dough becomes too warm and sticky while shaping, a short 15-20 minute rest in the fridge makes handling much easier and helps the “fingers” hold their intricate, creepy form during baking.
– For sharper nails, select thin, pointed sliced almonds and press them gently but firmly into place before baking. If you only have thicker almonds, you can carefully trim them with a small sharp knife.
– Add color magic. Mix the egg yolk with gel food coloring for more vibrant, haunting red or green “polish” that really pops. Liquid food coloring can also work, but gel offers a richer hue.
– Serve warm. These witchy breadsticks are at their absolute best right out of the oven, when they are golden, the cheese is still slightly gooey, and they’re perfectly crisp and just a little sinister. Provide a warm dip for maximum enjoyment.
– Even baking is key. Try to make your grissini roughly the same thickness so they bake evenly. Thinner parts will crisp faster, while thicker parts might remain softer.
– Parchment paper is your friend. Always line your baking sheet with parchment paper to prevent sticking and ensure easy cleanup. It also helps with even heat distribution.
– Experiment with dips. Don’t limit yourself to just one dip! Offer a variety, like a classic marinara, a creamy spinach dip, or a vibrant pesto, to cater to different tastes.
Nutrition
Nutrition information is automatically calculated, so should only be used as an approximation. Individual results may vary based on exact ingredients and preparation methods.
