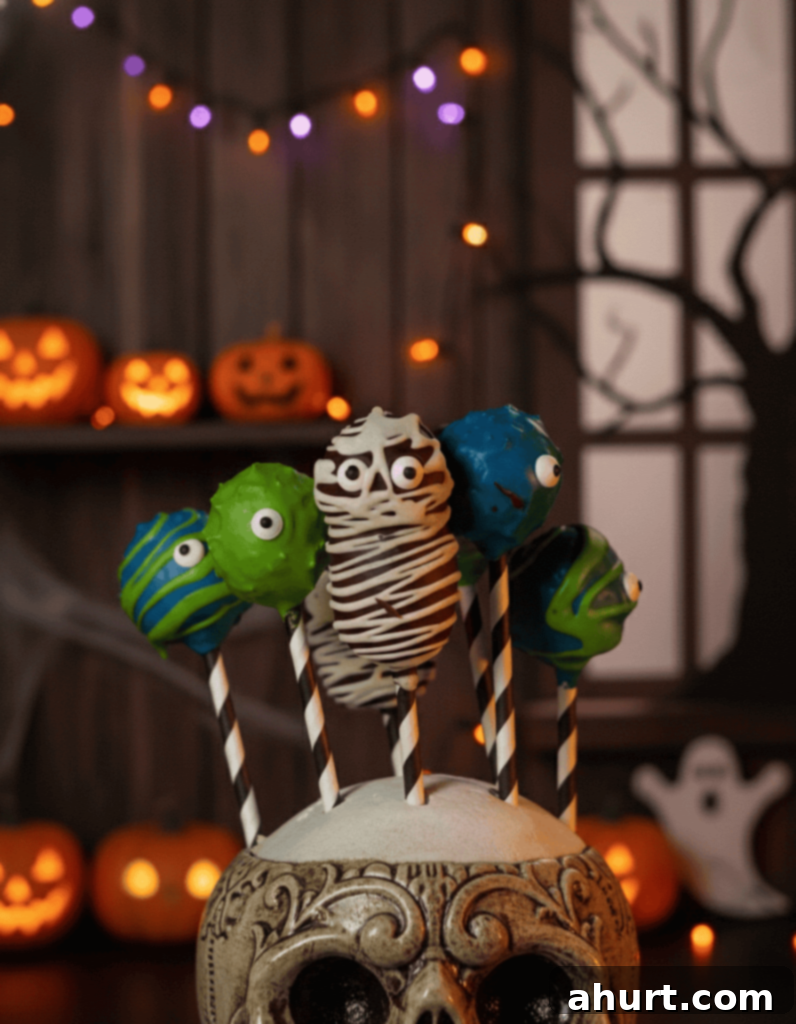
Spooktacular Red Velvet Monster Cake Pops: Your Ultimate Guide to Halloween’s Sweetest Treat
Step aside, ordinary Halloween candy! This year, elevate your spooky season celebrations with our truly unforgettable Red Velvet Monster Cake Pops. These aren’t just any treats; they are a masterpiece of flavor and fun, designed to bring a ghoulishly delightful smile to every face. Imagine luscious, soft, and impossibly moist red velvet cake, infused with that signature hint of cocoa and vibrant crimson hue, lovingly crumbled and mixed with a rich, fluffy vanilla frosting. The resulting decadent mixture is then shaped into playful monster spheres, expertly coated in a smooth, glossy layer of melted chocolate – your canvas for creativity! Adorned with quirky candy eyes, whimsical sprinkles, or vibrant drizzles, each bite of these red velvet cake pops is an adventure in pure indulgence. They are rich, perfectly moist, and possess an addictive quality that will have everyone reaching for another.
Crafting these monster cake pops is an experience in itself, offering endless opportunities for creativity, especially when it comes to decorating. Whether you’re planning a Halloween party for kids or an elegant adult gathering with a touch of spooky charm, these homemade treats are guaranteed to be the star of your dessert table. Not only are they incredibly delicious, but their enchanting appearance makes them a fantastic centerpiece and a joy to share. Get ready for them to disappear faster than a ghost in the night!
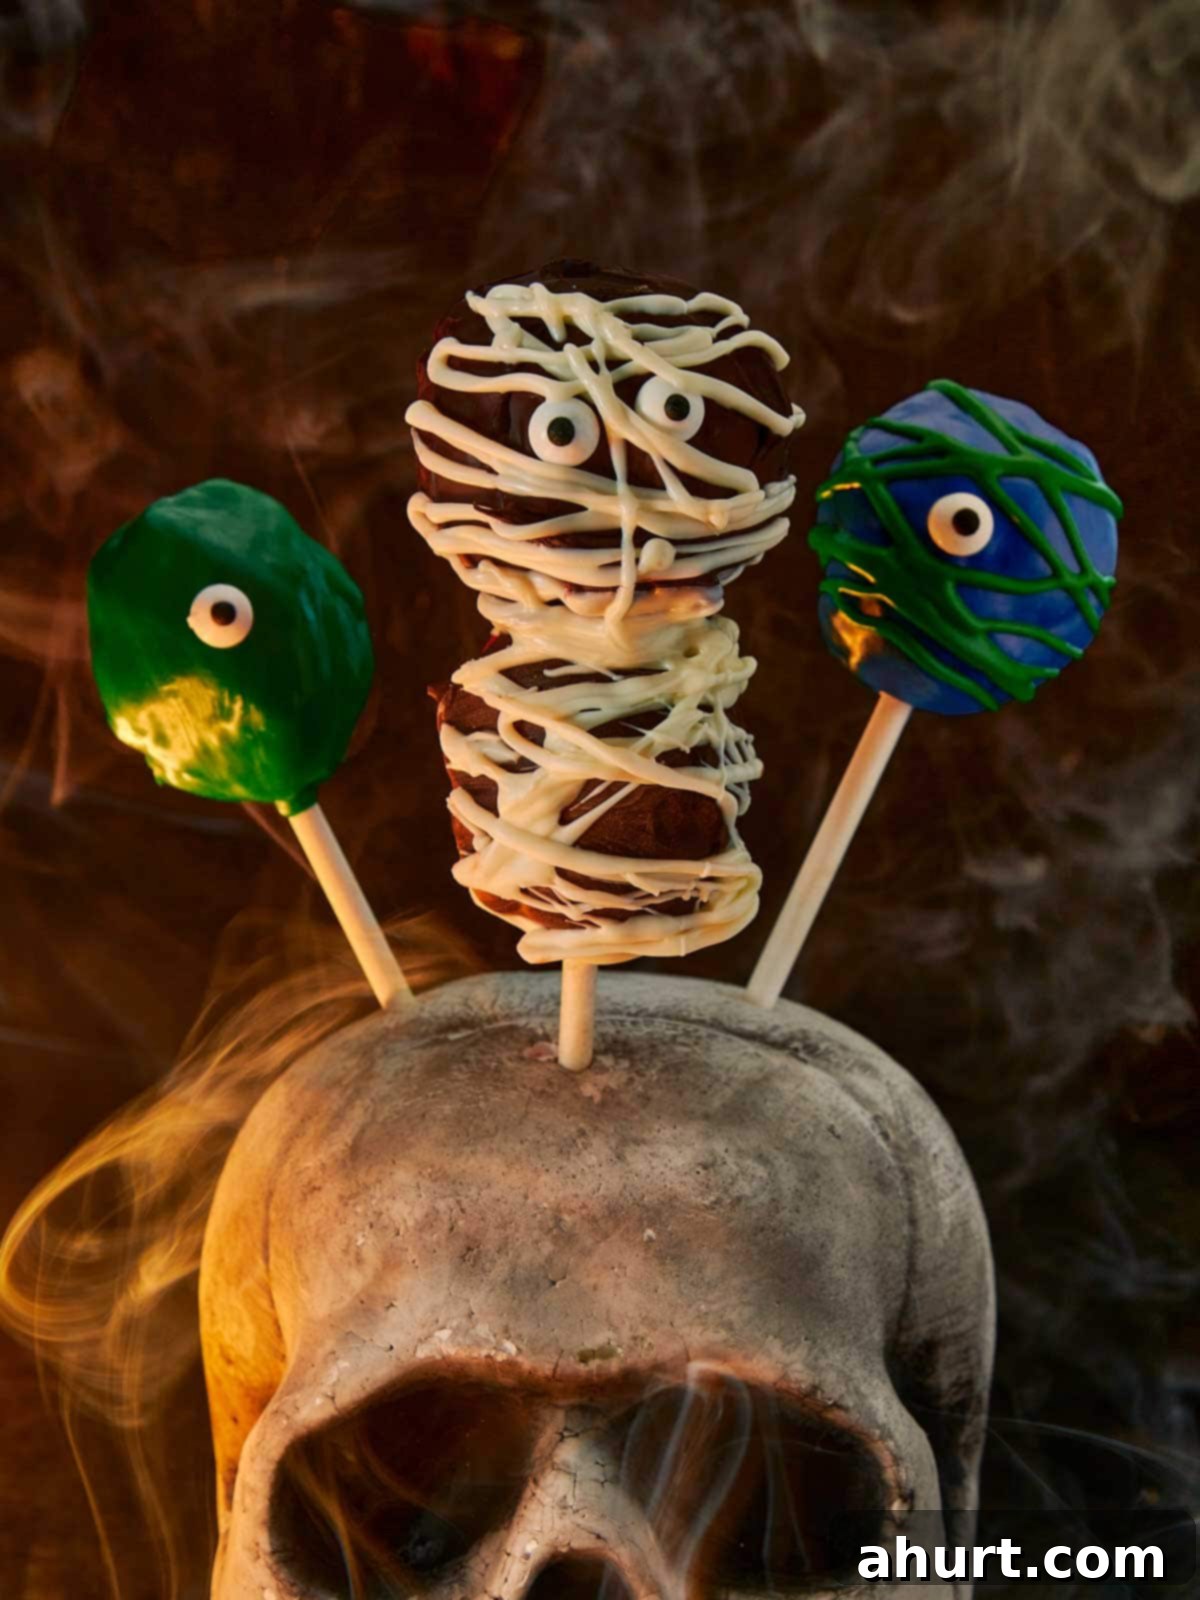
Why These Red Velvet Monster Cake Pops Are Utterly Irresistible
There’s a reason our Red Velvet Monster Cake Pops become the instant favorites at any festive gathering, especially during Halloween. They expertly combine a deeply rich, almost fudgy texture with an undeniable sense of playful, spooky delight. The secret lies in the homemade red velvet cake, which provides a profound, subtle cocoa flavor alongside an incredibly soft and tender crumb. This distinct base is then masterfully blended with our creamy, velvety vanilla frosting, ensuring each cake pop remains wonderfully moist and smooth on the inside, preventing any dryness often found in lesser cake pop recipes. This perfect internal consistency is what truly sets them apart.
But the magic doesn’t stop there. The experience of biting into these treats is further enhanced by the satisfying “snap” of the chocolate coating. Whether you opt for a classic milk chocolate, a sophisticated dark chocolate, or a playful white chocolate canvas, this exterior shell provides a delightful textural contrast. Beyond taste, the true charm of these monster cake pops comes alive during the decoration phase. It transforms baking into a creative, hands-on activity suitable for all ages – from meticulous adults to enthusiastic children. Adorning each pop with whimsical candy eyes, vibrant sprinkles, or intricate fondant details turns them into mini edible works of art, making them as much a feast for the eyes as for the palate.
For those looking to curate the ultimate Halloween dessert spread, these monster cake pops serve as a fantastic anchor. Their vibrant red and playful designs pair wonderfully with other seasonal delights. Consider complementing their rich flavor profile with something warm and comforting, perhaps pumpkin-spiced, like a batch of chewy Soft Pumpkin Chocolate Chip Cookies or a decadent, spiced Pumpkin Cheesecake. These additions will beautifully round out your spooky-sweet night, offering a variety of textures and flavors that will impress all your guests and ensure a truly memorable Halloween celebration.
Essential Ingredients to Bring Your Spooky Monster Cake Pops to Life
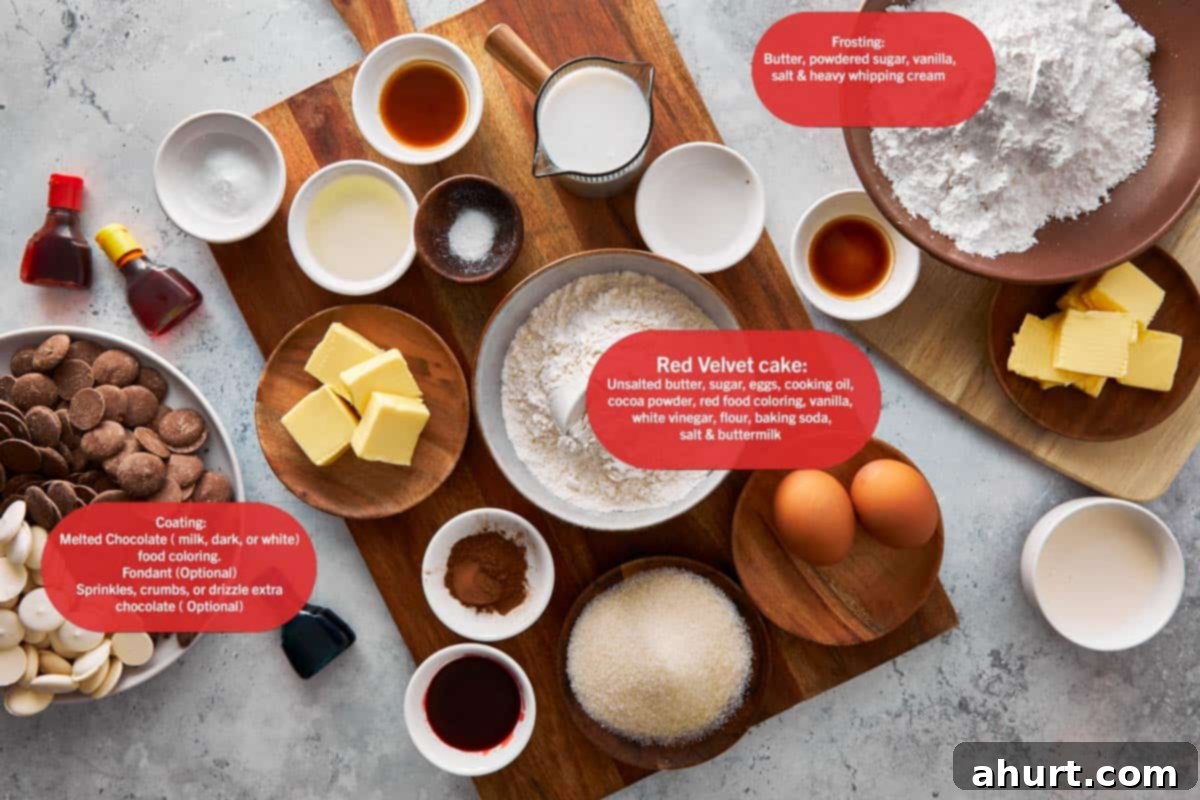
Creating these delightful, fudgy, and chocolate-dipped monster cake pops doesn’t require an extensive shopping list. In fact, just a handful of straightforward ingredients, readily available at most grocery stores, are all you need to transform simple components into an extraordinary Halloween treat. Each ingredient plays a crucial role in achieving that perfect balance of flavor, texture, and visual appeal. Here’s a closer look at what you’ll need to gather to bring these adorable (and slightly spooky) monsters to life in your kitchen:
- Red Velvet Cake Base: This is the heart of your cake pops. We aim for a cake that is exceptionally soft, rich, and buttery, with that distinctive subtle cocoa flavor that red velvet is famous for. The deep red hue will peek through any cracks in your chocolate coating, adding to the monster effect. Using high-quality cocoa and fresh ingredients here makes a significant difference in the final taste and texture.
- Creamy Frosting: Not just for flavor, the frosting is the magical binder that transforms cake crumbs into a cohesive, shapable dough. Our recipe calls for a creamy and fluffy vanilla frosting, which complements the red velvet beautifully without overpowering it. The right consistency of frosting is key to achieving perfectly smooth, crack-free cake pop balls.
- Chocolate Coating: This forms the glossy, firm shell of your monster cake pops. Whether you choose milk, dark, or white chocolate, ensure it’s a good quality melting chocolate or candy coating for the best results. A smooth melt and quick set are essential for a professional-looking finish and that satisfying outer crunch.
- Food Coloring & Playful Decorations: This is where the real monster fun begins! Red food coloring is essential for the iconic red velvet cake, but additional food coloring (especially gel-based for chocolate) can be used to tint your coating in vibrant, spooky shades. Then, unleash your creativity with decorations like edible candy eyes, various sprinkles (Halloween-themed, jimmies, nonpareils), or even small fondant details to give each monster its unique personality.
Pro Tip: For a detailed breakdown of all the specific quantities and precise measurements for each component, please refer to the comprehensive Recipe Card below. Having all your ingredients prepped and measured before you start will make the baking process even more enjoyable!
Crafting Your Spooky Treats: A Step-by-Step Guide to Red Velvet Monster Cake Pops
The journey to creating these irresistible Red Velvet Monster Cake Pops is a delightful culinary adventure. From the vibrant, moist red velvet interior to the gleaming chocolate exterior, every step is designed to be enjoyable, culminating in a dessert that’s as fun to eat as it is to make. Follow these detailed instructions to ensure your monster cake pops are a howling success!
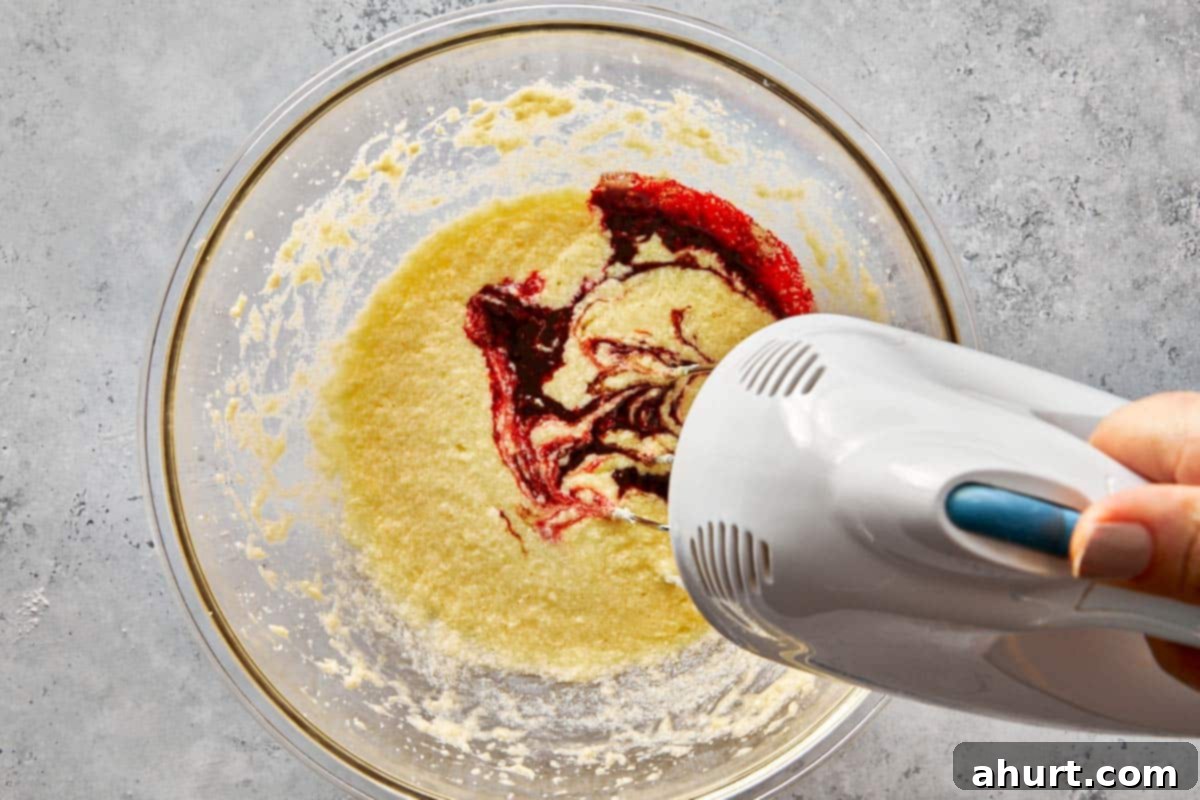
- Prepare the Red Velvet Cake Base
Begin by carefully preparing your red velvet batter according to the recipe card. Mix until all ingredients are smoothly incorporated and the color is a consistent, deep red. The visual transformation as the red food coloring blends with the cocoa and other wet ingredients is truly satisfying, promising that classic red velvet experience.
- Bake and Cool Your Cake
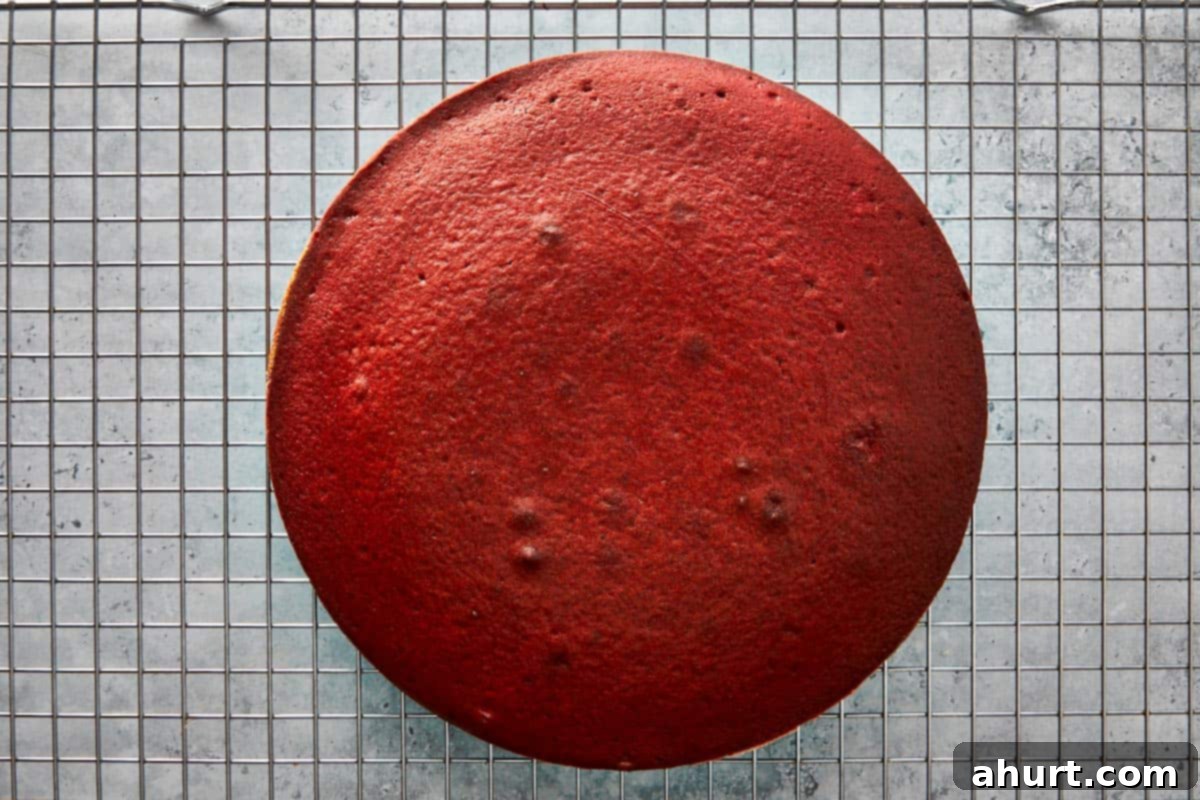
Pour the perfectly mixed batter into your prepared baking pan. Bake until a toothpick inserted into the center comes out clean, indicating it’s firm yet moist. It’s crucial to allow the cake to cool down completely on a wire rack before moving to the next step. A warm cake will make the crumbling and mixing process messy and lead to a greasy consistency for your cake pops.
- Whip Up the Creamy Frosting
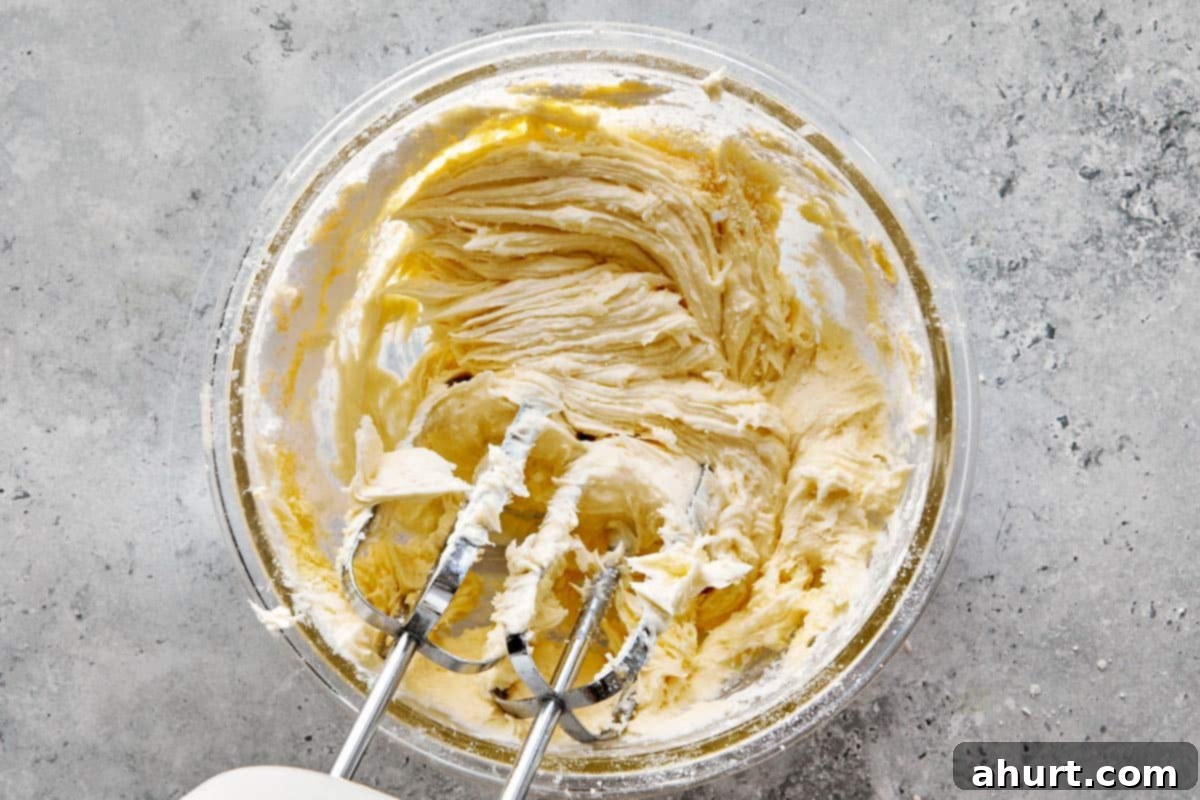
While your cake cools, prepare the delightful frosting. Beat together butter, powdered sugar, vanilla extract, and heavy cream until it transforms into a smooth, incredibly fluffy, and spreadable consistency. This frosting isn’t just for flavor; it’s vital for binding the cake crumbs together, providing the perfect internal moisture and structure for your cake pops.
- Form and Chill the Cake Pops
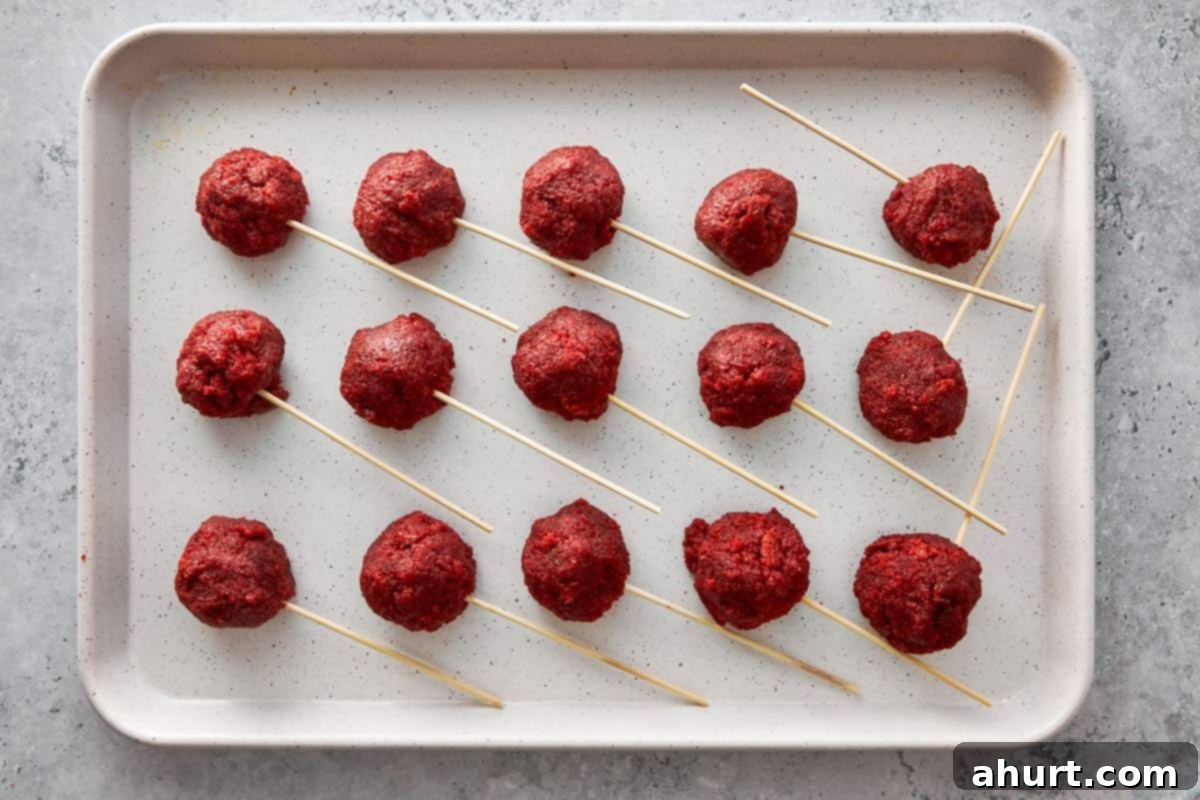
Once the cake is fully cooled, crumble it finely into a large bowl. Gradually add your prepared frosting, a spoonful at a time, mixing until the cake mixture is moist enough to hold its shape when pressed, but not overly wet. Roll this mixture into uniform balls, then carefully insert a cake pop stick into each. Dip the tip of the stick into a little melted chocolate first for extra security! Chill these formed cake pops in the fridge for at least 30-60 minutes until they are firm enough to handle and dip without falling apart.
- Dip and Apply the Chocolate Coating
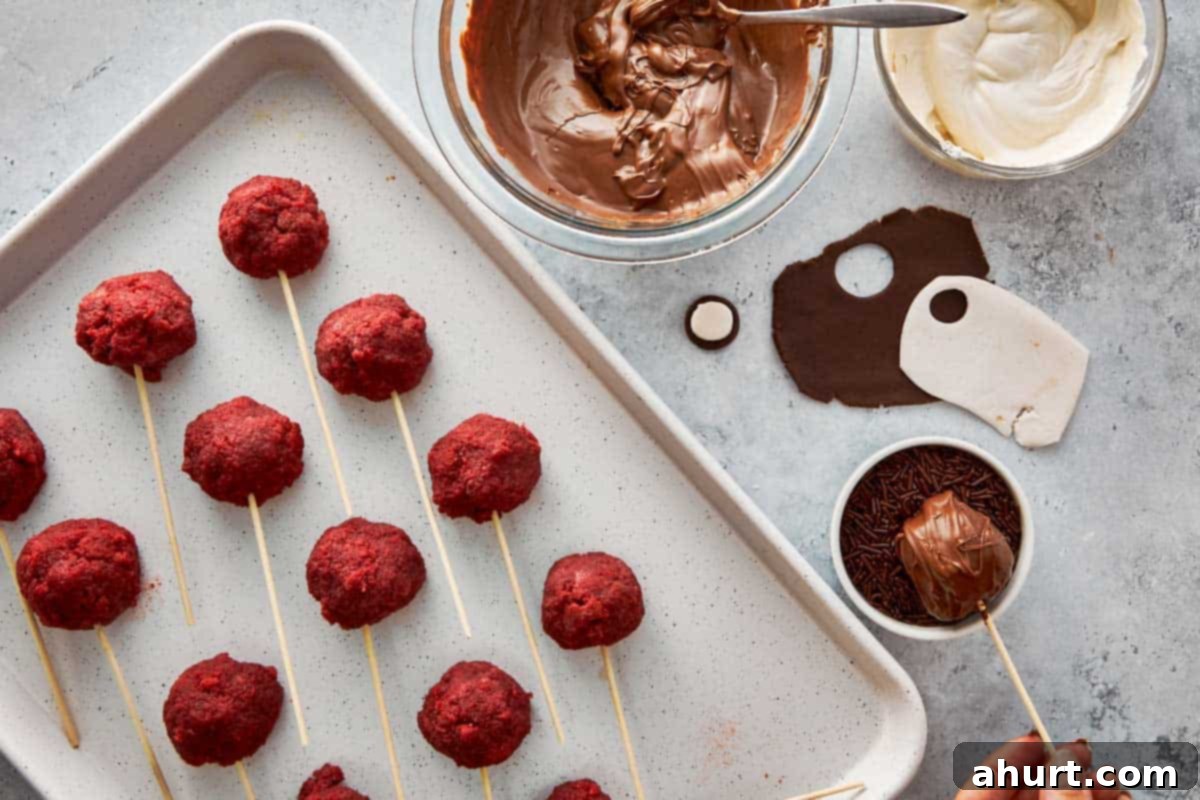
Melt your chosen chocolate in a microwave or over a double boiler until smooth and fluid. If desired, now is the time to tint your white chocolate with gel food coloring to create vibrant monster hues. Dip each chilled cake pop into the melted chocolate, swirling gently to ensure a complete and even coating. Allow any excess chocolate to drip off, then immediately add sprinkles, crushed cookies, or a contrasting chocolate drizzle while the coating is still wet.
- Decorate Your Monsters and Let Them Set
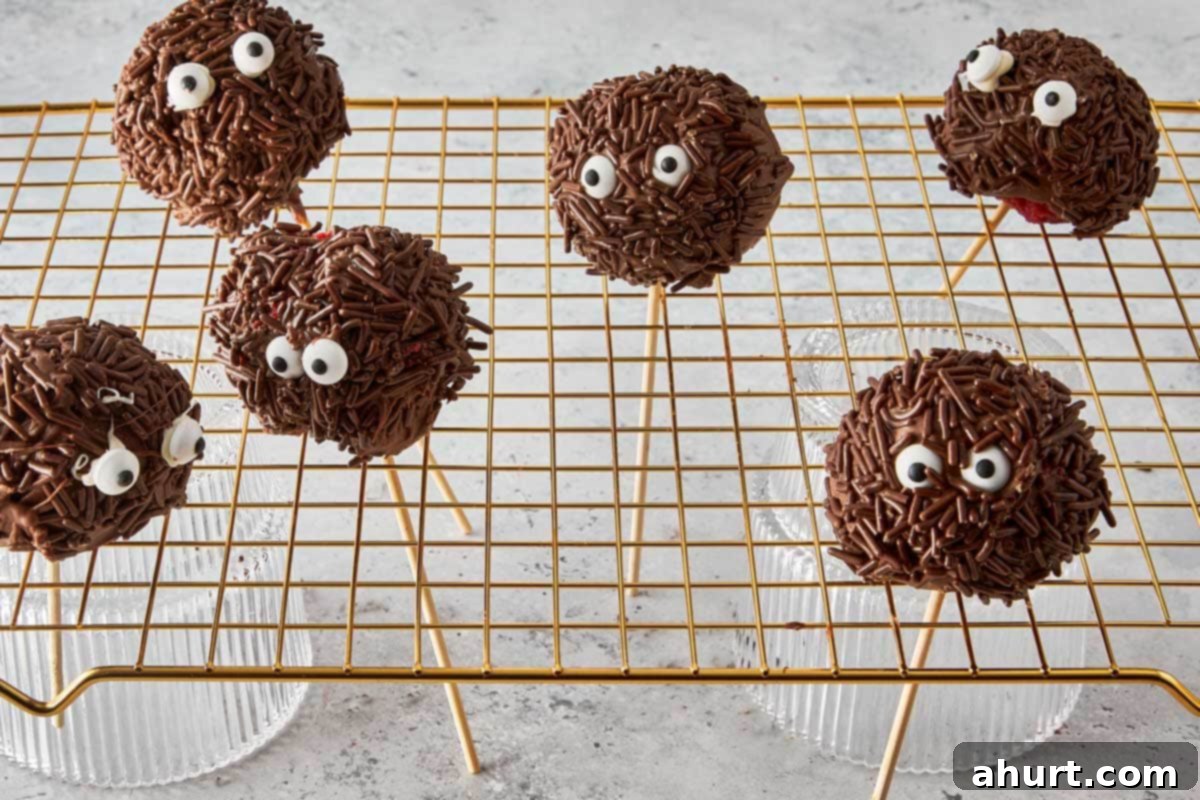
This is the most exciting part! Give your monster cake pops their final, unique personalities. Affix candy eyes, press on various sprinkles, or create intricate designs with fondant. Once decorated, stand the cake pops upright in a styrofoam block, a tall glass, or a specialized cake pop holder. This allows the chocolate coating to set completely without smudging, ensuring your festive creations look perfect for serving.
Curious to see these steps brought to life? For a visual demonstration and an even clearer understanding, you can See It In Action by watching our detailed step-by-step video tutorial. It’s an excellent resource for visual learners!
When planning your Halloween dessert table, these Red Velvet Monster Cake Pops offer a fantastic foundation for a varied and exciting spread. Their rich, fudgy texture can be beautifully contrasted with lighter options such as delicate Swiss Meringue Ghosts, which provide an airy and crisp bite. For a touch of cozy comfort, consider adding an Easy Apple Crumble, filled with warm, spiced apples. If you’re aiming for something more playful and interactive, Churro Apple Pie Bowls offer a delightful crunch, while those craving ultimate decadence will adore Nutella-Stuffed Salted Caramel Blondies. This combination ensures a diverse range of textures – airy, crumbly, crunchy, and supremely fudgy – that tantalize every palate without ever overshadowing the whimsical charm of your primary monster cake pops. Your Halloween feast will be a memorable one!
Frequently Asked Questions About Red Velvet Monster Cake Pops
You can certainly get a head start on your Halloween baking! These delicious cake pops can be fully prepared and decorated up to two days in advance. To maintain their freshness and perfect texture, keep them properly chilled and covered in an airtight container. For the best flavor and a softer bite, allow them to come to room temperature for about 15-20 minutes before serving. This allows the cake and frosting to soften slightly from the cold.
Once the chocolate coating has completely set and hardened, transfer your decorated Red Velvet Monster Cake Pops to an airtight container. Store them in the refrigerator, where they will remain fresh and delicious for up to five days. If you need to store them for longer, they can also be frozen (undipped or dipped) for up to one month; just be sure to thaw them in the refrigerator before bringing them to room temperature to serve.
Cracking is a common issue that typically arises from a temperature imbalance. It usually happens if your melted chocolate is too hot, causing a thermal shock when it hits a very cold cake ball, or if the cake balls themselves are too cold. To prevent this, ensure both your melted chocolate and your chilled cake balls are closer to room temperature before dipping. Letting the melted chocolate cool slightly (but still fluid) and removing the cake balls from the fridge about 10-15 minutes before dipping can make a huge difference.
Absolutely! While our recipe provides instructions for a homemade red velvet cake from scratch, using a good quality boxed red velvet cake mix is a fantastic shortcut that won’t compromise the fun or deliciousness of these monster cake pops. Simply bake the cake according to the package directions, let it cool completely, and then crumble it as usual. The frosting preparation and subsequent steps remain exactly the same, making this recipe highly adaptable for busy bakers.
For the best results and a smooth, professional-looking finish, we highly recommend using melting chocolate wafers (often labeled as candy melts) or a high-quality chocolate specifically formulated for dipping. These types of chocolates melt smoothly without seizing and set firmly at room temperature, creating that perfect glossy, non-sticky shell that is characteristic of excellent cake pops. Regular chocolate chips can be used, but you might need to add a teaspoon of coconut oil or shortening to achieve the desired fluidity and prevent cracking.
Yes, you can! To make gluten-free Red Velvet Monster Cake Pops, simply substitute the all-purpose flour in the cake recipe with a good quality 1:1 gluten-free all-purpose baking blend. Ensure the blend contains xanthan gum or add a quarter teaspoon if it doesn’t. Follow the rest of the recipe as instructed. All other ingredients (frosting, chocolate coating, decorations) are typically gluten-free, but always check labels to be sure.
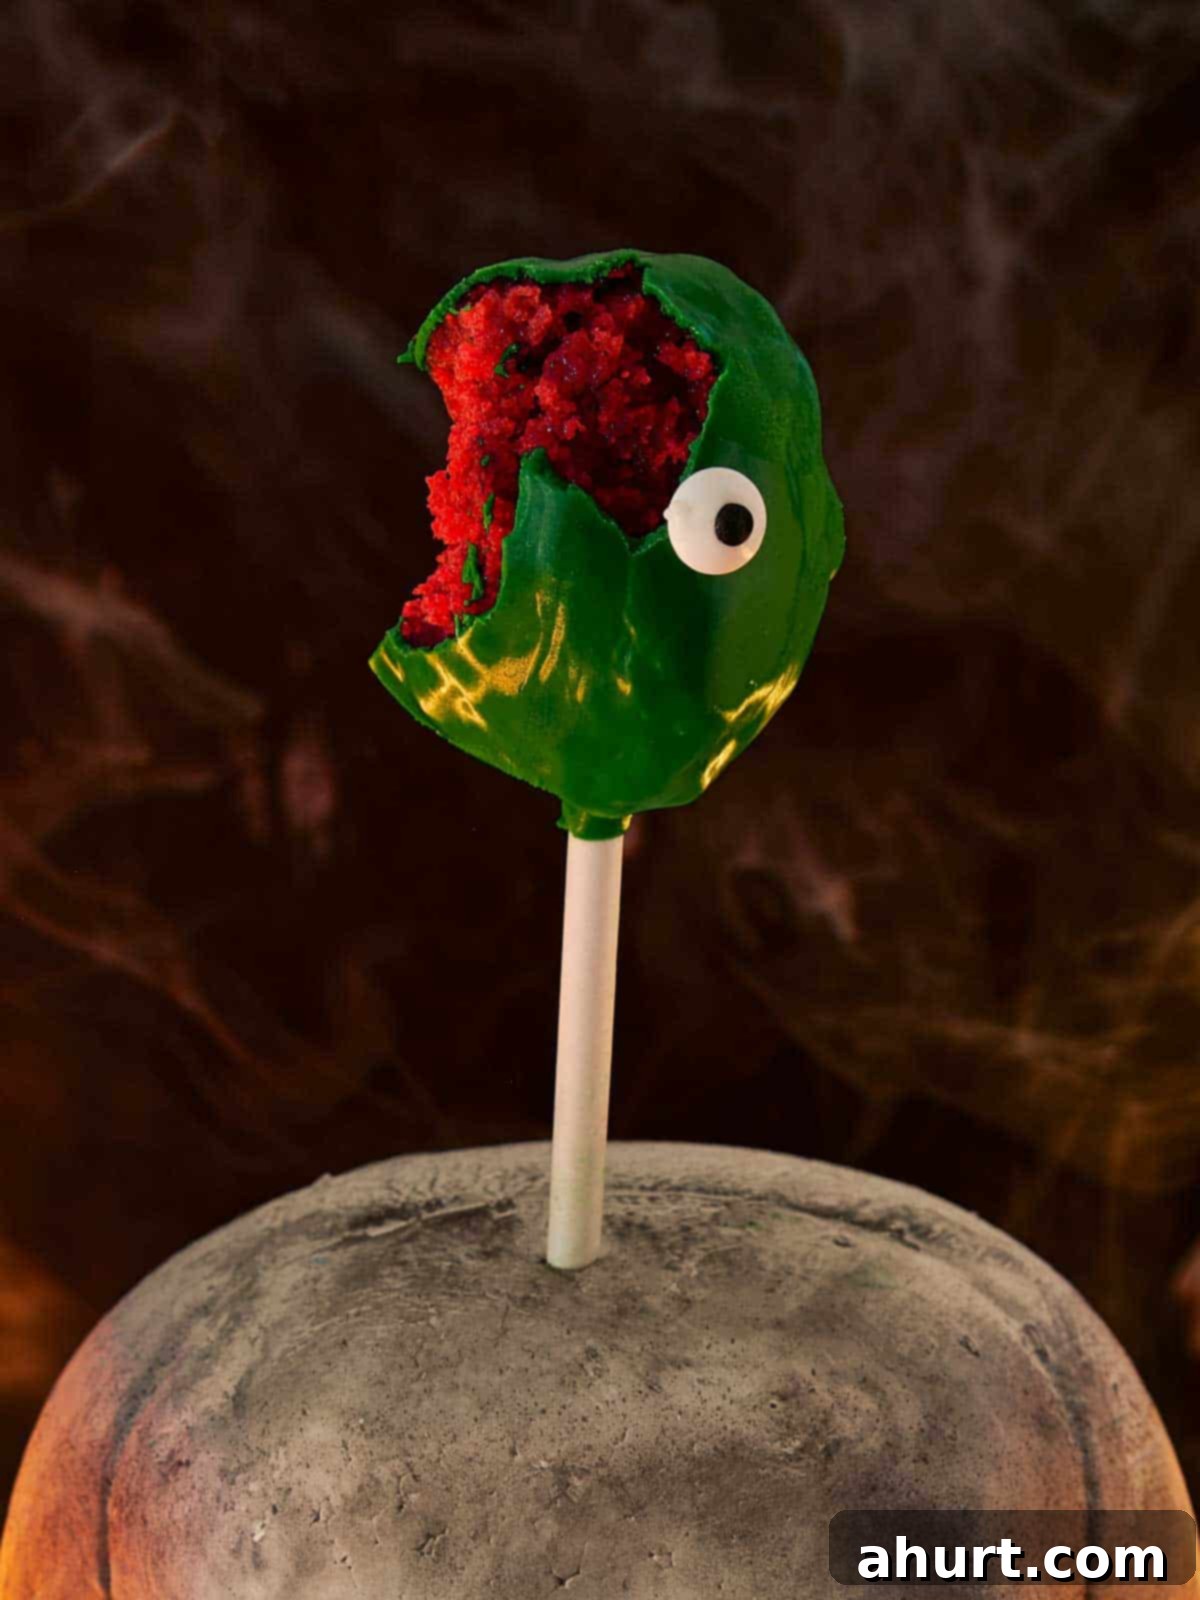
See It In Action: Step-By-Step
Pin
Red Velvet Monster Cake Pops Recipe
Ingredients
For the Red Velvet Cake
- ¼ cup unsalted butter softened
- ½ cup caster sugar
- 2 large eggs
- 2½ tbsp cooking oil
- 1 tsp unsweetened cocoa powder
- 2 tbsp red food coloring liquid
- 1 tsp pure vanilla extract
- 2 tsp white vinegar
- 1¼ cups all-purpose flour
- ½ tsp baking soda
- ½ tsp salt
- ½ cup buttermilk
For the Frosting
- ⅓ cup unsalted butter softened
- 2 cups powdered sugar
- ½ tsp pure vanilla extract
- 5 tbsp heavy whipping cream
- 1 pinch salt
For Coating
- 2½ cups melted chocolate milk, dark, or white — your choice
Optional
- Food coloring
- White and black fondant
- Sprinkles, crumbs, or drizzle extra chocolate
Instructions
Make the Red Velvet Cake
-
Heat oven to 350°F (175°C). Lightly grease and line an 8-inch (20 cm) baking pan with non-stick baking spray or parchment paper.
-
In a large bowl, beat the butter and sugar together until pale and fluffy.
-
Add the eggs one at a time, beating well after each addition.
-
In a smaller bowl, combine the oil, cocoa powder, red food colouring, and vanilla extract until smooth.
-
Stir this mixture into the creamed butter mixture. Add the vinegar and mix to combine.
-
In a separate bowl, sift together flour, baking soda, and salt.
-
Add half of the dry ingredients and half of the buttermilk to the wet mixture, mixing until combined. Repeat with remaining dry ingredients and buttermilk until smooth.
-
Pour batter into the prepared pan and bake for 25–30 minutes, or until a toothpick inserted into the centre comes out clean. Cool completely on a wire rack.
Make the Frosting
-
In a medium bowl, beat the butter and salt for about 1 minute until smooth
-
Gradually add powdered sugar and beat until fluffy.
-
Add vanilla extract, then pour in heavy cream while mixing.
-
Beat until smooth and fluffy. Set aside.
Form the Cake Pops
-
Once the cake is cooled, crumble it finely with your hands or a fork.
-
Add frosting, a spoonful at a time, and mix until the mixture holds together when pressed.
-
Roll into 15 even balls. Insert a cake pop stick into each and chill in the fridge until firm (about 30–60 minutes).
Coat in Chocolate
-
Melt chocolate in a microwave or double boiler.
Optional
-
Add food coloring to the melted chocolate for your monsters, white chocolate will dye a much better color
-
Dip each cake pop into the melted chocolate, swirling to coat evenly.
-
Decorate as desired with sprinkles, crumbs, or drizzle extra chocolate. Or use a black circle of fondant over a larger white circle and stick it on to create an eye.
-
Stand cake pops upright in a styrofoam block or holder to set completely.
To Serve:
-
Allow the chocolate coating to set completely before serving.
-
Store cake pops in an airtight container in the fridge for up to 5 days.
Notes: Monster Pop Success Tips
- Thoroughly Cool Your Cake: This is perhaps the most crucial step! It is essential that your baked red velvet cake is completely cooled to room temperature before you begin crumbling it. Attempting to crumble a warm cake will result in a greasy, overly moist mixture that is difficult to shape and may lead to sticky, inferior cake pops. Patience here pays off!
- Add Frosting Incrementally: When combining the cake crumbs with the frosting, always add the frosting gradually, a spoonful at a time. The goal is to reach a consistency where the mixture holds together when pressed firmly, but isn’t sticky or wet. Too much frosting will make your cake pops gooey and difficult to work with, while too little will make them crumbly.
- Chill for Easier Shaping: If your cake pop mixture feels too soft or sticky after mixing with frosting, don’t despair! Simply cover the bowl and chill it in the refrigerator for 10-15 minutes. This will firm up the mixture, making it much easier to roll into smooth, uniform balls.
- Opt for White Chocolate for Bright Colors: If your vision includes vibrant, brightly colored monster cake pops, white chocolate is your best friend for the coating. It provides a neutral base that can be easily tinted with gel food coloring to achieve intense and clear hues like bright green, purple, or orange without affecting the chocolate’s texture.
- Secure Sticks with Chocolate: To prevent your cake pops from slipping off their sticks while dipping or handling, dip the very end of each cake pop stick into a little melted chocolate before inserting it into the cake ball. The chocolate acts like glue, firmly adhering the stick to the cake and ensuring stability.
- Room Temperature Setting is Key: Once dipped and decorated, allow your cake pops to set at room temperature first before transferring them to the refrigerator. Moving them too quickly to a cold environment can cause the chocolate coating to crack due to rapid temperature changes. Patience yields a smooth, unblemished finish.
- Proper Storage for Longevity: Store your finished Red Velvet Monster Cake Pops in an airtight container in the refrigerator. They will stay fresh and delicious for up to 5 days. For longer storage, you can freeze them for up to 1 month. Make sure they are fully defrosted in the fridge before bringing them to room temperature for serving.
Nutrition
Nutrition information is automatically calculated, so should only be used as an approximation.
