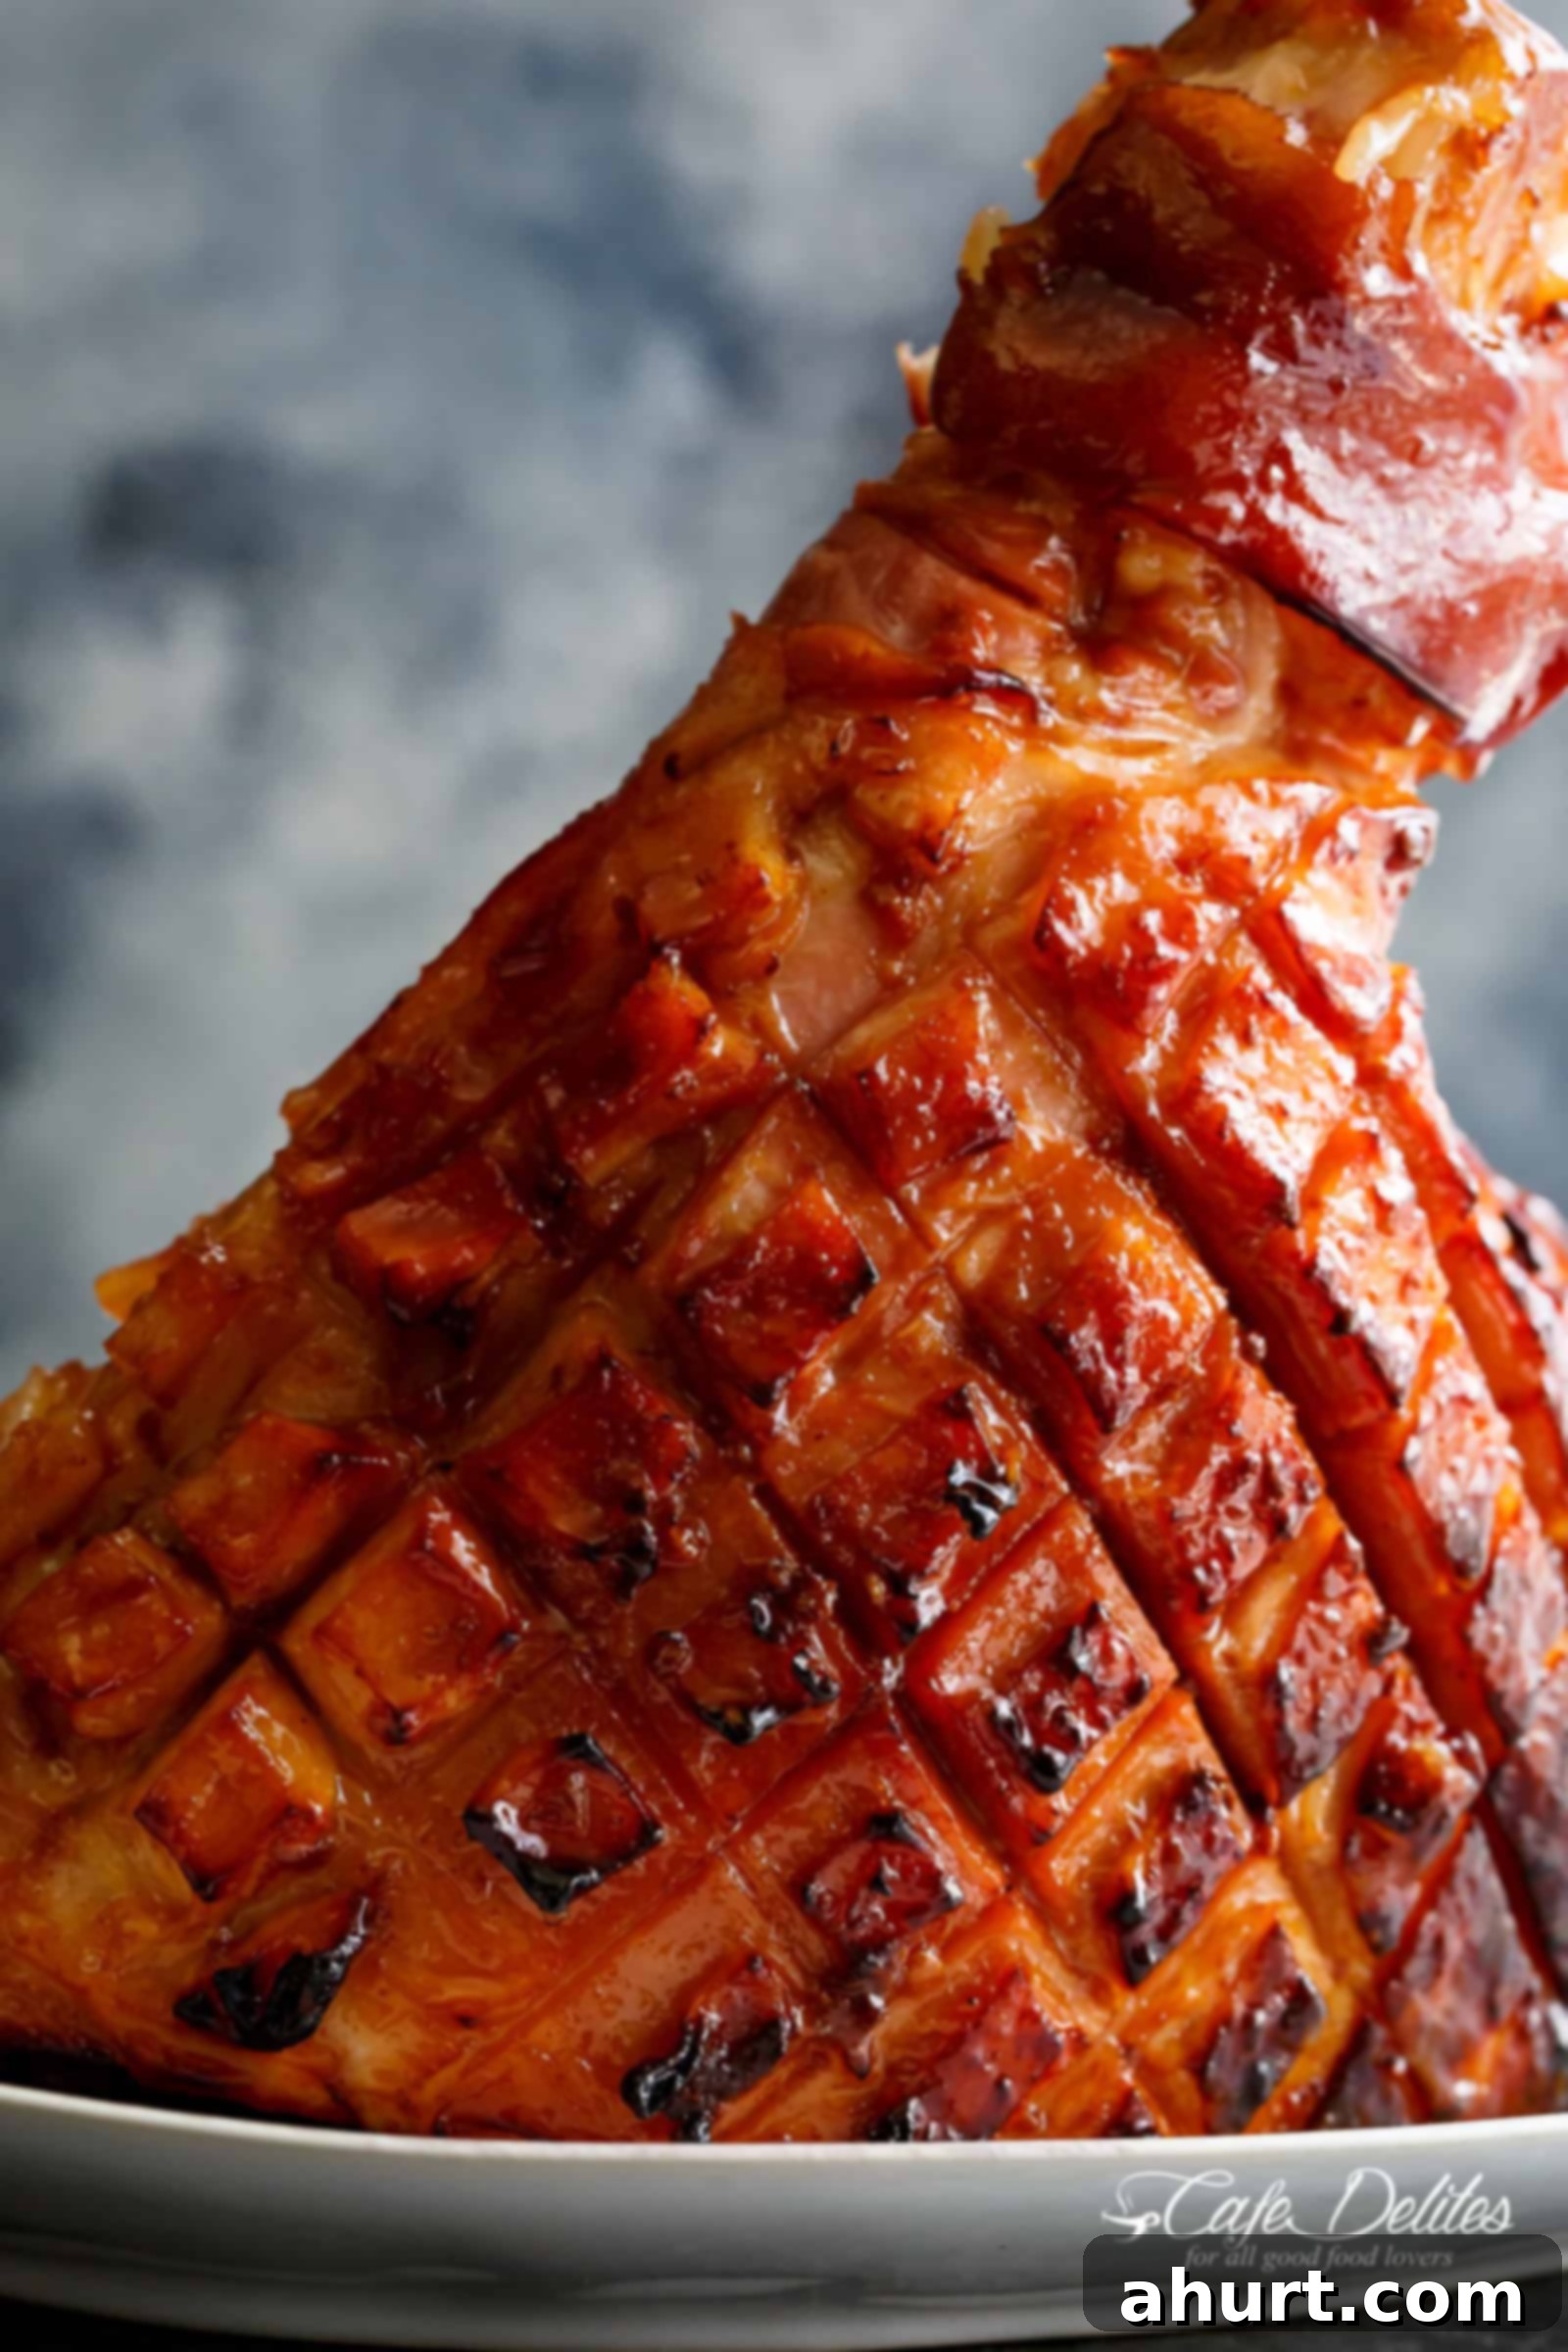
Perfect Holiday Feast: Juicy Maple Glazed Ham with Pineapple (Easy Recipe!)
Transform your holiday dinner into an unforgettable feast with this incredible Maple Glazed Ham with Pineapple. This recipe delivers a ham that is exceptionally juicy, bursting with flavor, and utterly irresistible, thanks to its rich, buttery maple glaze infused with bright pineapple juice and a whisper of warming spices. It’s truly the ultimate holiday showstopper that will have everyone asking for seconds and raving about your culinary skills.
As this magnificent ham bakes to golden perfection, the sweet and savory aromas will waft through your home, creating an inviting atmosphere and drawing family and friends into the kitchen with eager anticipation. Every tender slice promises a symphony of tastes, rich with the essence of the holidays. The sticky, caramelized crust offers a delightful contrast to the succulent meat beneath, making each bite a truly memorable experience. This isn’t just a meal; it’s a festive centerpiece that not only disappears fast but also elevates your Christmas or Thanksgiving dinner, making every moment feel extra special and memorable. Prepare to impress without the stress, as we guide you through creating this showstopping masterpiece!
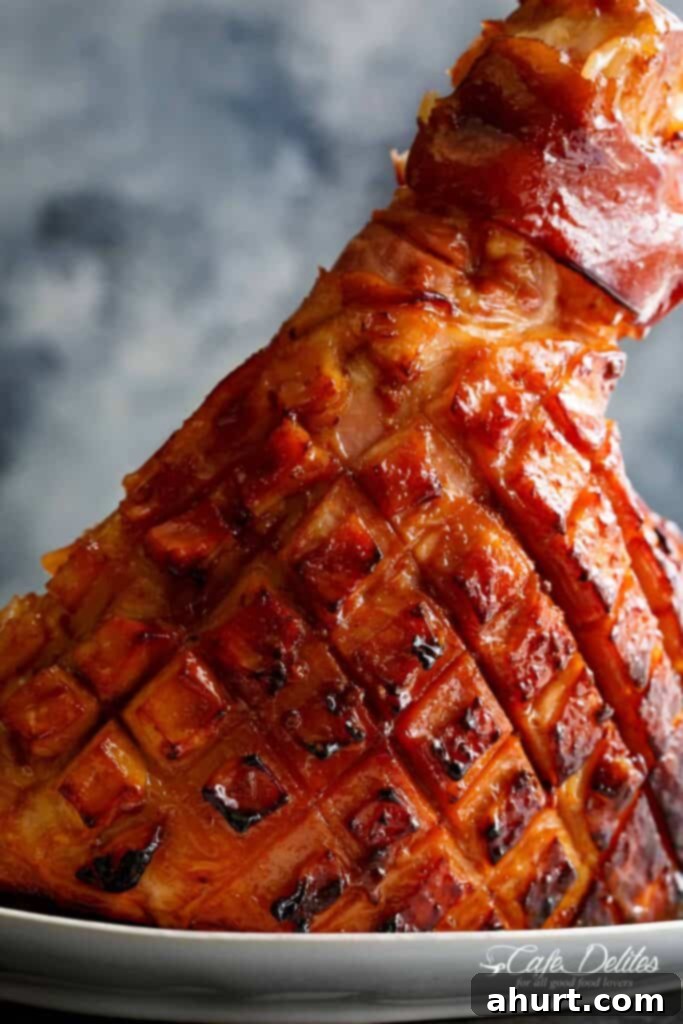
Why This Maple Glazed Ham Recipe is Your Holiday Go-To
For many home cooks, the idea of preparing a spectacular holiday ham can feel like a daunting task, often reserved for seasoned chefs or family matriarchs. Visions of complex steps and elaborate ingredients might dance in your head, but the truth is, this maple glazed ham recipe is surprisingly straightforward and incredibly forgiving. We’ve simplified the process to ensure that even first-timers can achieve a perfectly moist, flavorful ham with a gorgeous, sticky glaze that looks like it took hours of painstaking effort.
What makes this particular recipe stand out is its reliance on readily available ingredients – items you likely already have in your pantry or can easily find at any local grocery store. No exotic spices or hard-to-find components are needed, which significantly reduces the stress typically associated with holiday cooking. You’ll be amazed at how quickly you can assemble this delicious glaze and prepare your ham for the oven, leaving you more precious time to socialize and enjoy the festive atmosphere with your loved ones rather than being tethered to the kitchen.
Beyond its ease of preparation, baking a ham for the holidays offers numerous practical advantages. Firstly, it’s an excellent choice for feeding a large gathering, making it ideal for big family dinners, holiday parties, or potlucks. A substantial ham ensures everyone gets a generous serving, and very often, there’s plenty left over. Speaking of leftovers, this recipe is a gift that truly keeps on giving! Leftover glazed ham can be effortlessly repurposed into a variety of delicious meals, extending your holiday cheer and saving you cooking time well beyond the initial dinner. Imagine turning those sweet and savory slices into a comforting Creamy Ham Potato Soup, a hearty Hearty Ham And Bean Soup, flavorful sandwiches, quiches, breakfast scrambles, or even a savory pasta dish. The versatility of glazed ham makes it an economical, satisfying, and incredibly practical choice for any festive occasion.
Key Ingredients for the Perfect Pineapple Maple Glaze
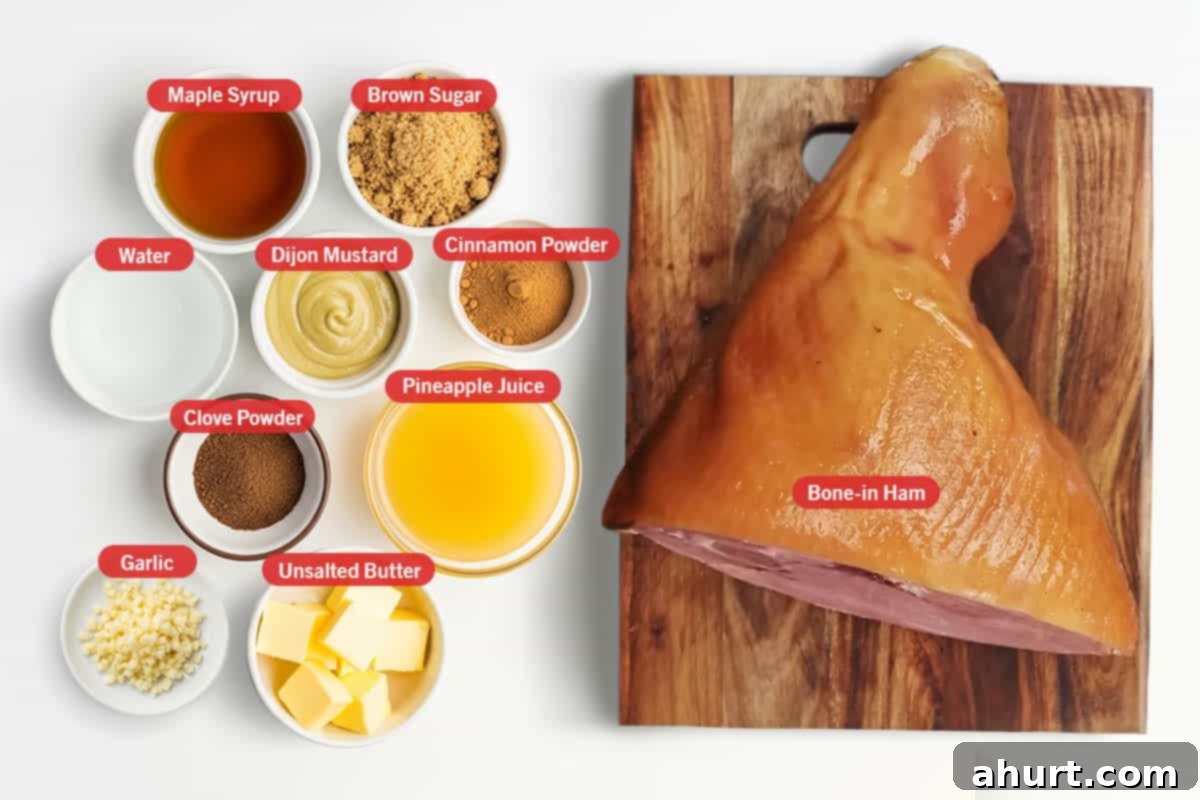
Crafting this exquisite pineapple maple glazed ham is far simpler than its impressive appearance suggests. While the steps might seem a bit advanced at first glance, rest assured, every component of this glaze is incredibly simple to work with, delicious, and perfectly manageable for any home cook. Here’s a breakdown of the core ingredients that make this glaze truly special and contribute to the ham’s incredible flavor and texture:
- Bone-In Fully Cooked Ham: The star of our dish! We recommend starting with a good quality, bone-in, fully cooked ham, typically weighing between 8-10 pounds. A pre-cooked ham significantly cuts down on overall preparation time, allowing you to focus on developing that beautiful, flavorful crust. Bone-in hams also tend to stay inherently juicier and more flavorful during the roasting process, thanks to the bone imparting extra moisture and taste.
- Unsalted Butter: The rich foundation of our sticky glaze. Melting butter provides a luxurious base and acts as a carrier for all the other flavors, contributing significantly to the incredible caramelization and depth of color on the ham’s crust. Using unsalted butter gives you better control over the final sodium content.
- Maple Syrup: This isn’t just any sweetener; pure maple syrup is the heart of our glaze, offering a complex, earthy sweetness with subtle caramel notes that perfectly complement the savory ham. It’s essential for creating that signature sticky, glossy finish that makes the ham so visually appealing and delicious.
- Brown Sugar: Working in beautiful harmony with the maple syrup, brown sugar adds an extra layer of sweetness and depth, while also playing a crucial role in achieving that desirable, deep golden-brown caramelization on the ham’s surface. It helps create a slightly crisp, almost candy-like crust that is simply irresistible.
- Dijon Mustard: A crucial ingredient for balance! Dijon mustard is key to cutting through the sweetness with a subtle tang and a slight peppery bite, preventing the glaze from becoming overly saccharine. Its savory notes highlight the richness of the ham, and it also acts as a natural emulsifier, helping to bind all the glaze ingredients together into a smooth, cohesive mixture.
- Ground Cinnamon and Cloves: While optional, these warm, aromatic ground spices are highly recommended for their ability to infuse the ham with warm, festive aromas and flavors. They evoke the cozy spirit of the holidays and add a layer of complex spice that transforms a simple ham into something truly extraordinary and special.
- Pineapple Juice: More than just a liquid, pineapple juice adds a bright, tropical sweetness and a touch of acidity that beautifully complements the ham’s savory notes. When added to the roasting pan, it keeps the ham incredibly moist, prevents drying, and infuses the pan juices with an irresistible flavor that becomes perfect for basting.
- Garlic Cloves (smashed): A few smashed garlic cloves, simmered briefly in the glaze, add a subtle yet essential savory depth. This balances the sweet elements without overpowering them, adding a hidden layer of complexity that elevates the overall flavor profile of the ham.
- Water: Used in the roasting pan alongside the pineapple juice to create a moist, steamy environment for the ham during its initial baking phase. This ensures the ham stays succulent and tender before the high-heat glazing process begins.
Note: For a quick reference of all quantities and full ingredient details, please refer to the comprehensive recipe card at the bottom of this post.
Essential Equipment for Roasting Your Glazed Ham
To make your holiday ham preparation as smooth and enjoyable as possible, having the right kitchen tools on hand is key. Here’s a list of essential equipment you’ll need for a perfectly executed maple glazed ham:
- Large Roasting Pan with Rack: A sturdy roasting pan is fundamental. The rack elevates the ham, allowing for even heat circulation around all sides and ensuring the bottom doesn’t sit directly in the pan juices, which helps in creating that desirable crispy crust. It also collects the flavorful pan juices for basting.
- Very Sharp Chef’s Knife: Essential for precise tasks like scoring the ham fat and, later, for carving neat, even slices for serving. A sharp knife is not only more efficient but also safer.
- Basting Brush: A silicone or natural bristle basting brush is indispensable for evenly applying the rich glaze over the ham. Frequent basting is key to building up those beautiful, caramelized layers of flavor and achieving a glossy finish.
- Aluminum Foil or Parchment Paper: You’ll need these for lining the roasting pan, which makes cleanup a breeze! They are also used to cover the ham during its initial, gentle baking phase to lock in moisture and prevent drying.
- Small Saucepan: A small saucepan is perfect for simmering and preparing the aromatic maple-pineapple glaze to the correct consistency.
- Meat Thermometer: While most holiday hams are sold fully cooked, a reliable meat thermometer is crucial. It ensures your ham is heated through evenly and reaches the optimal internal temperature of 140°F (60°C) for safe and succulent serving. This is your best friend for preventing an overcooked, dry ham.
- Cutting Board: A large, stable cutting board is necessary for safely preparing the ham (removing rind, scoring) and for carving it after it has rested.
Mastering Ham Preparation: Rind Removal and Scoring Techniques
If this is your first time working with a whole ham, the thought of removing the rind might seem a little daunting. But don’t worry, it’s a straightforward process that sets the stage for a beautifully glazed ham. This section provides a detailed, step-by-step guide to properly remove the ham rind and score the fat layer, ensuring your glaze adheres perfectly, the fat renders beautifully, and you achieve that desirable crispy, caramelized crust. If you’re already a pro at this, feel free to skip ahead to the cooking instructions!
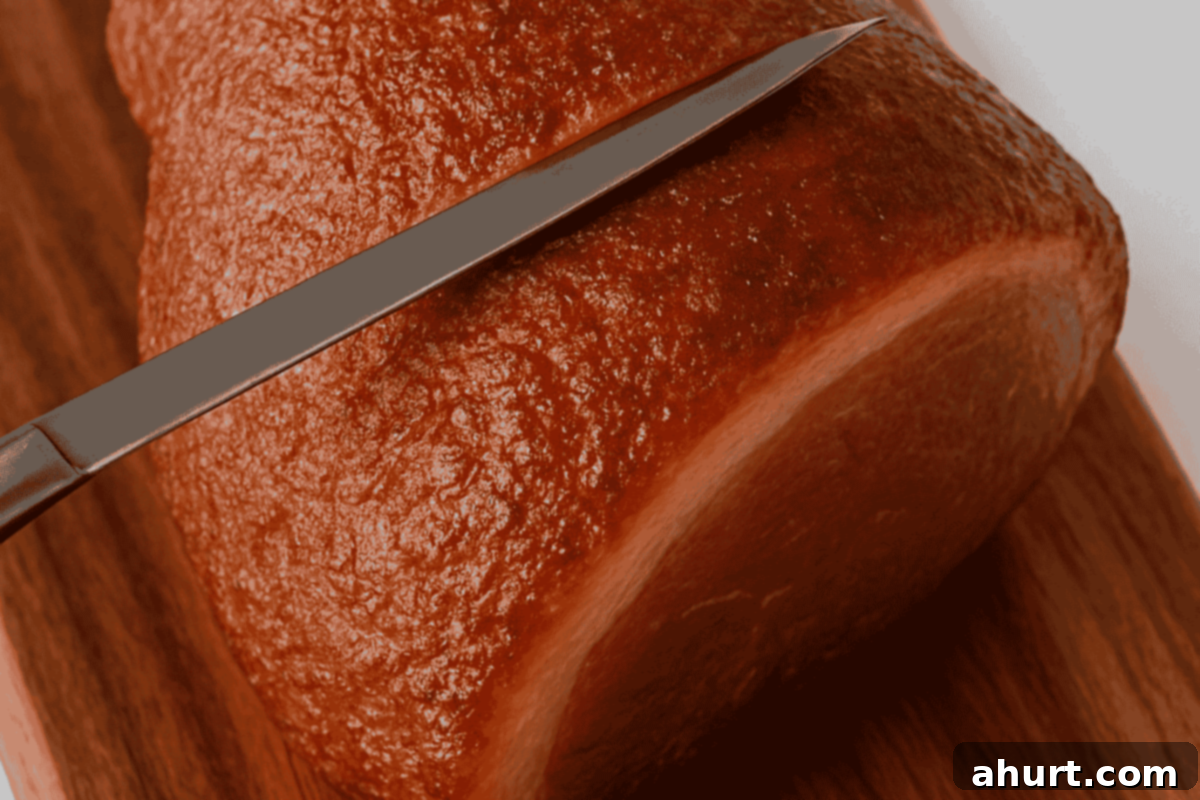
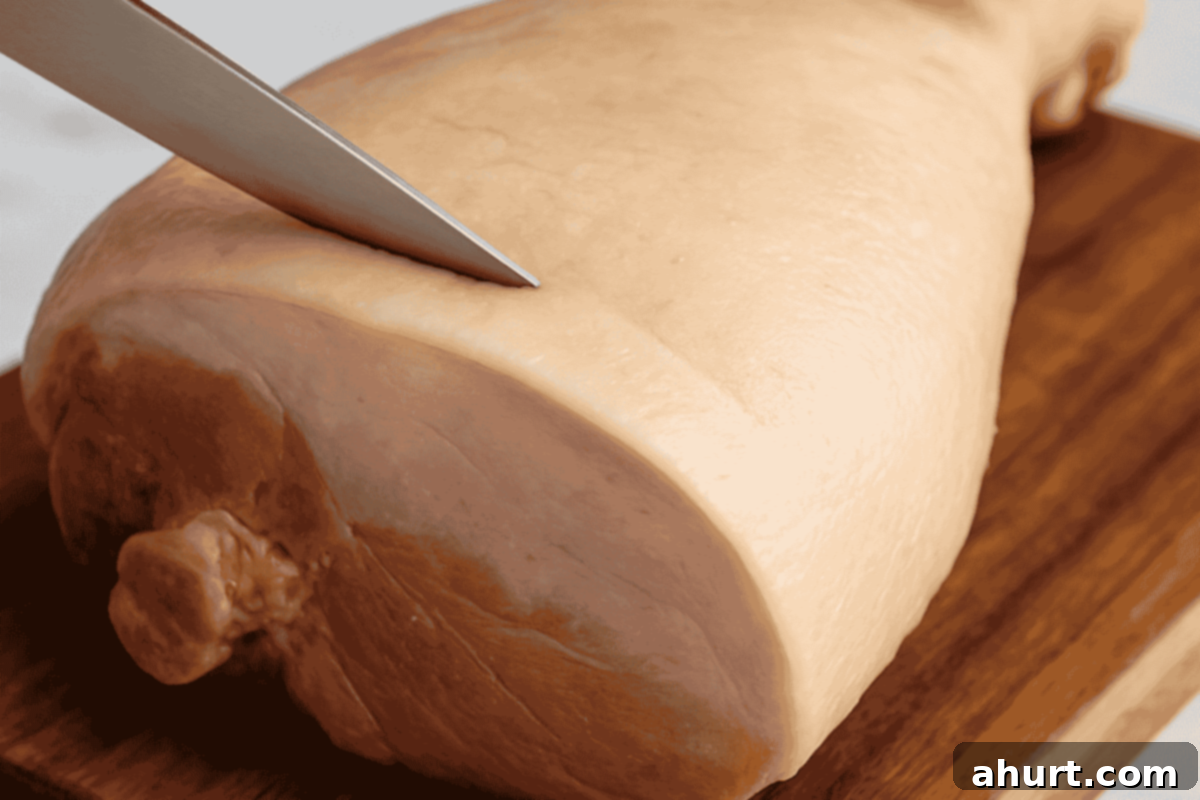
- Score the Shank for Easy Rind Removal: Place your ham on a clean, sturdy cutting board. Using a very sharp knife, carefully cut a line through the thick skin, or rind, around the shank end (the narrower part) of the ham. This incision should be deep enough to penetrate the rind but not into the underlying fat layer. This controlled cut creates a crucial starting point, making it significantly easier to begin the process of peeling away the rind smoothly and efficiently.
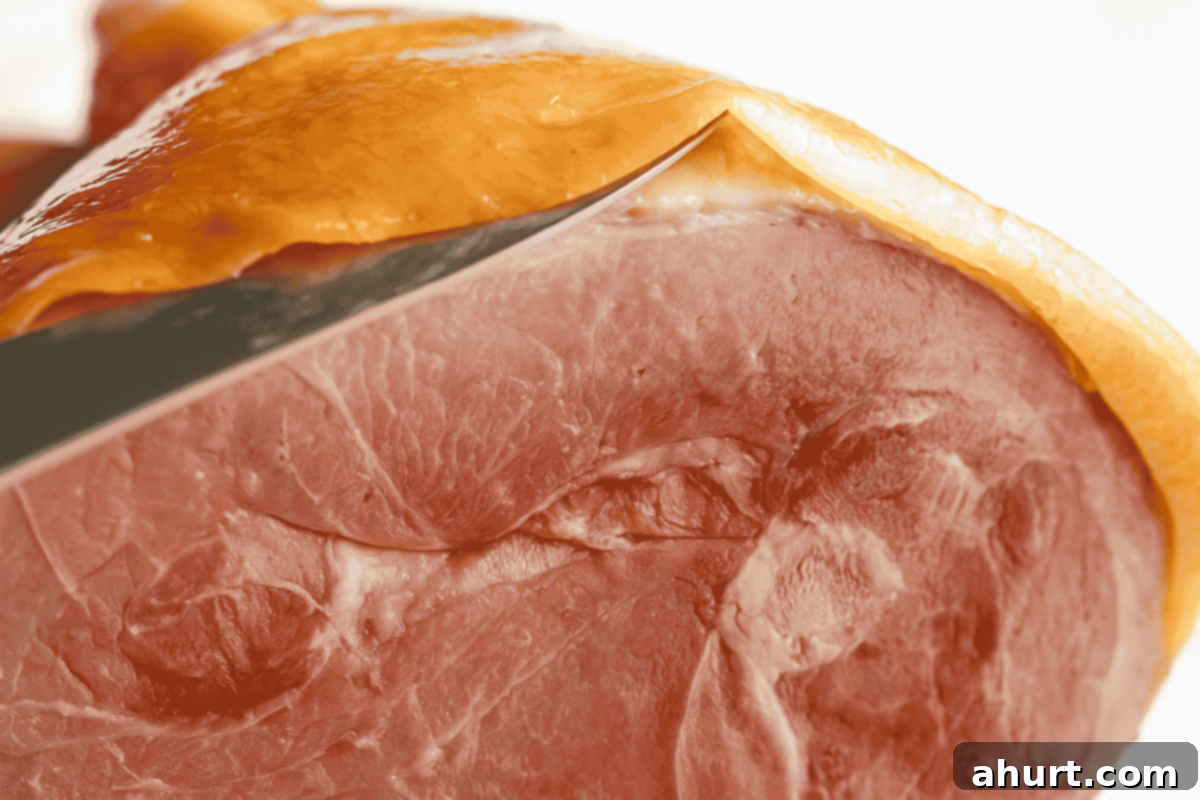
- Gently Separate Rind from Fat Layer: Once you have your starting point, carefully insert your knife just beneath the scored rind and slide it between the rind and the layer of fat. Use slow, deliberate, and shallow movements to loosen them. The goal is to lift the rind without cutting into the fat too deeply. As sections become loose, use your fingers to gently peel the rind away from the ham. Continue this process until the entire rind is removed and can be discarded. It’s crucial to ensure the underlying layer of fat remains intact, as this fat layer will render, crisp up, and absorb the delicious glaze.
- Smooth and Even Out the Fat Layer: With the rind completely removed, take a moment to inspect the exposed fat layer. Use your sharp knife to carefully trim away any overly thick, uneven, or rough spots. The goal here is to create a relatively uniform and smooth fat surface across the entire ham. This not only makes the ham look more appealing but, more importantly, ensures that when you score the fat, the cuts are even, and the glaze has an optimal, consistent surface to adhere to and penetrate during baking.

- Score the Fat Layer in a Diamond Pattern: With a clean, smooth fat surface, it’s time to score! Using your sharp knife, lightly cut a shallow diamond pattern across the entire fat layer. These cuts should be no deeper than 1/4 inch (about 0.5 cm) – the goal is to cut into the fat, not the meat itself. The purpose of scoring is twofold: it creates more surface area for the delicious glaze to seep into the ham, infusing it with flavor throughout, and it helps the fat render and crisp up beautifully during roasting, creating a stunning, visually appealing presentation and a delightful textural contrast.
How To Make Maple Glazed Ham: A Step-by-Step Guide for Holiday Perfection
Follow these detailed steps to create a showstopping glazed ham that will be the highlight of your holiday table. This comprehensive guide ensures every stage is clear, from preparation to the final, delicious slice.
- 1. Prepare the Ham for Roasting: Begin by removing your bone-in, fully cooked ham from all packaging and netting. This is the time to remove the rind, following the detailed steps provided in our “Rind Removal and Scoring Techniques” section above, ensuring you leave a uniform layer of fat intact. Once prepared, allow the ham to rest at room temperature for 1–2 hours. This crucial step helps the ham cook more evenly, preventing it from drying out in the oven by reducing the temperature shock. While it’s resting, preheat your oven to a gentle 300°F (150°C) and position an oven rack in the lower third to ensure even cooking and browning throughout the process.
- 2. Set Up Your Roasting Pan and Score the Fat: Line a sturdy roasting pan with several sheets of aluminum foil or parchment paper; this simple trick will make cleanup significantly easier later, saving you time and effort. Once the ham rind is removed and the fat layer smoothed (as per our guide), use a sharp knife to score a 1-inch diamond pattern into the fat layer, being careful not to cut deeper than 1/4 inch into the meat. This scoring allows the glaze to penetrate deeply, infusing the ham with flavor, and helps the fat render beautifully. Pour the pineapple juice and water into the base of the prepared pan, then place the ham fat-side up. Cover the ham securely with two pieces of foil or parchment paper, creating a tight tent to trap moisture.
- 3. Initial Gentle Bake for Moisture: Carefully place the covered roasting pan into your preheated oven. Bake for an initial 30 minutes at the low temperature of 300°F (150°C). This gentle, initial baking phase is vital for several reasons: it helps the ham warm through gradually, ensuring an even internal temperature throughout the entire cut, and allows it to absorb moisture from the pan liquids, which actively prevents the ham from drying out. This step also subtly prepares the ham’s surface to readily accept the rich glaze and ensures a perfectly succulent foundation for the delicious crust to form later.
- 4. Craft Your Flavorful Glaze: While the ham is having its initial bake, it’s the perfect time to prepare the star of the show – the incredible maple-pineapple glaze. In a small saucepan, melt the unsalted butter over medium heat until it begins to lightly brown and smells deliciously nutty (be careful not to burn it!). Stir in the brown sugar, rich maple syrup, tangy Dijon mustard, fragrant ground cinnamon, and warm ground cloves. Continue stirring continuously until the brown sugar has completely dissolved, which typically takes about 2 minutes, creating a smooth, cohesive mixture.
- 5. Infuse Glaze with Garlic and Cool: Reduce the heat under your saucepan to low, add the 4 smashed garlic cloves, and let the glaze gently simmer for just 1-2 minutes. This brief simmer allows the garlic’s subtle savory notes to meld beautifully with the sweet and spicy elements, adding an extra layer of complexity. Remove the saucepan from the heat and allow the glaze to cool to lukewarm; it should have a thick, syrupy consistency, similar to room-temperature honey, making it perfectly brushable.
- 6. First Glaze and High-Heat Roast: After the initial 30-minute bake, carefully remove the ham from the oven. Now, significantly increase your oven temperature to a higher 425°F (220°C). Discard the foil or parchment paper covering the ham. Using a basting brush, generously apply about 1/3 of your prepared glaze all over the ham, ensuring you press it into the scored cuts so every crevice is thoroughly coated. This initial layer will begin to caramelize beautifully under the higher heat. Return the uncovered ham to the oven and bake for 15 minutes.
- 7. Repeat Basting for a Rich, Sticky Crust: After the first 15-minute glazing session, remove the ham from the oven. Brush another generous third of the glaze onto the ham, ensuring even coverage. For added depth of flavor and to keep the glaze fluid, remember to incorporate some of the flavorful pan juices into your basting mixture. Return to the oven and repeat this glazing process again after another 15 minutes of baking. Continue basting every 15 minutes until a gorgeous, dark golden-brown, irresistibly sticky crust has formed, typically after about 30 minutes total of uncovered baking. The frequent basting builds up rich layers of flavor and ensures a consistently luscious, glossy glaze. If your crust is still light after the suggested baking time, turn on your broiler (or oven grill) and broil for a very short 2-5 minutes, watching it extremely closely to prevent the sugar in the glaze from burning.
- 8. Rest, Slice, and Serve: Once the ham is beautifully glazed and browned to perfection, remove it from the oven. This next step is perhaps the most important for tenderness: allow the ham to rest for 10–20 minutes, loosely tented with foil. This crucial resting period permits the juices to redistribute evenly throughout the meat, resulting in an exceptionally moist, tender, and flavorful ham. Skipping this step can lead to a drier ham. Once properly rested, carve the ham against the grain into beautiful, uniform slices and serve warm with your favorite holiday sides.
While this magnificent maple glazed ham is undeniably a star on its own, its perfect balance of sweet and savory flavors pairs wonderfully with a diverse array of side dishes, complementing your entire holiday spread. Consider serving it with vibrant vegetable dishes to balance the richness and add a pop of color to your plate. We highly recommend:
- Starting your meal with a creamy and subtly flavored Cream of Asparagus Soup, offering a delicate contrast to the ham’s robust flavors.
- Pairing it with classic and comforting Buttery Sautéed Green Beans for a simple yet elegant and fresh side that’s always a crowd-pleaser.
- Opting for a more indulgent side like Cheesy Roasted Green Beans, which adds a layer of savory richness that complements the ham beautifully.
- Fluffy mashed potatoes, creamy gratin, or a vibrant medley of roasted root vegetables (like carrots, parsnips, and sweet potatoes) are excellent choices for soaking up those delicious pan juices and glaze.
- A fresh, crisp green salad with a light vinaigrette can also offer a refreshing counterpoint to the richness of the ham.
And to complete your festive meal, why not try my fruity and thirst-quenching Holiday Punch? Its bright, effervescent notes are the perfect accompaniment to this savory and sweet glazed ham, adding an extra touch of holiday cheer and refreshing every palate.
Frequently Asked Questions About Maple Glazed Ham
Absolutely! This maple glazed ham with pineapple juice is wonderfully versatile and excellent for repurposing. However, do keep in mind its distinct sweet and savory flavor profile when planning your leftover dishes. It shines particularly well in recipes where a touch of sweetness can enhance the overall taste, such as in gourmet sandwiches, breakfast scrambles, omelets, savory casseroles, or even flavorful ham and cheese pastries. It also works beautifully in chopped salads or as an addition to creamy pasta dishes for an extra layer of flavor.
For achieving the best flavor and a wonderfully tender texture, we highly recommend purchasing a bone-in, fully cooked ham. Specifically, the shank end (often called the half leg) is an excellent choice. It’s generally easier to carve into neat, uniform slices and consistently remains incredibly juicy throughout the cooking process. While the butt end is also tender and flavorful, it can be a bit more challenging to carve due to the presence of part of the hip bone and a slightly different muscle structure. Both will absorb this delicious glaze beautifully, but the shank end often offers a slightly more user-friendly experience for carving.
Yes, you certainly can, and many people love the visual appeal of a clove-studded ham! You can opt to stud your scored ham with whole cloves, carefully placing one into the center of each diamond cut in the fat layer. This traditional method not only looks incredibly festive but also infuses the ham with a deep, aromatic clove flavor as it bakes. Alternatively, for a more even and subtle distribution of flavor throughout the glaze itself, you can use ground cloves as specified in this recipe. Both methods will deliver delicious, spiced results, so choose the one that best fits your preference for presentation and flavor intensity.
To keep your leftover glazed ham fresh and delicious, allow it to cool completely at room temperature, but no longer than two hours. Once cooled, you can either slice any remaining ham off the bone (which makes storage easier) or keep it on the bone for enhanced flavor. Transfer the ham to an airtight container or wrap it tightly in aluminum foil or plastic wrap. Refrigerate promptly. Properly stored, leftover ham will stay fresh and safe to eat in the refrigerator for 3-4 days. For longer storage, you can freeze individual portions for up to 1-2 months, ensuring it’s well-wrapped to prevent freezer burn.
To reheat leftover glazed ham and retain its delicious moisture, it’s best to do so gently and slowly. For individual slices, you can gently warm them in a skillet with a splash of water, chicken broth, or a little extra glaze, covered, over low heat until heated through. Alternatively, for larger portions, place the ham slices or a small roast in an oven-safe dish with a tablespoon or two of liquid, cover it tightly with foil, and warm in a preheated 275°F (135°C) oven until it reaches an internal temperature of 140°F (60°C). Avoid high heat or microwaving for too long, as this can quickly dry out the ham and diminish its flavor.
Pin
Maple Glazed Ham with Pineapple
Ingredients
- 8-10 pound bone-in fully cooked ham
- 1/2 cup pineapple juice
- 1/2 cup water
- 1/2 cup unsalted butter
- 3/4 cup brown sugar
- 3/4 cup maple syrup
- 2 tablespoons Dijon mustard
- 1/2 teaspoon ground cinnamon
- 1/4 teaspoon ground cloves
- 4 cloves garlic cloves smashed
Instructions
-
1. Preheat Oven & Prep Ham: Preheat your oven to 300°F (150°C) and arrange a rack in the lower third. Remove any plastic packaging or netting from the ham. Following the detailed guide above, carefully trim away the rind and discard it, ensuring you leave the fat layer intact. Set the ham aside to rest at room temperature for 1-2 hours; this step is crucial for even cooking.
-
2. Prepare Roasting Pan & Score Ham: Line a sturdy baking tray or roasting dish with several sheets of aluminum foil or parchment paper; this will significantly simplify cleanup. Using a sharp knife, score a 1-inch-wide diamond pattern over the entire fat layer of the ham, making sure the cuts are no deeper than 1/4 inch. Pour 1/2 cup each of pineapple juice and water into the base of the prepared pan, then place the ham fat-side up. Cover the ham securely with two pieces of foil or parchment paper to create a tent.
-
3. Initial Bake for Moisture: Place the covered ham in the preheated oven and bake for 30 minutes. This low-temperature, covered bake gently warms the ham through, ensuring it stays incredibly moist and succulent before the glaze is applied, preventing any dryness.
-
4. Prepare the Maple-Pineapple Glaze: While the ham bakes, prepare the glaze. In a small pot or saucepan, melt the 1/2 cup unsalted butter over medium heat until it turns a light golden brown and smells nutty. Add the 3/4 cup brown sugar, 3/4 cup maple syrup, 2 tablespoons Dijon mustard, 1/2 teaspoon ground cinnamon, and 1/4 teaspoon ground cloves. Stir continuously until the brown sugar has completely dissolved, which typically takes about 2 minutes.
-
5. Infuse Glaze with Garlic & Cool: Reduce the heat to low, add the 4 smashed garlic cloves, and let the glaze gently simmer for 1-2 minutes to allow the flavors to meld beautifully. Remove the saucepan from the heat and set it aside to cool to lukewarm. The glaze should have the consistency of room-temperature honey, thick enough to cling to the ham but still brushable.
-
6. First Glaze & Roast: After 30 minutes of initial baking, carefully remove the ham from the oven. Increase the oven temperature to a higher 425°F (220°C). Discard the foil or parchment paper. Generously pour about 1/3 of the prepared glaze all over the ham, using a basting brush to ensure it gets into all the scored cuts. Return the uncovered ham to the oven and bake for 15 minutes.
-
7. Repeat Basting for a Rich Crust: Remove the ham from the oven, brush with another third of the glaze, incorporating some of the flavorful pan juices. Return to the oven and repeat this glazing process again after another 15 minutes of baking. Continue until a rich, dark golden-brown, sticky crust has formed, typically after about 30 minutes total of uncovered baking. The frequent basting builds up layers of flavor and ensures a consistently luscious glaze. If your crust is still light after the suggested baking time, turn on your broiler (or oven grill) and broil for 2-5 minutes, watching very closely to prevent burning due to the sugar content.
-
8. Rest Before Slicing: Once the ham is beautifully glazed and browned, remove it from the oven. It is essential to let the ham rest for 10-20 minutes, loosely tented with foil, before slicing. This allows the juices to redistribute throughout the meat, resulting in a more tender and juicy ham. Slice against the grain and serve warm with your favorite holiday sides.
Notes
If your glaze thickens too much between basting sessions (which can happen if it cools down too much), simply add a few tablespoons of the warm pan juices from the roasting pan to it. Gently reheat it over low heat, stirring until it returns to the consistency of warmed honey – perfectly brushable!
Always use a reliable meat thermometer inserted into the thickest part of the ham (avoiding the bone) to ensure your fully cooked ham reaches an internal temperature of 140°F (60°C) for safe and deliciously moist serving.
Nutrition
Nutrition information is automatically calculated, so should only be used as an approximation.
