Effortless No-Knead Artisan Bread: Your Ultimate Easy Homemade Loaf Recipe
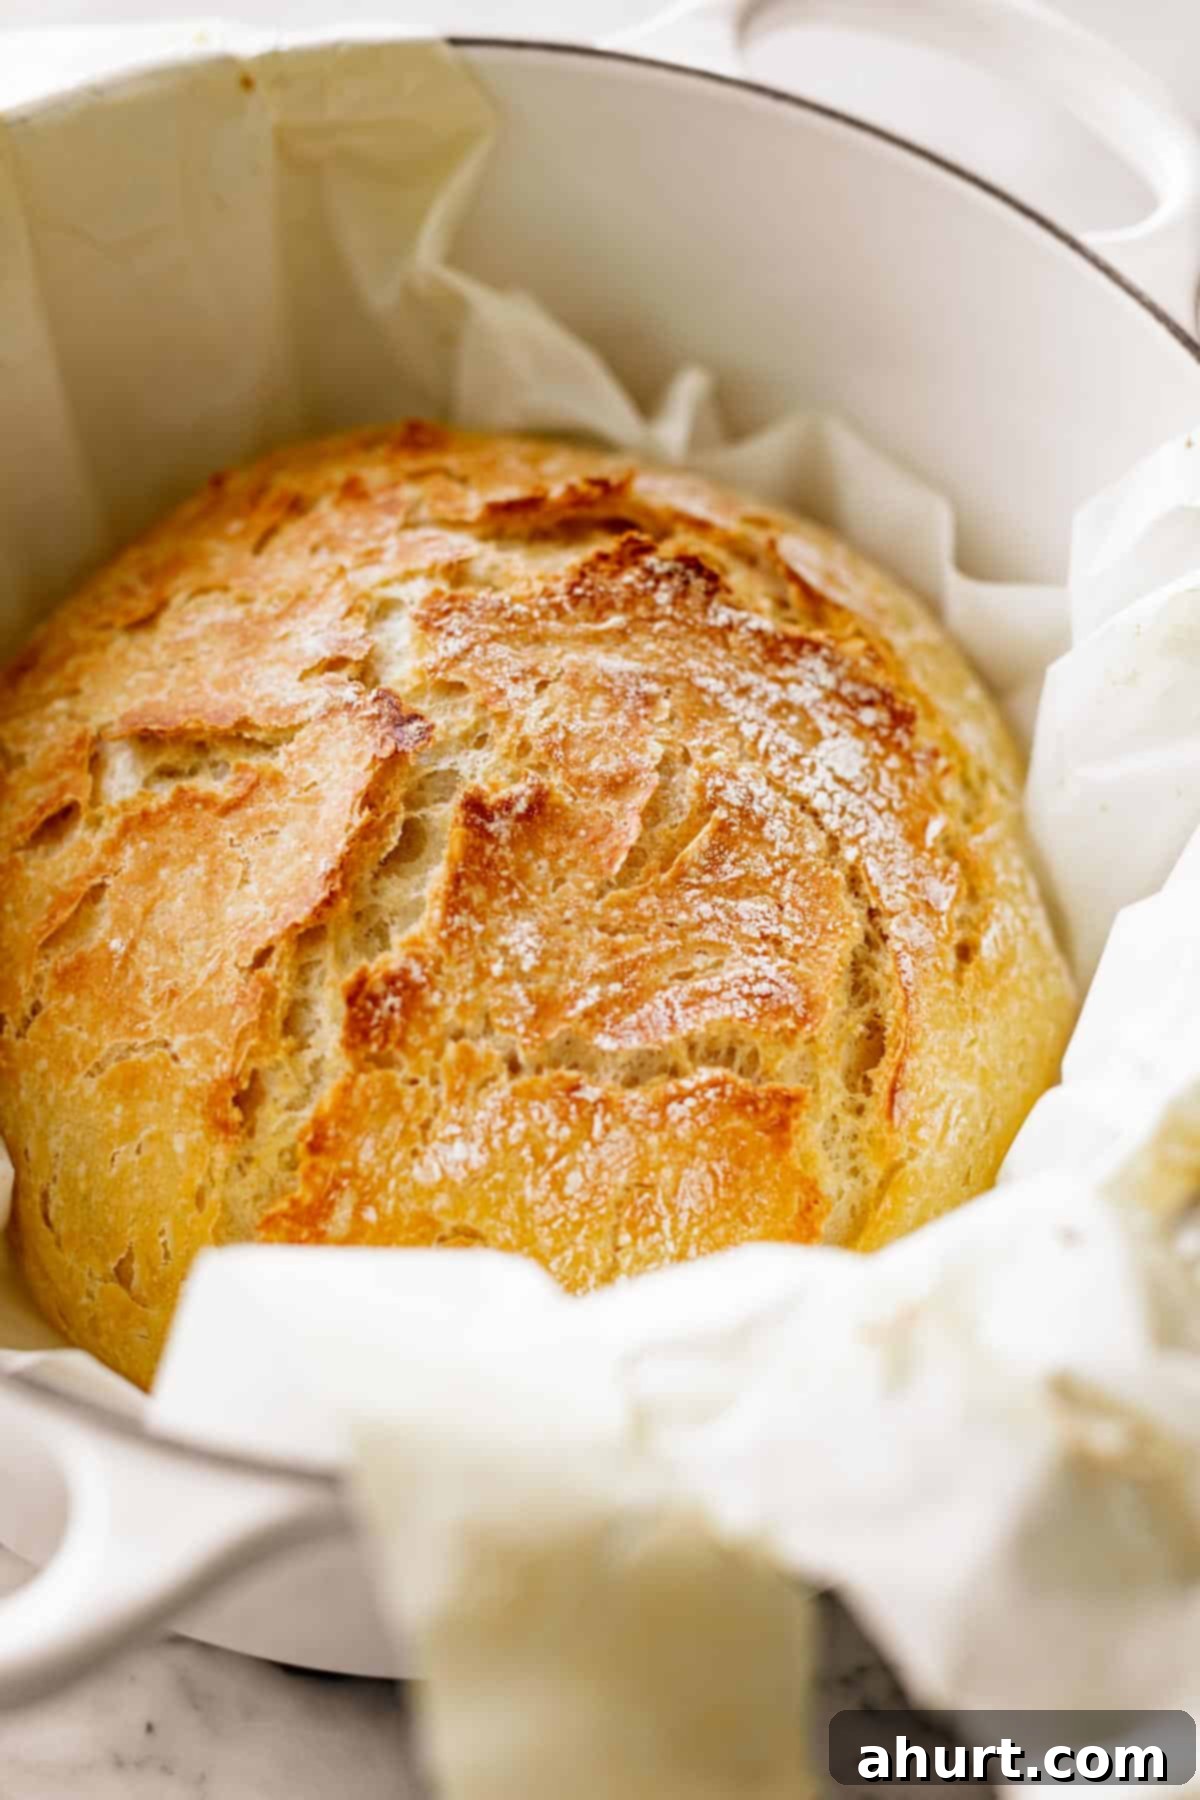
Imagine the irresistible aroma of freshly baked bread wafting through your home. Now, imagine achieving that artisan-level loaf with a golden-brown, crackling crust, and a delightfully chewy interior, all without the strenuous effort of kneading. This Easy No-Knead Bread Recipe makes that dream a delicious reality! That’s right! Forget about special equipment, stand mixers, or dough hooks. This remarkably simple bread recipe requires minimal effort and delivers maximum flavor and texture.
Picture slicing into the warm loaf: the knife resists just enough, then yields to reveal a satisfying crunch and a beautifully open crumb filled with airy pockets. Every bite is a testament to homemade goodness. Bread lovers will adore spreading generous Garlic Butter on these warm slices, fresh from the oven, or pairing them with their favorite meals. In just under three hours, you’ll go from basic ingredients to a magnificent, homemade loaf ready to impress. This isn’t just baking; it’s an experience of culinary triumph, made incredibly accessible for everyone.
Why This No-Knead Bread Recipe Stands Apart
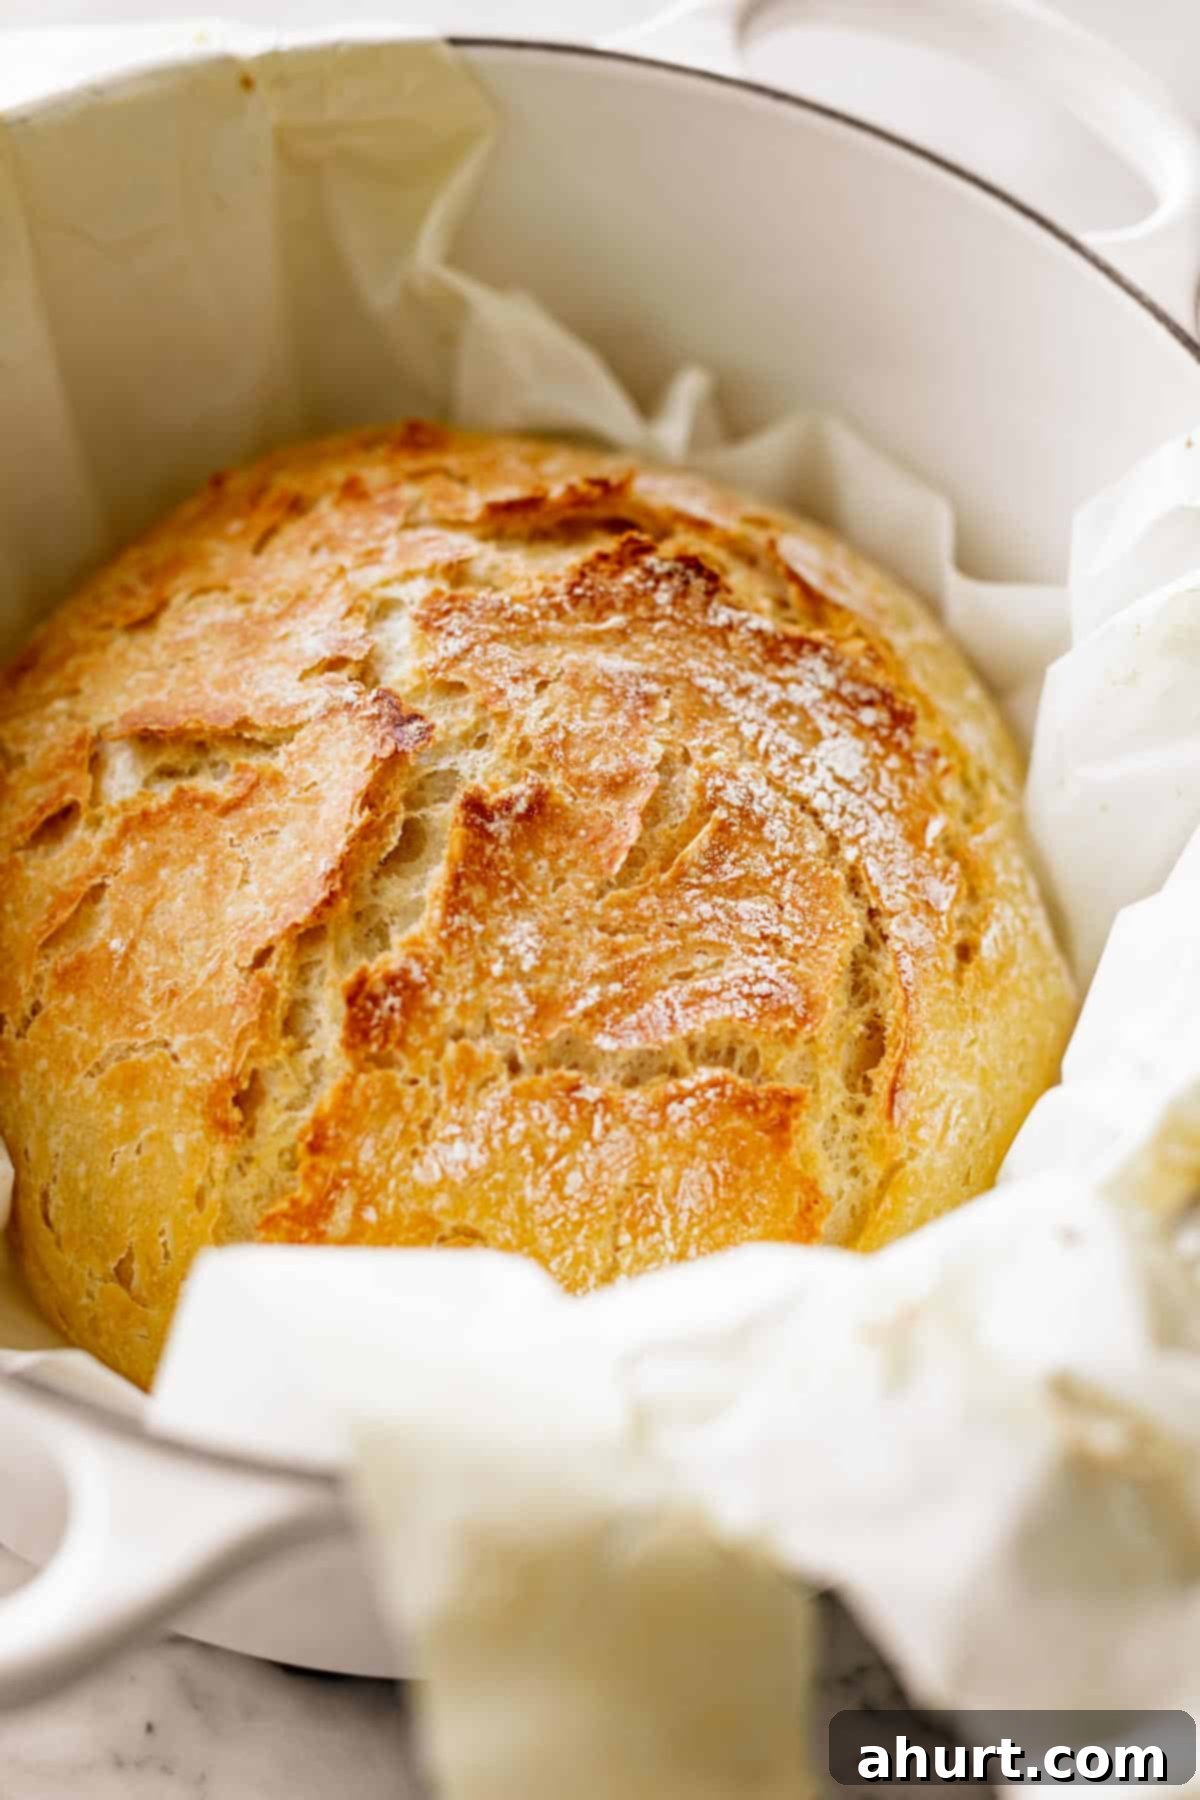
It might seem almost too good to be true: a fluffy, crusty homemade loaf with minimal effort? Yet, this incredibly simple no-knead bread has transformed my kitchen into a weekly bakery for years, and now it’s your turn! Beginner bakers, rejoice: there’s absolutely NO KNEADING required, so banish any intimidation. The magic of creating beautiful, rustic loaves that once felt confined to professional bakeries is now fully within your grasp.
This recipe liberates you from the lengthy and often messy process of traditional bread-making. Instead, it harnesses the power of time and natural fermentation to develop flavor and texture. The result is a truly artisanal loaf that boasts a perfectly chewy crumb and a magnificent, crisp crust – all with just a few minutes of active preparation. You’ll find yourself effortlessly baking delicious, wholesome bread that tastes like it came from a gourmet patisserie.
The versatility of this freshly baked artisan bread is another reason it will become a staple. Imagine dipping a warm, crusty piece into a hearty bowl of Chicken Noodle Soup, a robust Vegetable Soup, or a rich Chili. For a savory delight, use it to soak up the glorious glaze from this Maple Glazed Ham. Or, elevate a simple side dish by transforming your artisan bread into the ultimate Cheesy Garlic Bread. This easy bread recipe isn’t just about baking; it’s about enriching every meal with the joy and satisfaction of homemade goodness. Every loaf will be a testament to your newfound bread-making prowess, proving that exquisite baking doesn’t have to be complicated.
Easy No-Knead Bread: Essential Ingredients
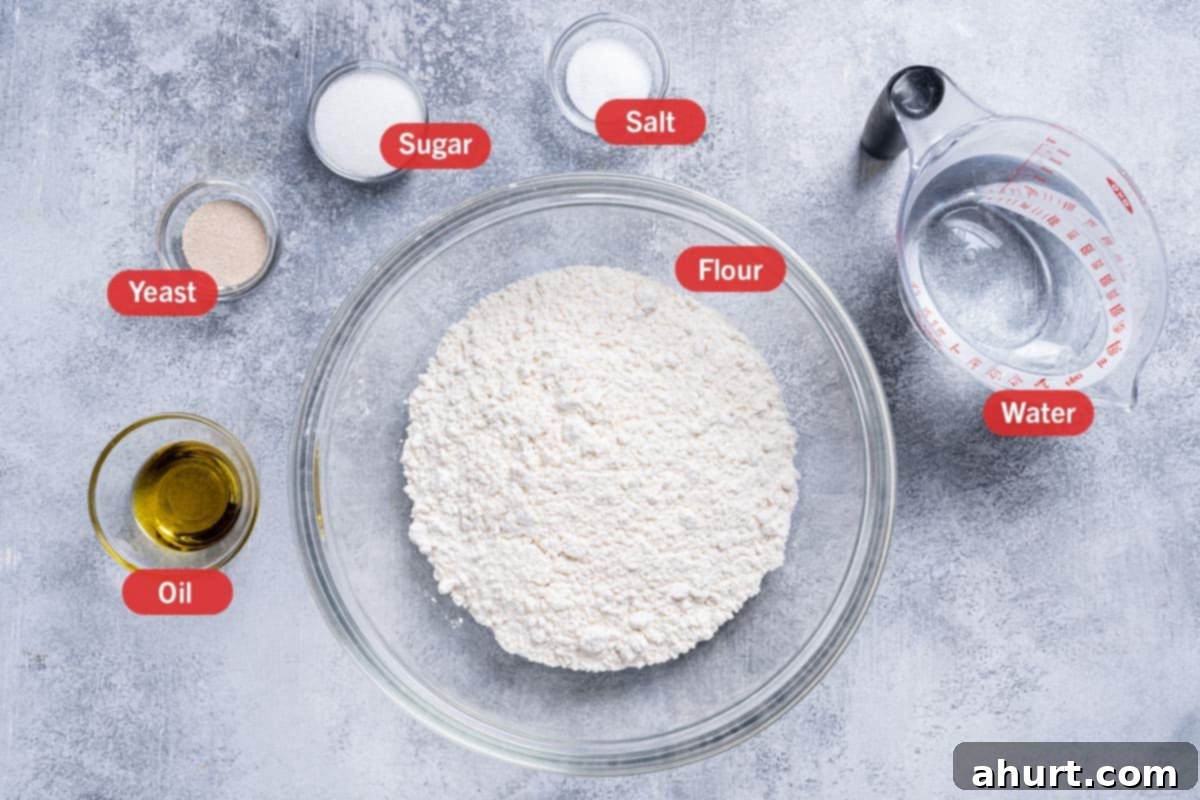
The secret to this effortlessly delicious bread lies in its simple yet powerful key ingredients. Each component plays a unique and crucial role in creating a perfectly textured, flavorful loaf with that sought-after open crumb. From the gluten-rich bread flour to the swift action of rapid-rise yeast, every element works in harmony. Let’s delve into what makes this easy bread recipe truly exceptional and how to get the most out of each ingredient.
- Flour: For that ideal chewy, airy texture and robust structure characteristic of artisan bread, bread flour is your best friend. Its higher protein content (typically 12-14%) directly contributes to stronger gluten formation. However, if you prefer a slightly softer crumb or simply have it on hand, all-purpose flour (around 10-12% protein) will also yield excellent results. Always ensure your flour is fresh, free of any lumps, and stored in an airtight container to maintain its quality and prevent moisture absorption.
- Warm Water: The temperature of your water is paramount for yeast activation. Aim for water that is comfortably warm but not hot, ideally around 110°F (43°C). Water that’s too hot can kill the delicate yeast, preventing your dough from rising, while water that’s too cold won’t activate it efficiently. A quick check with a kitchen thermometer is ideal, but a finger test (it should feel like a warm bath) works perfectly if you don’t have one.
- Dried Yeast: For convenience and reliable, quicker rising times, we recommend using instant or rapid-rise yeast, just as we do for our popular Soft Dinner Rolls. Unlike active dry yeast, instant yeast doesn’t require prior proofing and can be mixed directly with the dry ingredients. Always verify the expiration date on the packet to ensure your yeast is potent. Store unused yeast in an airtight container in a cool, dry place, or even in the refrigerator or freezer, to prolong its shelf life and effectiveness.
- Olive Oil: A touch of good-quality olive oil does wonders for this recipe. It contributes a subtle richness and a beautiful, nuanced flavor to your bread. More importantly, it helps keep the crumb incredibly moist and tender, preventing it from drying out. If you don’t have olive oil, a neutral-flavored vegetable oil like canola or sunflower oil can be substituted, though the flavor profile of your finished loaf will be slightly different.
- Salt: Don’t underestimate the power of salt! It’s not just for flavor; salt also plays a critical role in controlling yeast activity and strengthening the gluten structure. It helps create a more evenly textured crumb and enhances the overall taste of your bread. Use fine-grain salt for even distribution.
- Sugar: A small amount of white granulated sugar acts as “food” for the yeast, helping to kickstart the fermentation process and promote a vigorous rise. It also contributes to the beautiful golden-brown color of the crust during baking. While essential for yeast activity, the amount is minimal and doesn’t make the bread taste sweet.
*Note: Please see the detailed Recipe Card at the bottom for a full list of precise ingredients and measurements.
Creative Additions And Savory Substitutions
When it comes to baking your Easy No-Knead Artisan Bread, creativity and versatility are your best friends. This recipe provides a fantastic blank canvas, allowing you to customize flavors and textures to suit your preferences or whatever ingredients you have on hand. Even with delightful additions, you’ll still achieve that perfect crust and fluffy crumb every time. Let’s explore how you can elevate this simple bread recipe with exciting twists.
- Add Seeds: Boost both the texture and nutritional value of your loaf by folding in various seeds. Sesame seeds add a subtle nutty flavor, sunflower seeds offer a satisfying crunch, and poppy seeds contribute a unique texture. You can mix them directly into the dough during the initial combining stage or sprinkle them generously over the top before baking for an appealing visual and textural contrast.
- Incorporate Herbs: Transform your bread into a fragrant masterpiece with fresh or dried herbs. Rosemary, thyme, oregano, or a blend of Italian herbs infuse the dough with wonderful aromatics. Finely chop fresh herbs or use dried herbs (which are more concentrated in flavor) and gently mix them into the dough before the first rise. This will create an aromatic loaf that pairs beautifully with savory meals.
- Cheese Lovers Rejoice: For an extra layer of indulgence, fold in some shredded cheese. Cheddar, Parmesan, Gruyère, or even a spicy Monterey Jack will melt into the dough, creating pockets of gooey, savory goodness in every bite. Imagine using this cheesy artisan bread to make something extraordinary like Pull-Apart Stuffed Bread with Chipotle Carne Asada – a true crowd-pleaser! Incorporate the cheese during the final shaping stage to ensure it’s evenly distributed.
- Garlic and Onion Infusion: For a savory depth, minced garlic or finely chopped onion can add an incredible burst of flavor. Lightly sautéing the garlic or onion beforehand will mellow their raw bite and deepen their sweetness, resulting in an even richer taste in your finished bread. Mix them into the dough with the other dry ingredients.
- Olives and Sun-Dried Tomatoes: Bring a delightful Mediterranean flair to your bread with chopped briny olives (Kalamata or green) or sweet and tangy sun-dried tomatoes. These additions provide bursts of savory, umami flavor that perfectly complement the rustic crust and soft interior. Drain them well and chop them before incorporating them into the dough.
*Note: When adding extra ingredients, aim for moderation. Incorporate them gently into the dough to ensure they enhance the classic bread flavors without overpowering them or inhibiting the dough’s rise. Too many heavy additions can sometimes affect the crumb structure.
Easy No-Knead Bread: A Step-By-Step Visual Guide
Ready to bake your perfect No-Knead Artisan Bread? This comprehensive guide, complete with visual cues (referencing the images provided), will walk you through each simple step. You’ll achieve that coveted golden, crackling crust with a tender, delightfully chewy interior that’s sure to impress and delight everyone at your table. Let’s dive in and create an easy homemade bread that will quickly become a cherished staple in your kitchen!
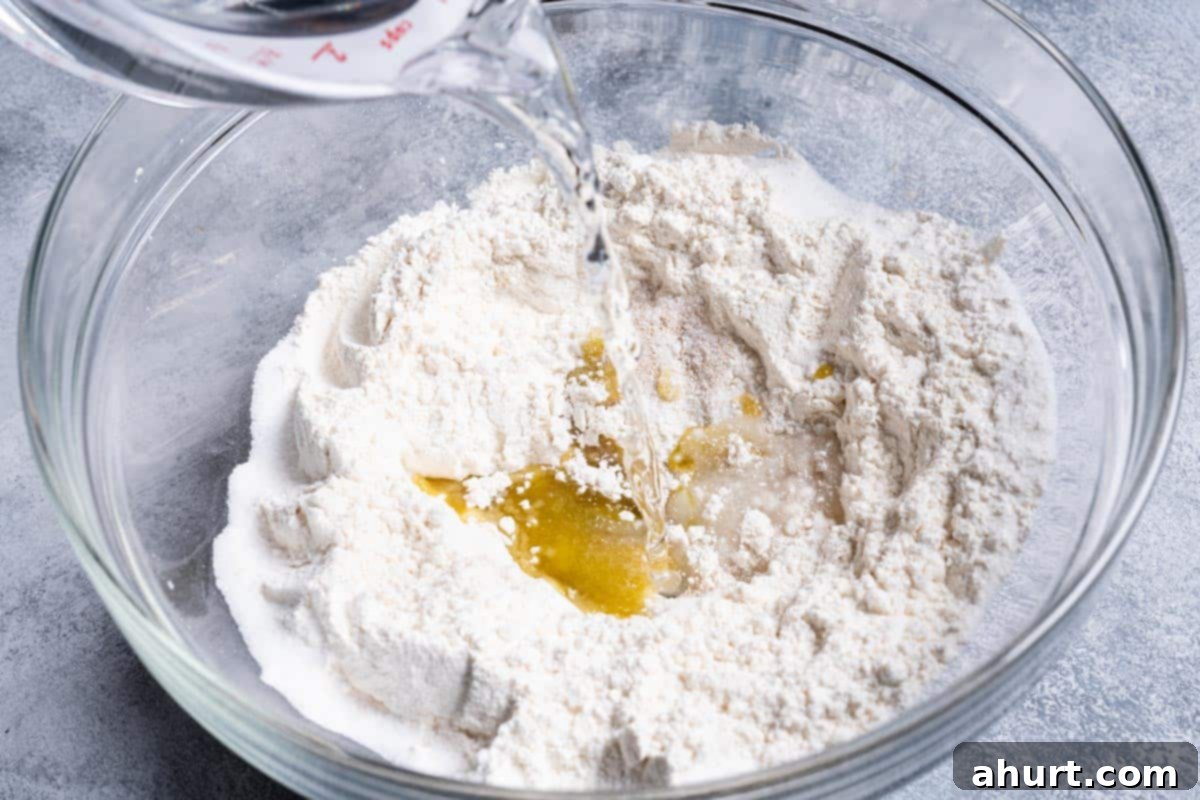
- Combine Ingredients: In a large mixing bowl, combine the flour, granulated sugar, instant yeast, and salt. Pour in the warm water and olive oil. Using a sturdy spoon or spatula, mix until all ingredients are fully incorporated. The dough will be quite wet, sticky, and shaggy in appearance—this is perfectly normal and desired for a no-knead bread!
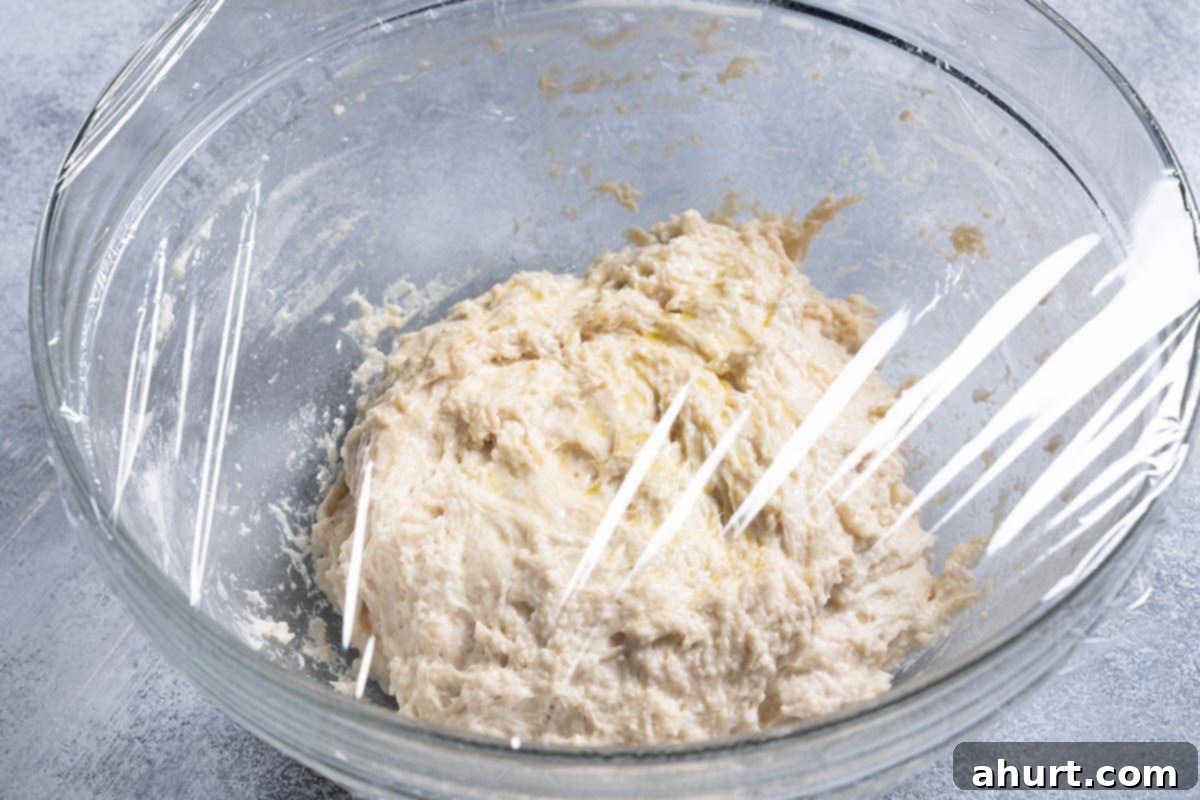
- Spray and Cover: Lightly mist the surface of the dough with cooking oil spray. This prevents the plastic wrap from sticking. Cover the bowl tightly with plastic wrap, ensuring an airtight seal. For extra insulation, place a clean, dry tea towel over the plastic wrap.
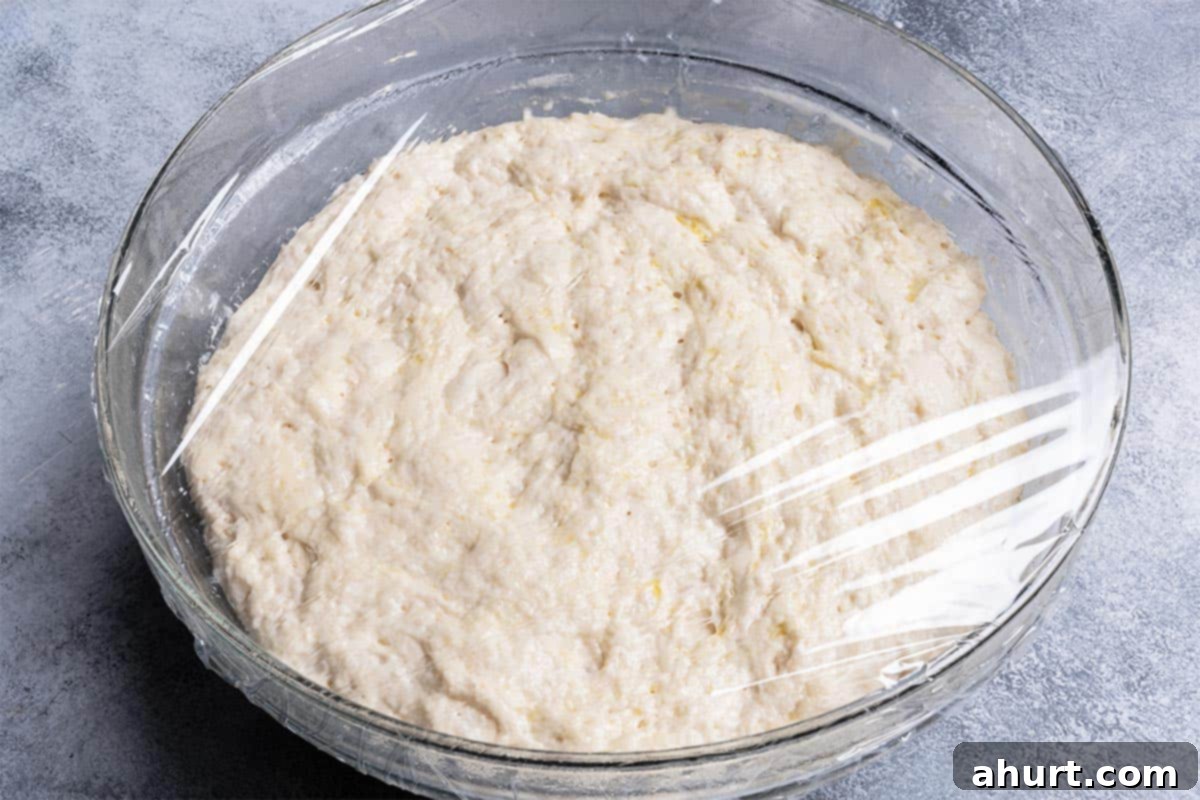
- Let Dough Rise: Place the covered bowl in a warm, draft-free spot. A slightly warm oven (turned off) or a sunny window works well. Let it rise for 2-3 hours, or until the dough has visibly doubled in size. You’ll know it’s ready when the surface has many small holes or bubbles and the dough feels wobbly, almost like jelly, indicating active yeast fermentation.
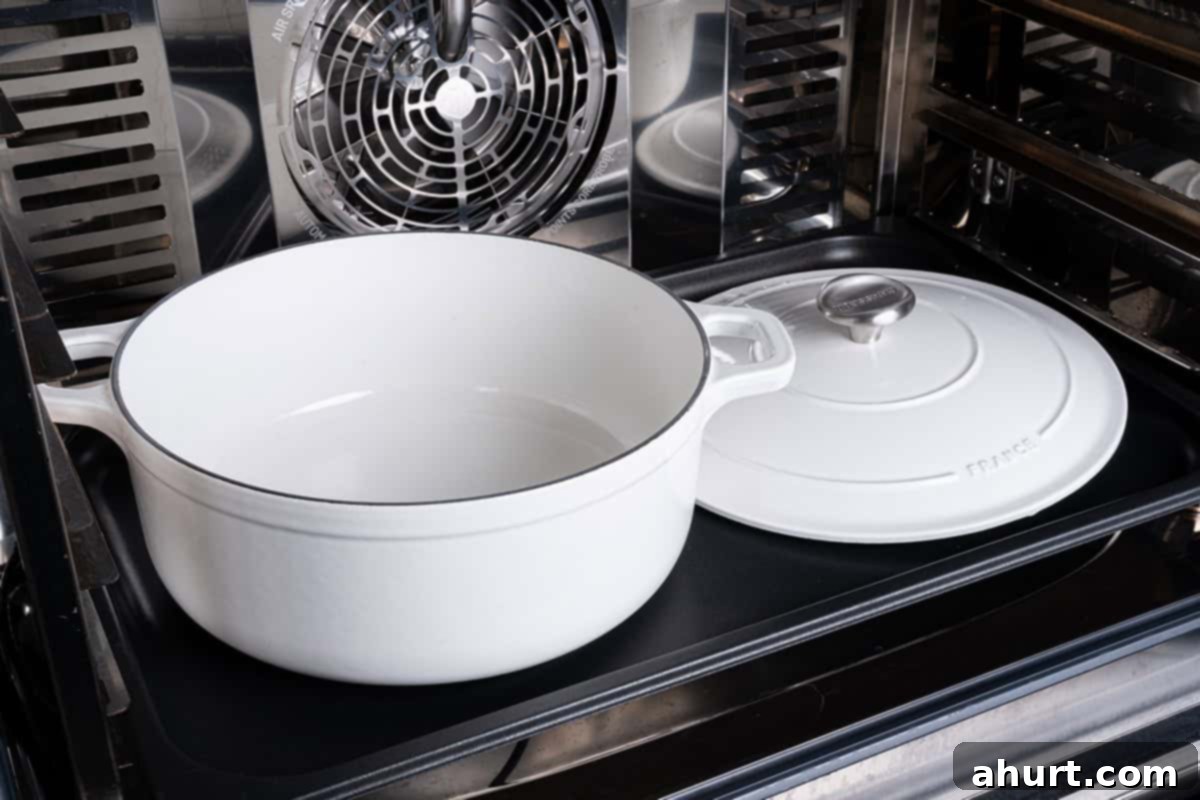
- Preheat Oven & Dutch Oven: About 30 minutes before you plan to bake, place a large (10-inch or 26cm is ideal) Dutch oven or a similar heavy-based, oven-safe pot with its lid into your oven. Preheat the oven to a high temperature of 450°F (230°C). Preheating the pot is crucial for achieving that signature crackling crust, as it creates a steamy environment when the dough is added.
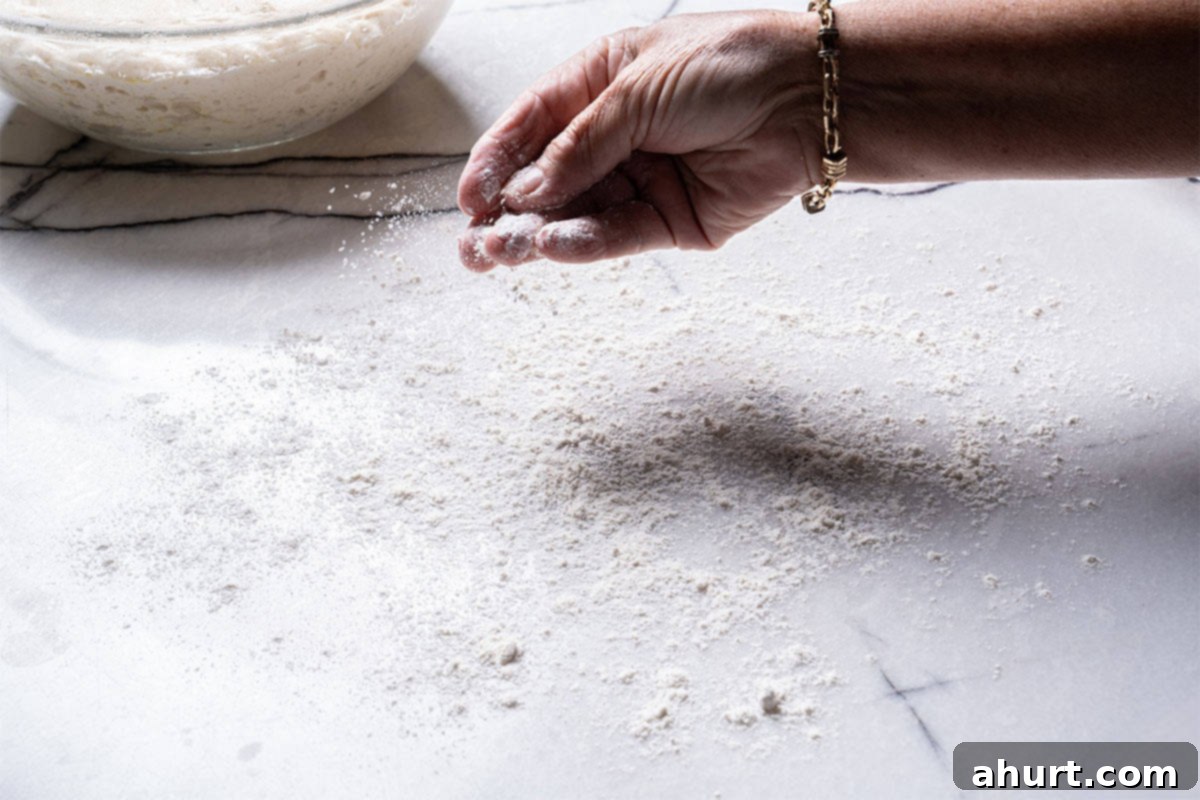
- Prepare Work Surface: Lightly dust your clean work surface (like a countertop or large cutting board) with a tablespoon or two of flour. Also, lightly flour your plastic spatula; this will prevent the sticky dough from adhering to it.
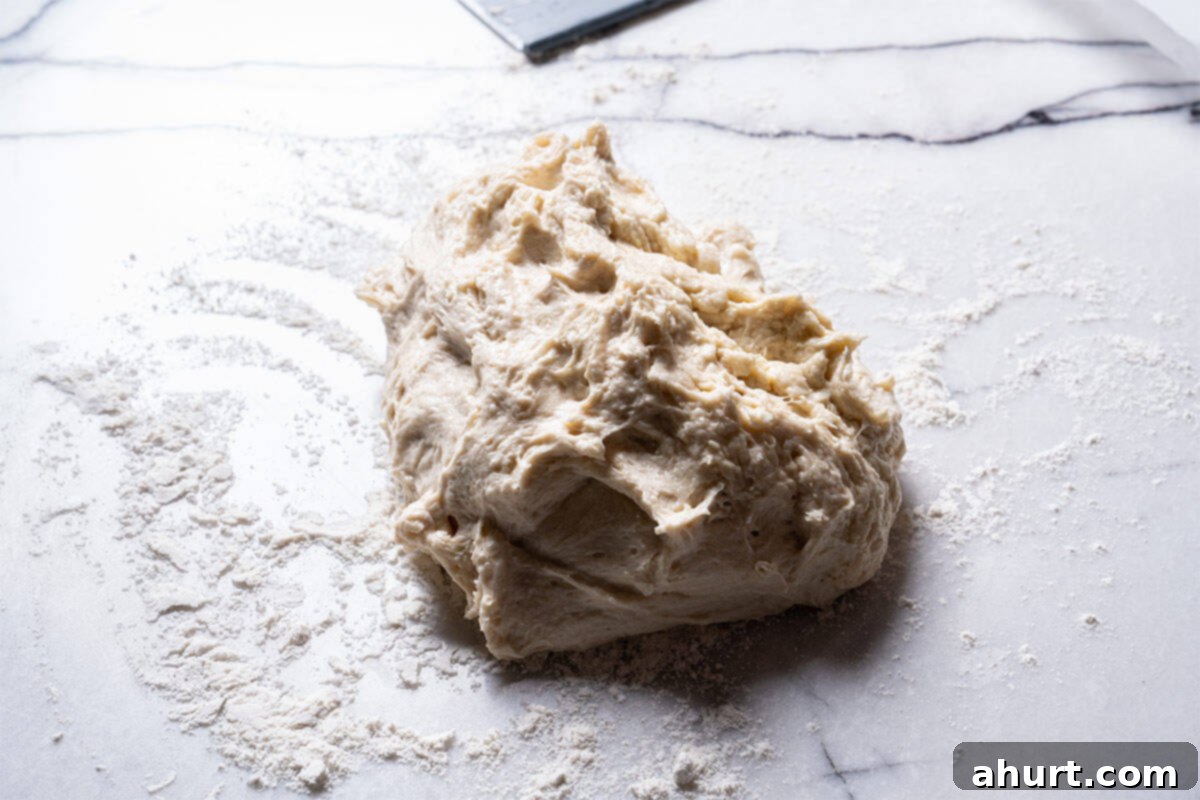
- Scrape Dough: Using your floured spatula, carefully scrape the risen, sticky dough out of the bowl and onto your prepared, floured work surface. Try to keep its airy structure as much as possible.
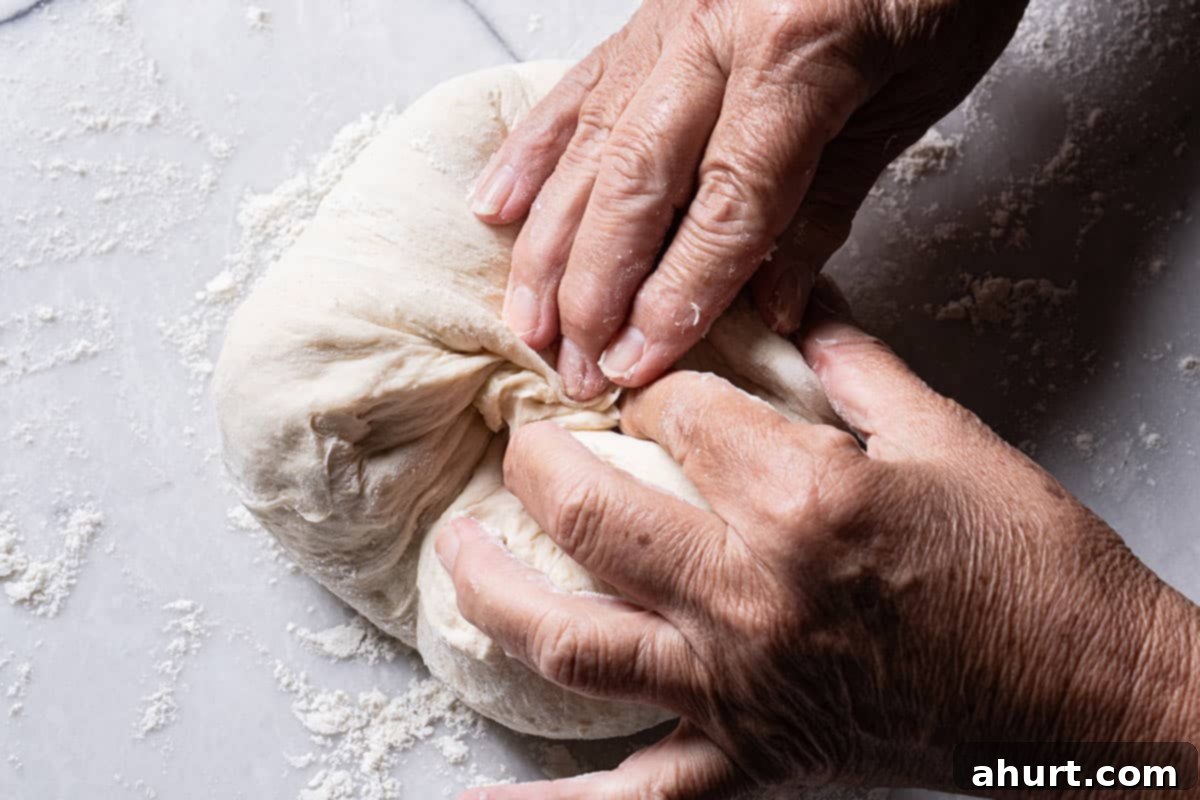
- Fold Dough: Sprinkle a large pinch of flour over the top of the dough. Using your floured spatula (or lightly floured hands if you prefer), gently fold the edges of the dough over itself about 5-6 times. This light folding helps to create surface tension and a more structured loaf without deflating all the precious air bubbles.
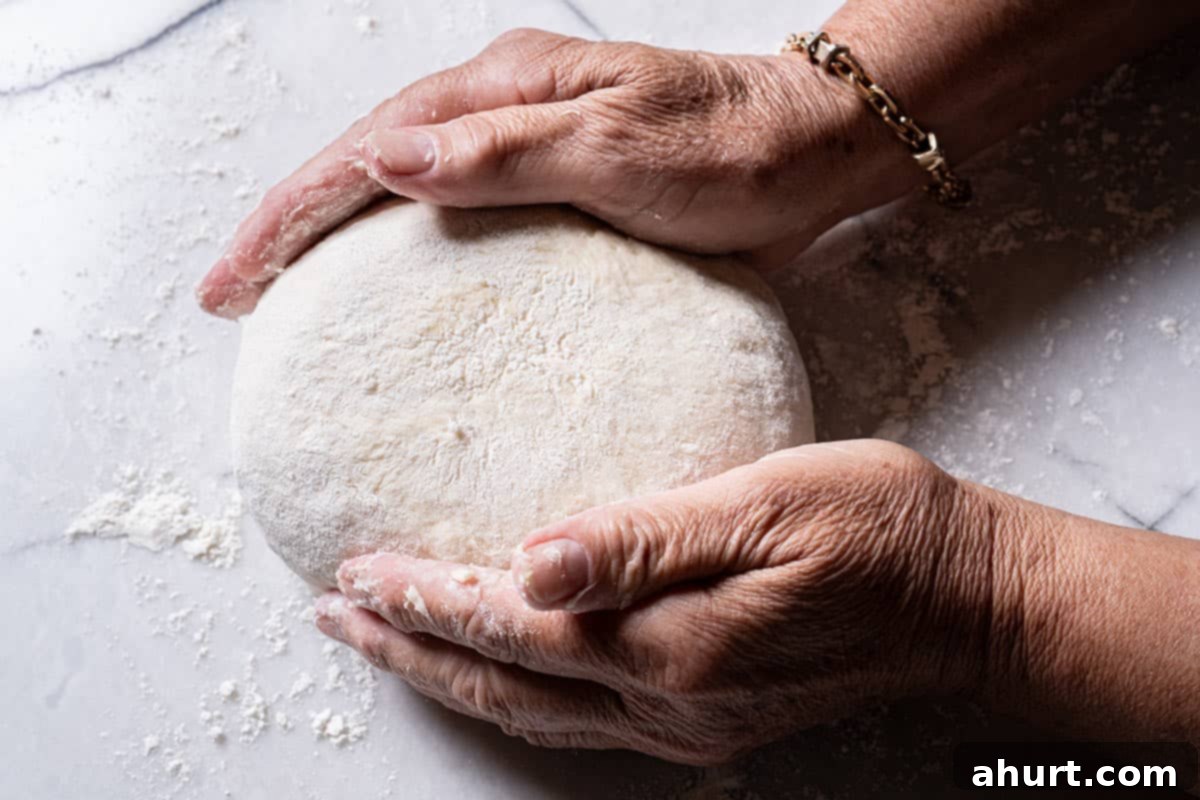
- Form Shape: Using your spatula and/or lightly floured hands, gently gather the folded dough and form it into a rough round shape. Don’t worry about perfection; the hot Dutch oven will help it take on a beautiful shape during baking.
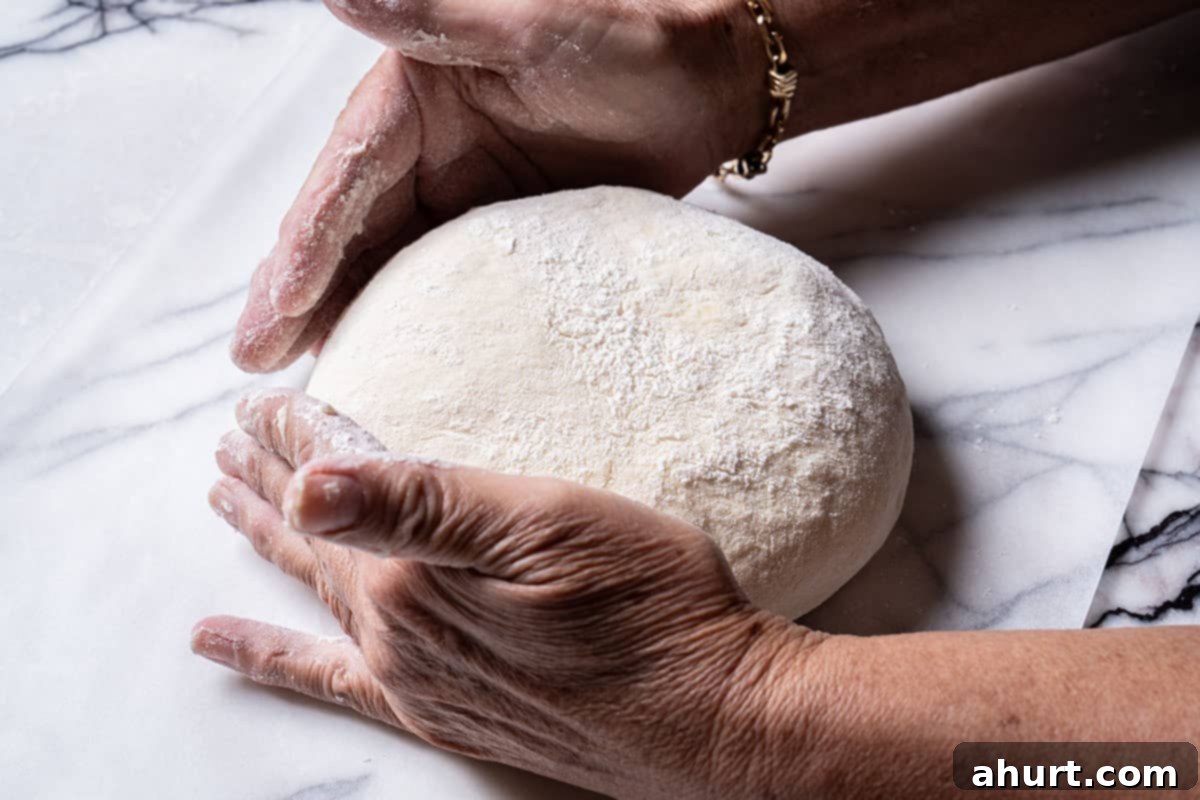
- Transfer to Parchment: Tear off a large piece of parchment paper, ensuring it’s big enough to easily lift the dough into your Dutch oven. Gently roll or slide the shaped dough onto the parchment paper, smooth side up. Reshape it slightly if necessary to maintain a nice round form. The parchment paper will be your handling tool for safely moving the dough into the hot pot.
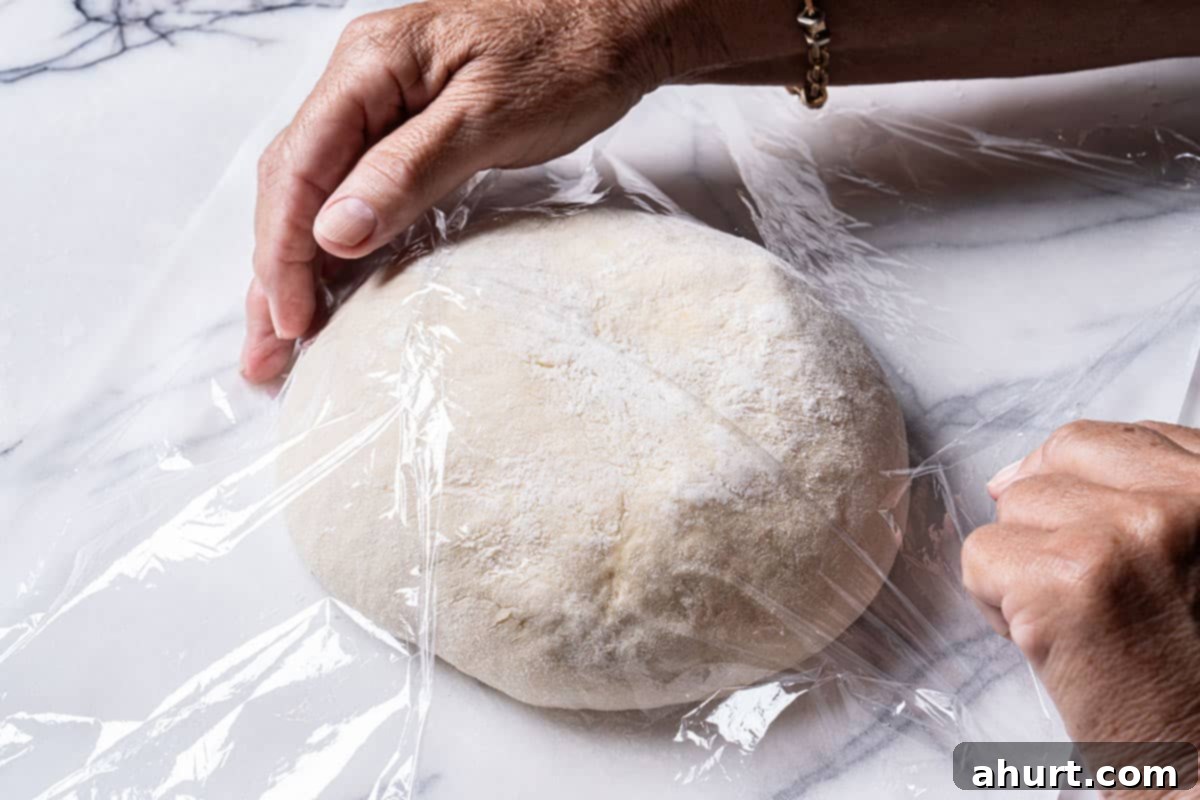
- Rest Dough: Loosely cover the dough on the parchment paper with plastic wrap. Let it rest on your countertop while the oven and Dutch oven finish preheating. This brief rest allows the gluten to relax slightly and the dough to maintain its shape.
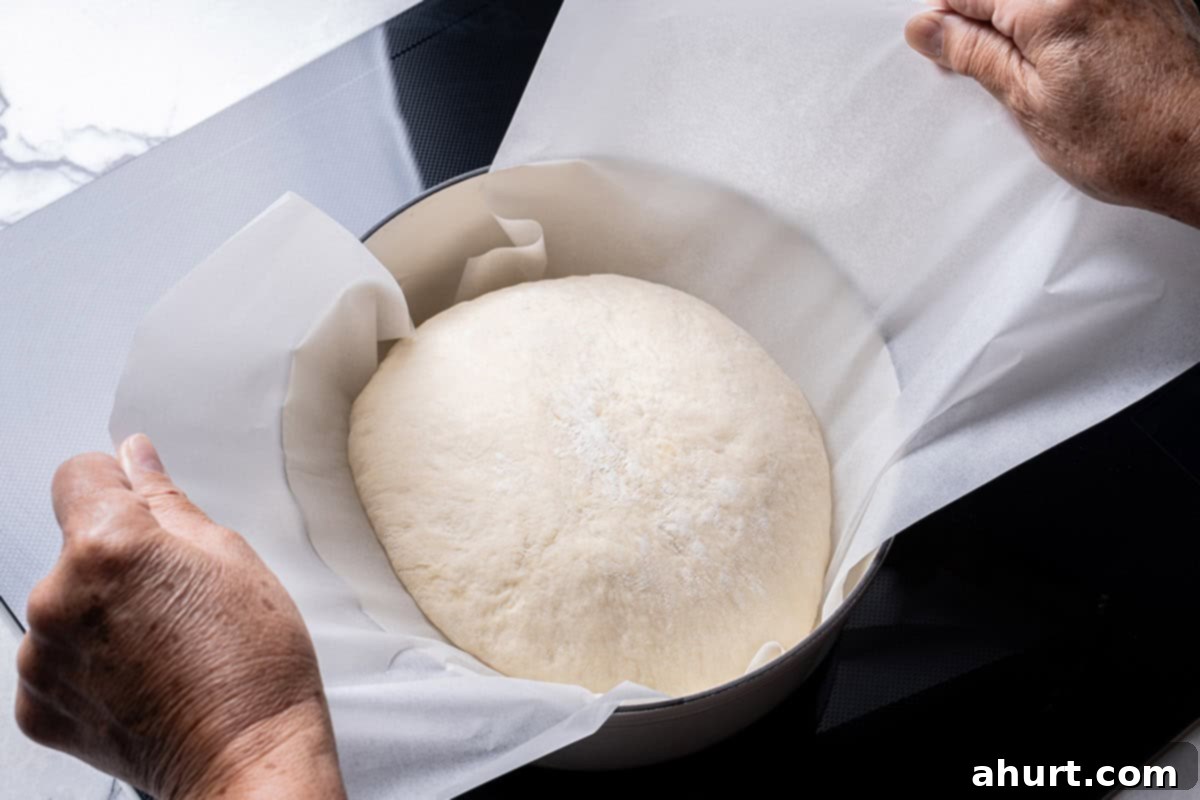
- Transfer to Pot: Using heavy-duty oven mitts, carefully remove the intensely hot Dutch oven from the oven. Gently pick up the dough by grabbing the parchment paper from each end, forming a sling. Carefully lower the dough (still on the parchment paper) into the preheated pot. Be cautious as the pot is extremely hot.
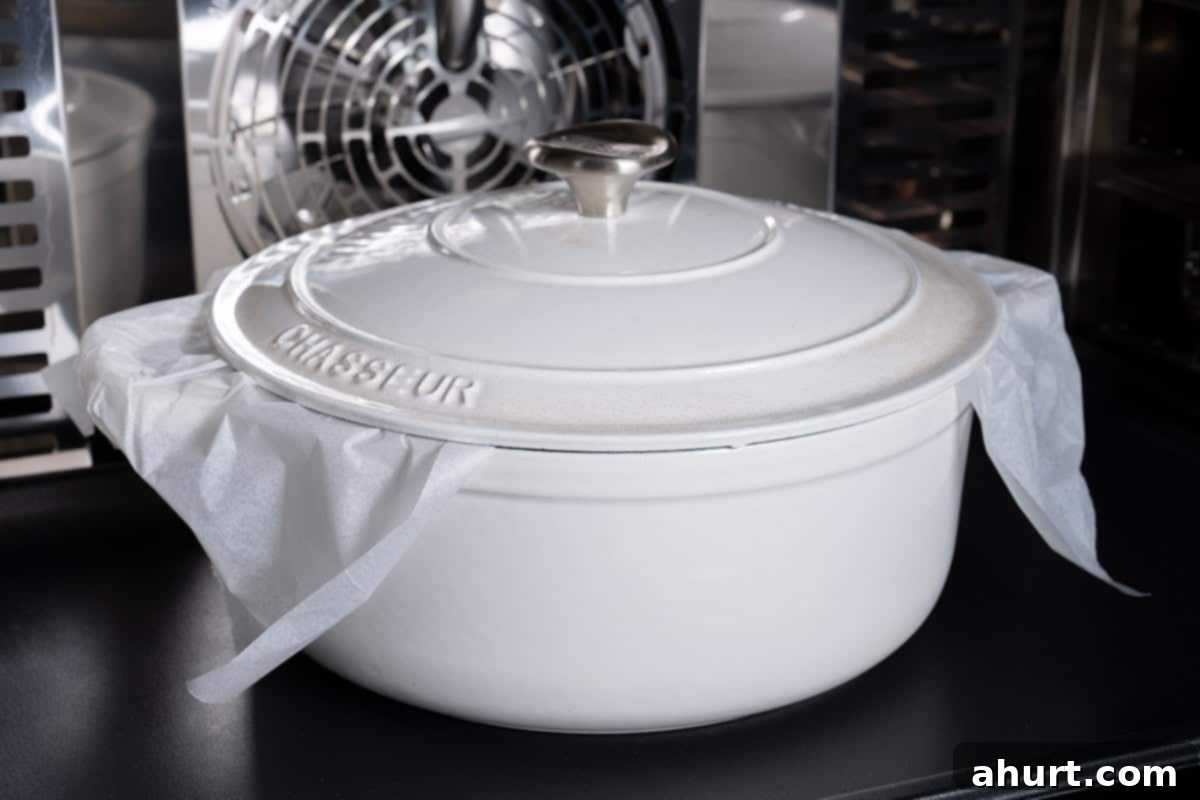
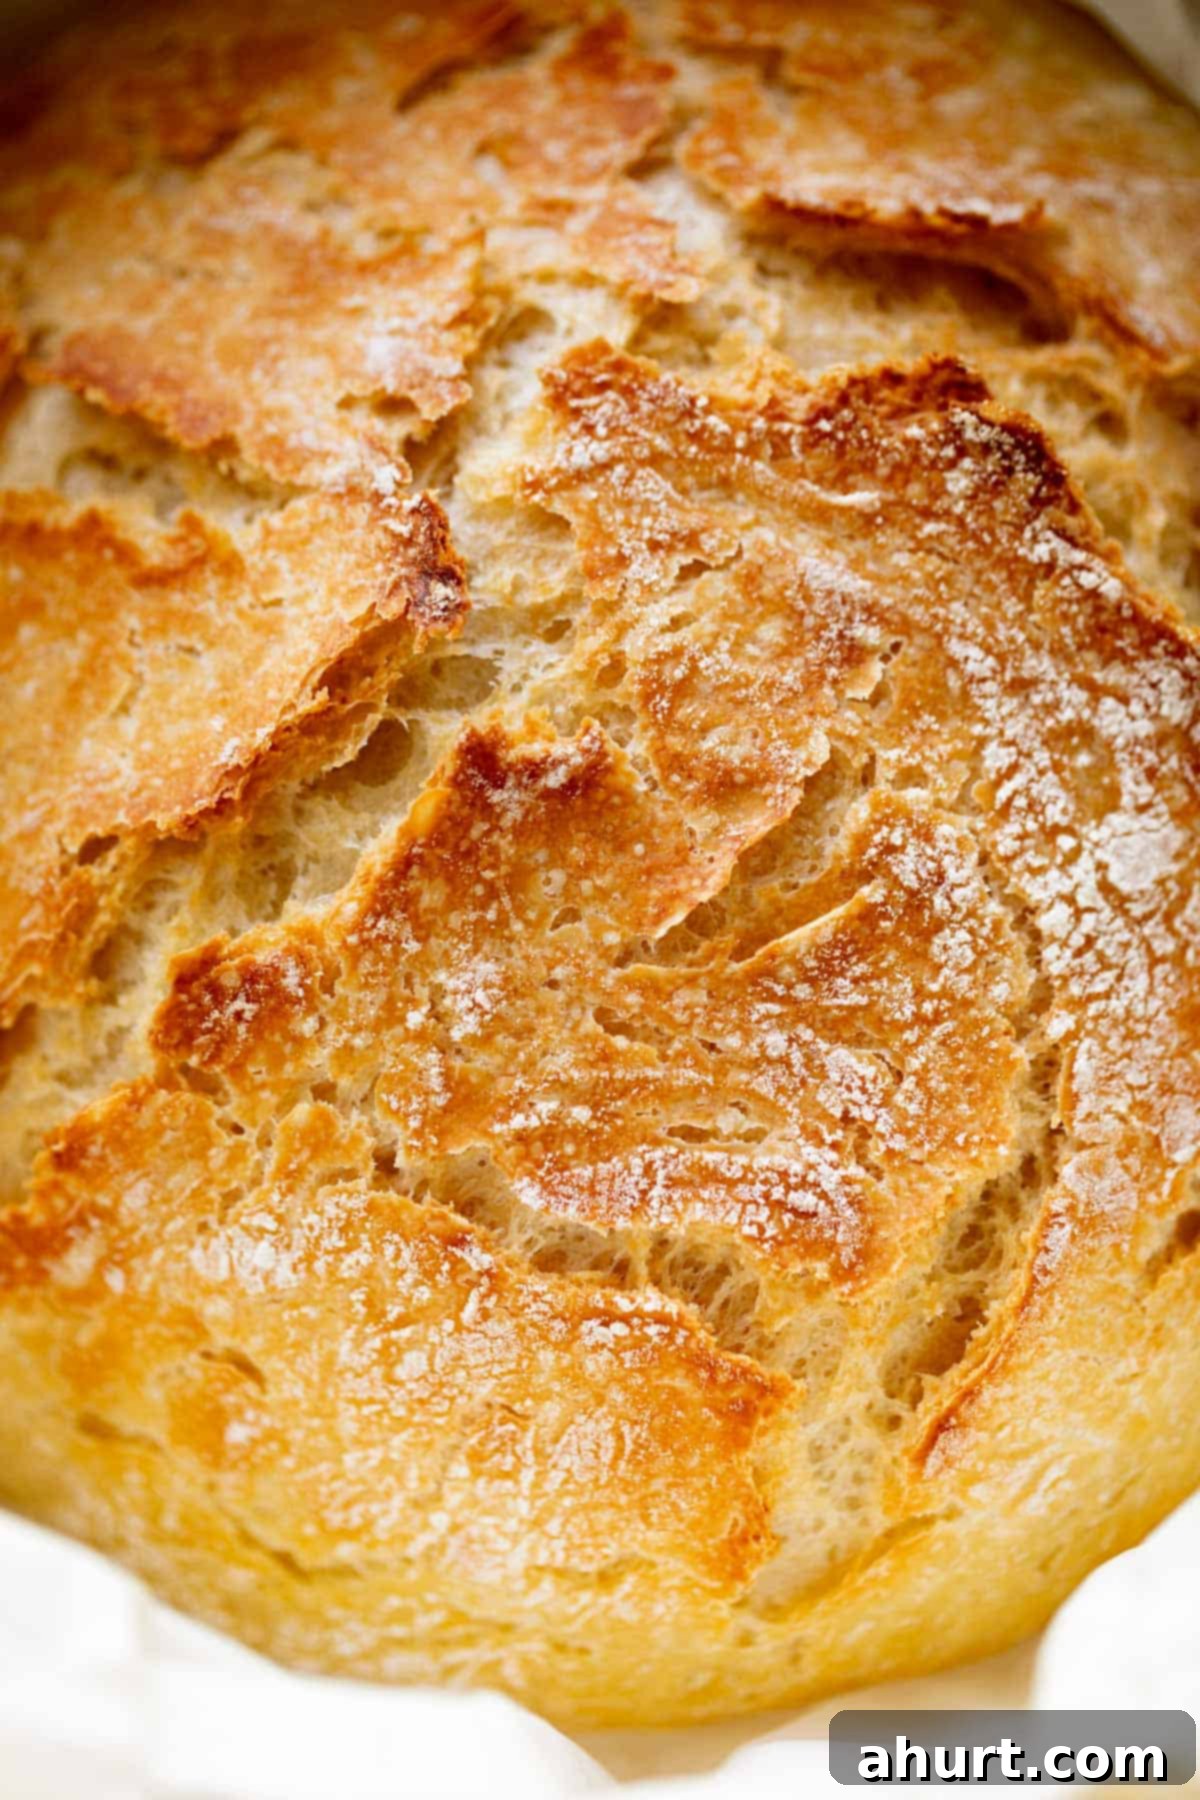
- Bake Bread: Place the lid back on the Dutch oven and carefully return it to the preheated oven. Bake for 30 minutes with the lid on. This trapped steam is vital for developing a thin, crisp crust. After 30 minutes, remove the lid and continue baking for an additional 12-15 minutes, or until the loaf achieves a beautifully deep golden-brown color and sounds hollow when tapped on the bottom.
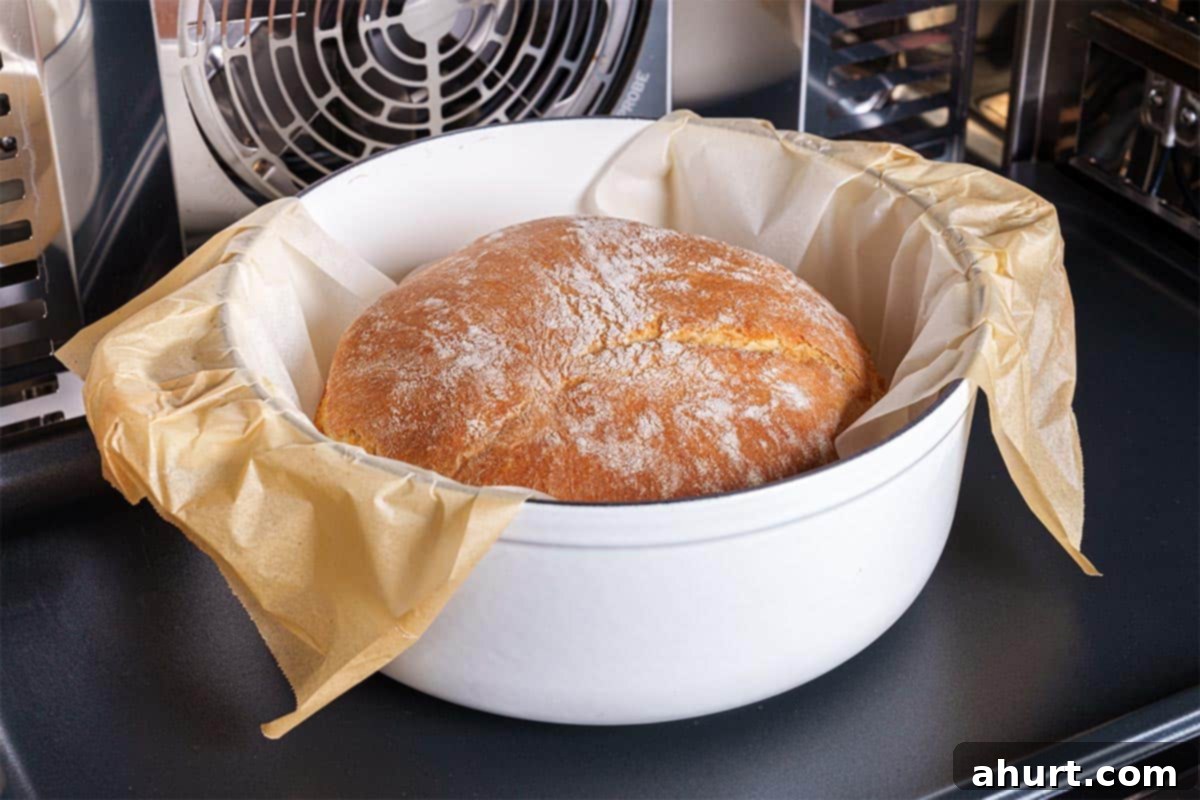
- Cool Bread: Once baked to perfection, carefully remove the Dutch oven from the oven. Using oven mitts and the parchment paper, lift the bread out and transfer it to a wire rack. It’s crucial to let the loaf cool for at least 10 minutes (preferably longer) before slicing. This allows the internal structure to set and prevents a gummy texture.
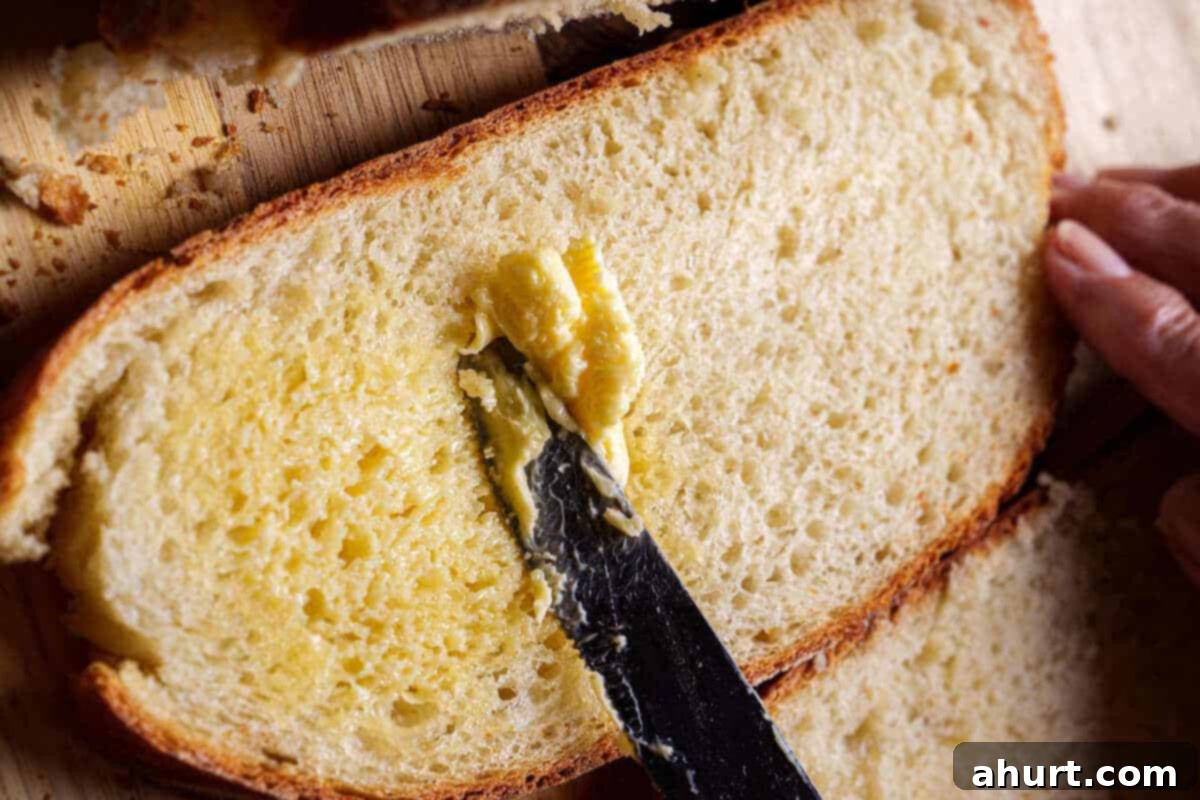
- Enjoy Your Masterpiece: Once cooled, slice the bread with a serrated knife and savor its incredible flavor and texture. Enjoy it plain to appreciate its rustic simplicity, or spread it generously with butter, honey, or even a luscious Sugar-Free Nutella Spread.
Tips for Perfect No-Knead Bread Every Time
- Don’t Rush the Rise: The long, slow rise is essential for flavor development and the signature airy crumb. While 2-3 hours is typical, if your kitchen is cool, it might take longer. Look for the visual cues (doubled in size, bubbly surface) rather than strictly adhering to the clock.
- Hot Dutch Oven is Key: The super-hot pot creates steam that keeps the crust soft initially, allowing for maximum oven spring and a light interior. Once the lid comes off, the dry heat bakes the crust to golden perfection.
- Handle Gently: Once the dough has risen, handle it as little as possible. You want to preserve those precious air bubbles that contribute to the open, airy crumb.
- Cool Completely (Almost): While tempting to slice right away, letting the bread cool on a wire rack allows the internal moisture to redistribute and the crust to become truly crispy.
Thank you for baking with us! We hope you thoroughly enjoy your freshly baked No-Knead Artisan Bread using this truly easy bread recipe. While you wait for it to cool and consider your next culinary adventure, why not explore more delicious recipes on our blog? This bread is the perfect accompaniment to countless dishes. Pair it with our Creamy Garlic Tuscan Shrimp for a rich and flavorful dinner. For breakfast or a delightful snack, spread it with some tasty Sugar-Free Nutella Spread or a vibrant Blueberry Sauce. It’s also the ideal bread to serve alongside a comforting bowl of Creamy Beef Stroganoff With Mushrooms, or pair a slice with a warm mug of Nutella Hot Chocolate to start your day right. Happy baking!
Easy Bread Recipe: FAQs
Yes, absolutely! You can certainly use all-purpose (plain) flour for this easy bread recipe. While bread flour, with its higher protein content, tends to develop more gluten for a chewier, airier texture, all-purpose flour will still produce a delicious loaf with a slightly softer crumb. Don’t hesitate to use what you have on hand.
Yes, preheating the Dutch oven is a critical step for this easy no-knead bread recipe. Placing the dough into a piping hot pot helps create a burst of steam, which is essential for achieving that beautifully crispy, golden-brown crust and promoting a good “oven spring” for a light interior. Don’t skip this step!
Yes, this homemade bread freezes wonderfully! Once the loaf has completely cooled to room temperature, wrap it tightly in plastic wrap, then place it in a freezer-safe bag or aluminum foil. It will maintain its quality for up to 3 months. When ready to enjoy, thaw at room temperature or refresh in a warm oven.
To encourage those beautiful large holes (an open crumb) in this easy artisan bread recipe, ensure your dough has had a long, slow rise in a warm, draft-free environment. Leaving it covered for the full 2-3 hours (or even slightly longer if your kitchen is cool) allows the yeast to produce more gas, creating those characteristic air bubbles. Also, handle the dough gently during shaping to avoid deflating it.
Unfortunately, it’s generally not recommended to freeze the raw dough from this easy bread recipe. Freezing can kill the active yeast, which would prevent the dough from rising properly when thawed and baked. It’s best to bake the bread first and then freeze the finished loaf.
If your dough isn’t rising as expected, several factors could be at play. The most common reasons are: 1) Your water was too hot and killed the yeast, or too cold and didn’t activate it. 2) Your yeast is expired or inactive; always check the date. 3) Your rising environment is too cold or drafty. Ensure a consistent, warm spot for the full rising time.
While a Dutch oven is highly recommended for achieving the best crust and texture due to its ability to trap steam, you can still bake this bread on a baking sheet. To emulate the steam, place a pan of hot water on the bottom rack of your oven during baking. The crust might be slightly less crisp, but it will still be a delicious homemade loaf.
Saved
Pin
No Knead Artisan Bread
Karina
10 minutes
42 minutes
2 hours
52 minutes
12
slices
Ingredients
-
3
cups
bread flour
or plain/all purpose -
1
tablespoon
white granulated sugar -
2
teaspoons
dried yeast
instant or rapid rise -
1 1/2
teaspoons
salt -
1 1/2
cups
warm water -
1
tablespoon
olive oil
Instructions
-
Combine flour, sugar, yeast and salt in a large bowl. Add water and oil, mixing to incorporate all of the ingredients together. Dough will be wet, sticky and shaggy.
-
Lightly spray the top with cooking oil spray. Cover with plastic wrap and place a dry tea towel over the top.
-
Leave in a warm, draft-free place for 2-3 hours, until doubled in size. Dough will have a lot of little holes or bubbles and be wobbly like jelly.
-
Place a large (10-inch or 26cm) dutch oven or heavy based pot in the oven with a lid. Preheat oven to 450°F (230°C) 30 minutes before baking.
-
Lightly flour work surface and plastic spatula with up to 1 tablespoon flour. Scrape dough out of bowl onto work surface with spatula. Sprinkle the top of dough with a large pinch of flour and fold it over on itself with the spatula (about 5-6 folds). Roughly form a round shape.
-
Measure out a large piece of parchment paper, large enough to transfer the dough into the pot. Place paper next to the dough and roll dough onto the paper, smooth side up. Carefully move it to the centre of the paper and reshape if needed, or shake pan a couple of times to evenly distribute dough. (It will even out while baking.)
-
Loosely cover with plastic wrap and let rest while oven is preheating.
-
Use oven mitts to carefully remove hot dutch oven from oven. Grab the parchment paper from each end to pick up the dough and transfer it into the pot.
-
Cover with lid and bake for 30 minutes, then remove lid and bake for an additional 12-15 minutes, until loaf is beautifully golden browned.
-
Transfer to a wire rack to cool for 10 minutes before slicing.
Notes
SUGAR: Yeast feeds on sugar and starch, the perfect pairing in bread dough. The mix releases carbon dioxide gas, causing the bread to rise while baking. The bubbles push the dough up and out, creating a soft and spongy texture.
YEAST: we have tried this recipe over the years with dried, instant and rapid-rise. We found the dried yeast did not need activating before mixing it through the dry ingredients. If hesitant, feel free to activate it first in the warm water and oil for a couple of minutes before adding the rest of your ingredients.
OIL is what makes our bread even softer. You need this sneaky little addition for a silky, soft crumb.
WARM WATER: not too hot or it will kill your yeast. 130°F or 55°C is the perfect temperature. You can also do the finger test: if you dip your finger in the water and its nice and warm, it’s perfect. If it burns, let it cool down slightly until warm.
RISING TIME can vary according to a couple of elements: humidity levels, room temperature, different flours, different yeast, etc. Let the bubbly surface be your guide. As long as the dough rises to double its size, it’s ready to continue as per the recipe above. Just remember, yeast thrives in warmer temps.
DON’T FORGET TO PREHEAT YOUR OVEN WITH THE POT!
Nutrition
Calories:
129
kcal
|
Carbohydrates:
24
g
|
Protein:
4
g
|
Fat:
2
g
|
Saturated Fat:
0.2
g
|
Polyunsaturated Fat:
0.4
g
|
Monounsaturated Fat:
1
g
|
Sodium:
293
mg
|
Potassium:
36
mg
|
Fiber:
1
g
|
Sugar:
1
g
|
Vitamin A:
1
IU
|
Vitamin C:
0.002
mg
|
Calcium:
6
mg
|
Iron:
0.3
mg
Nutrition information is automatically calculated, so should only be used as an approximation.
Tried this? Leave a comment below!
