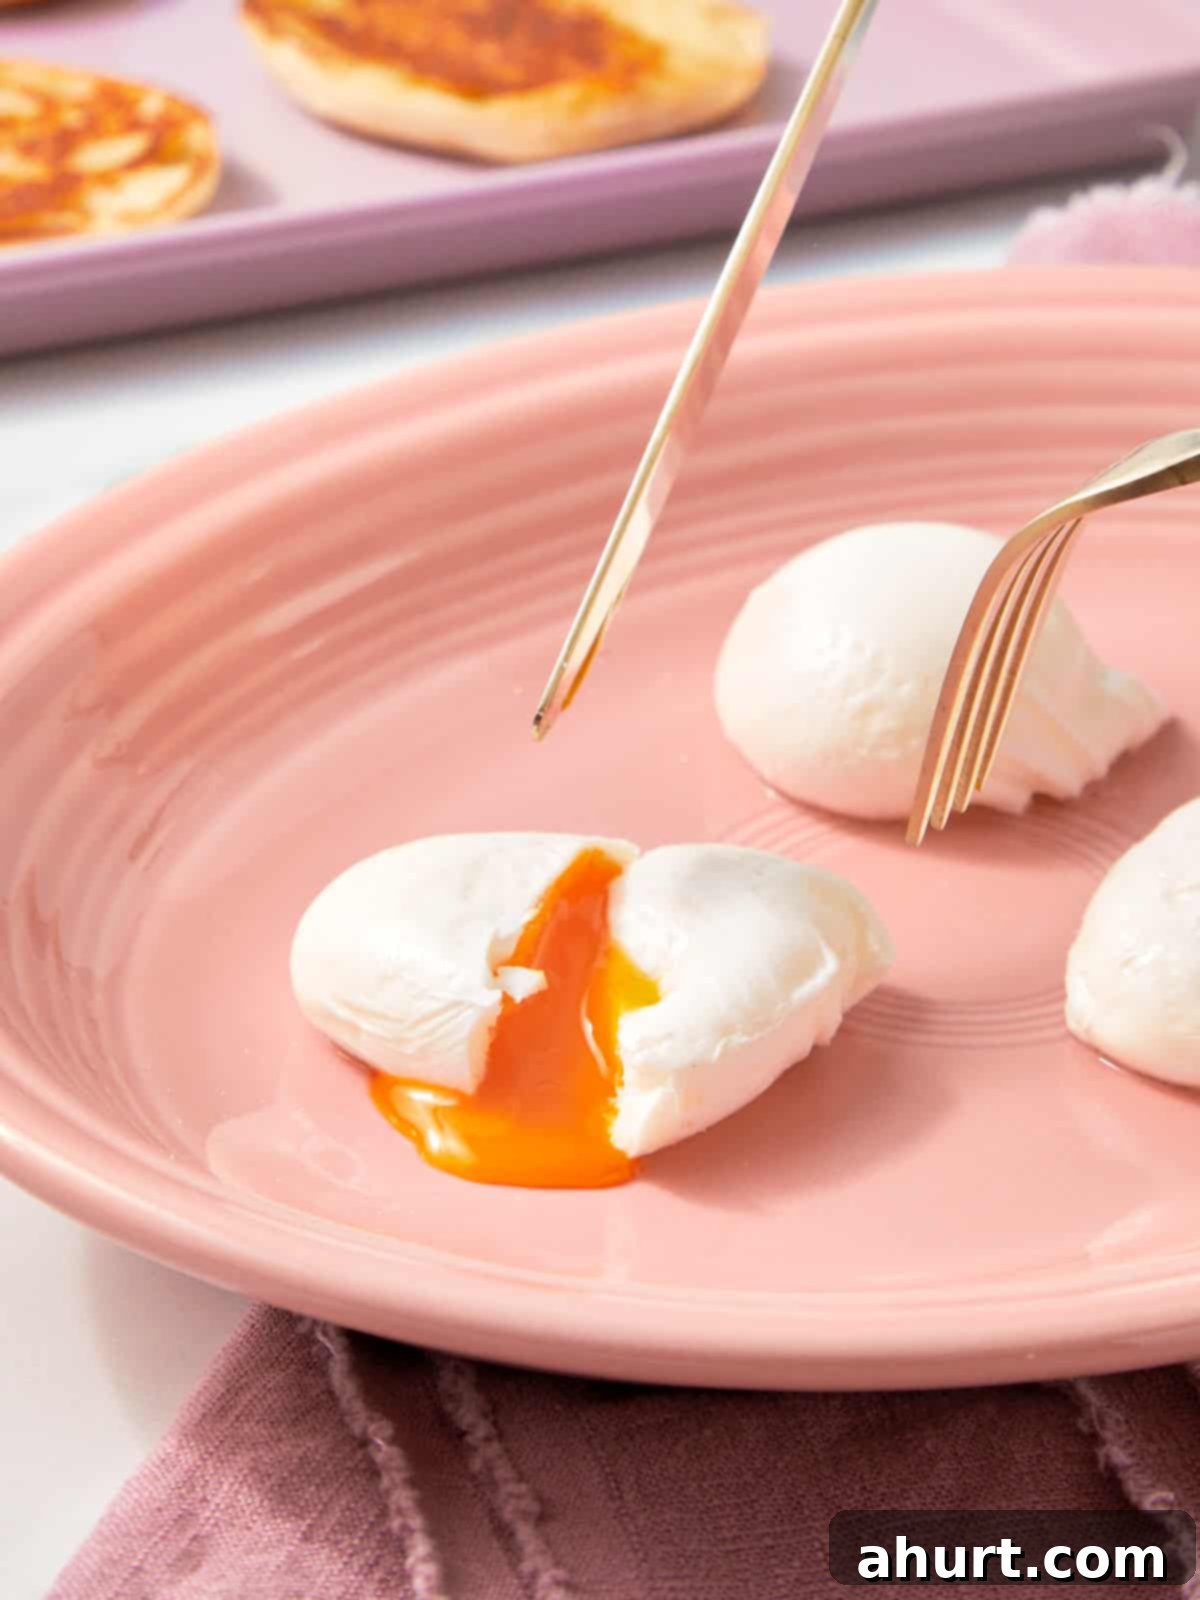
Master the Art of Perfect Poached Eggs Every Time: A Foolproof Guide for Runny Yolks & Firm Whites
Imagine effortlessly creating a dish that feels like it’s been plucked straight from a five-star restaurant. That’s precisely the feeling you’ll get when you master the skill of making Perfect Poached Eggs. Forget the intimidation and the fear of messy, wispy whites. My method is not just simple; it’s completely foolproof, designed to transform you into a brunch expert in minutes. I’m about to unveil all my no-fail secrets, ensuring you achieve that exquisite balance of a beautifully firm, delicate white and a gloriously runny, liquid-gold yolk, every single time you attempt it.
With just a few humble ingredients – water, a splash of white vinegar, and one incredibly simple trick – you’re not just learning to cook; you’re about to unlock a fundamental culinary technique that will elevate countless meals. This guide isn’t just a recipe; it’s your definitive passport to mastering brunch, making every bite feel luxurious and every presentation impeccable.
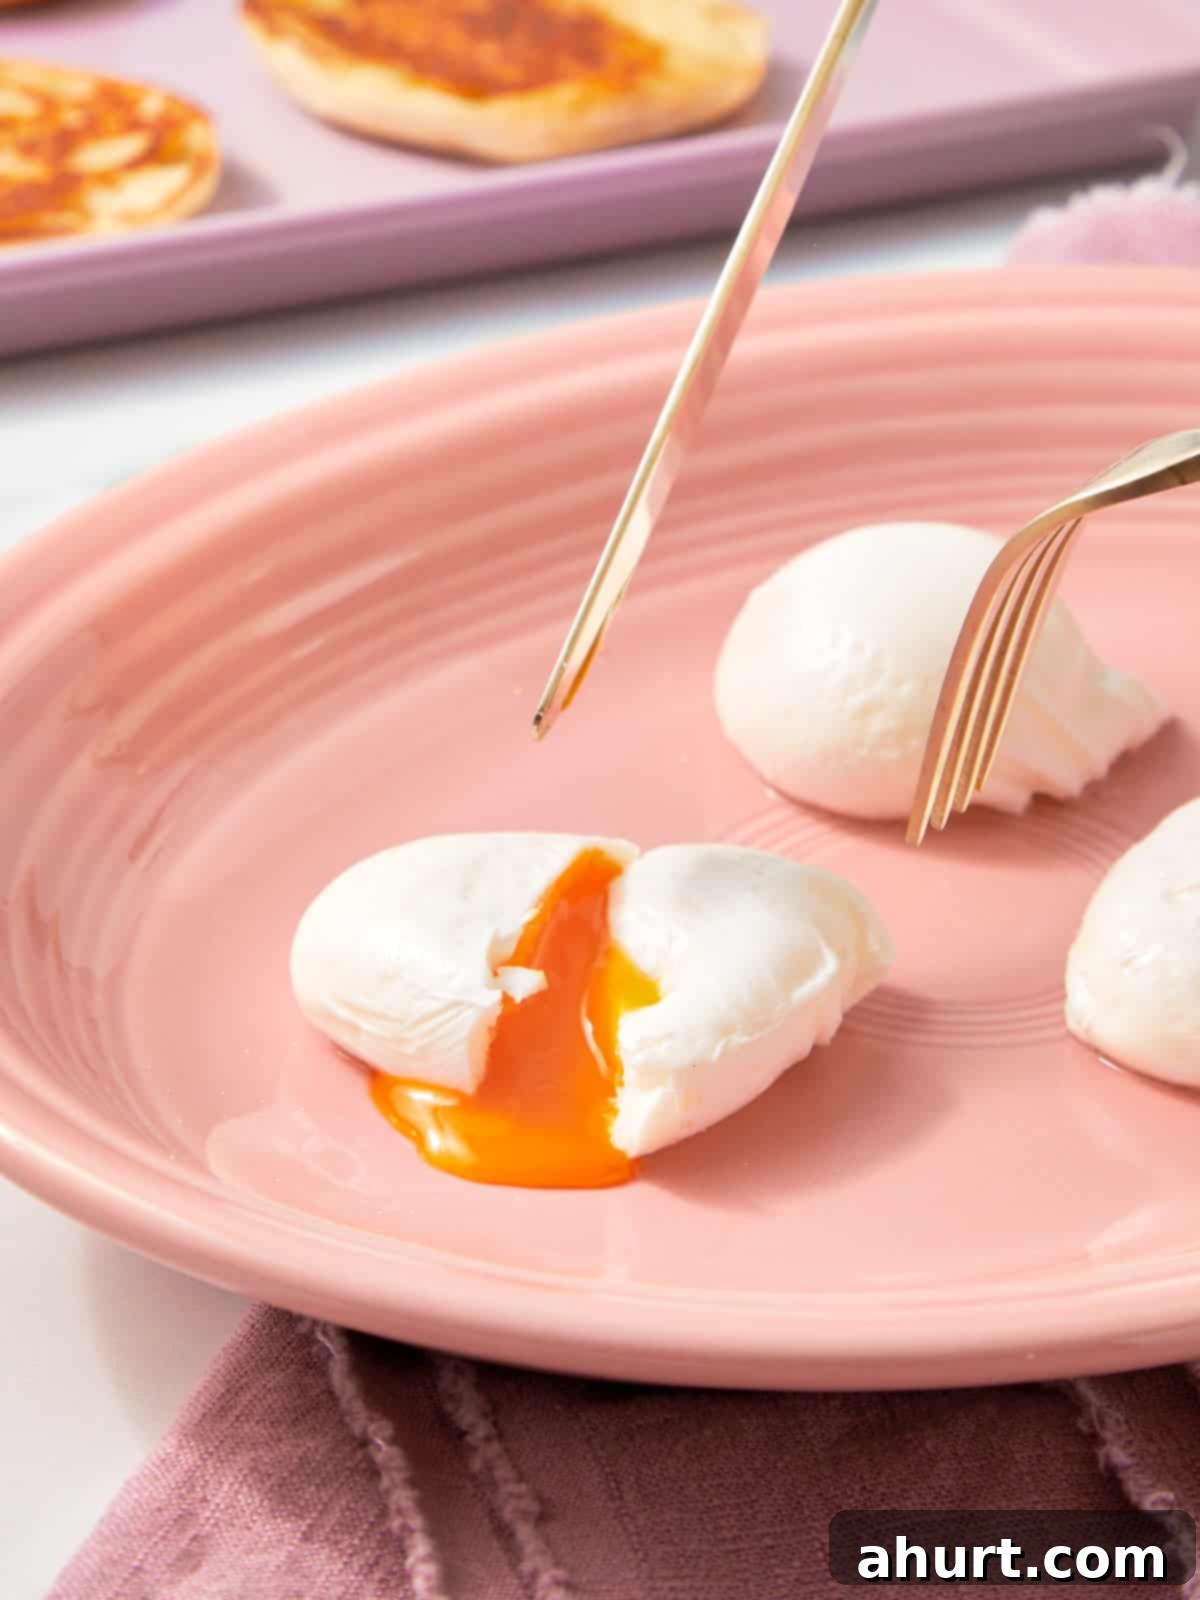
The Culinary Science Behind a Flawless Poached Egg
Achieving the perfect poached egg isn’t magic; it’s pure, brilliant kitchen science. Once you understand the simple principles at play, you’ll replicate flawless results with confidence every time. This method works because it leverages a few key scientific reactions and fluid dynamics to give you that iconic, elegant shape and texture.
- The Vinegar Effect: A modest splash of vinegar in the simmering water is our secret weapon. Vinegar (acetic acid) helps the egg whites coagulate and set almost instantly upon contact with the hot water. This rapid setting prevents those frustrating, wispy tendrils from forming and dispersing into the water, ensuring the egg white remains compact and neatly wrapped around the yolk. Crucially, the amount of vinegar is small enough that you won’t taste it in the final product, serving purely a functional purpose.
- The Whirlpool Method: Creating a gentle whirlpool in the water before adding the egg isn’t just for show. This clever technique uses the water’s motion to neatly coax the egg white to wrap itself tightly around the yolk. As the egg drops into the center of the swirl, the circulating water acts as a protective barrier and helps to form that beautiful, symmetrical, tear-drop shape we all adore. It’s like the water is gently cupping the egg for you.
- The Gentle Simmer: The temperature of your poaching water is paramount. We aim for a gentle simmer, never a rolling boil. A furious boil will violently agitate the delicate egg, causing it to break apart and result in a rubbery texture. A gentle simmer, characterized by small, champagne-like bubbles forming at the bottom of the pan, ensures the egg cooks evenly and tenderly, preserving its delicate structure and yielding that wonderfully firm-but-tender white with a luscious, runny yolk.
By combining these straightforward, science-backed tricks, you are guaranteed a beautiful, perfectly cooked poached egg every single time. It’s an elegant dance of temperature, acidity, and motion that results in culinary perfection, making you feel like a true chef in your own kitchen.
The Essential Ingredients: Simplicity for Perfection
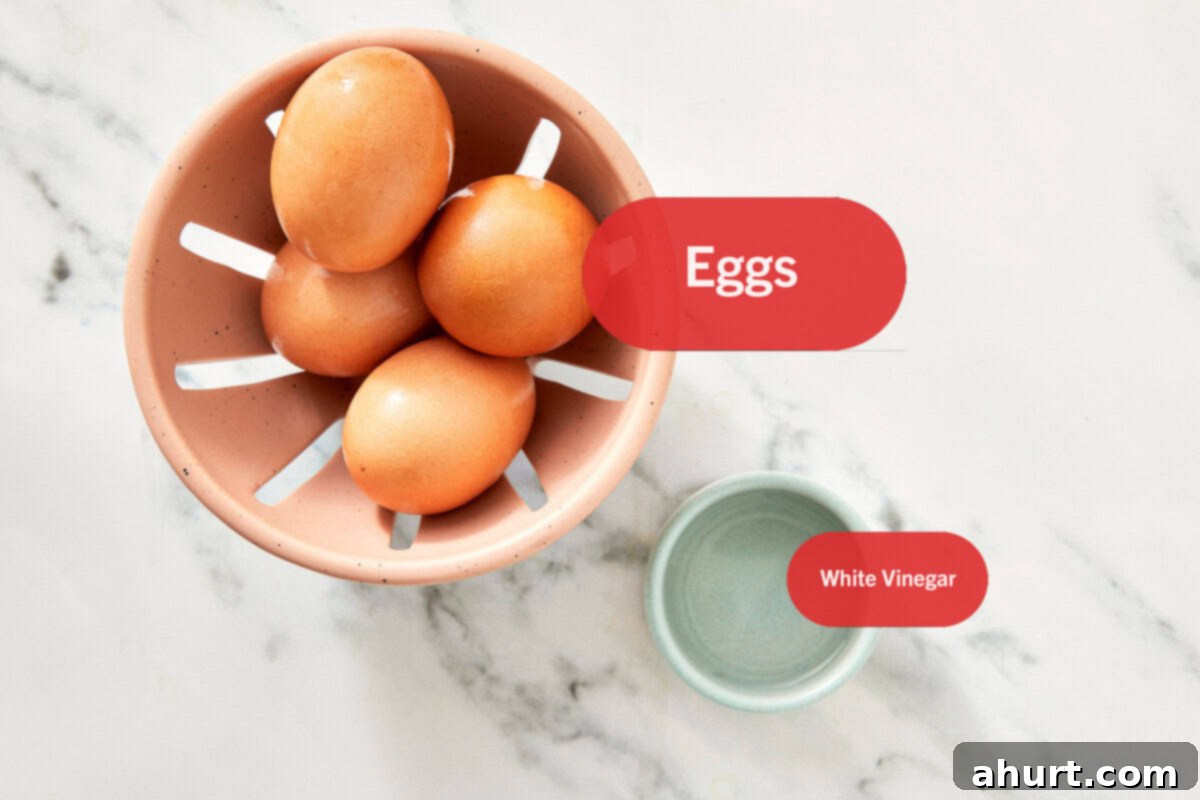
Are you ready for a truly minimalist ingredient list that delivers maximum impact? That’s right – perfect poached eggs aren’t about a dozen fancy additions; they’re all about mastering technique and letting a few simple powerhouses do their magic. The quality of your main ingredient truly shines here, so investing in the freshest eggs you can find will make all the difference.
- Fresh Eggs (Non-Negotiable!): This is your number one secret to success and the single most critical factor. The fresher an egg, the firmer and thicker its albumen (egg white). Fresh eggs have robust whites that cling tightly to the yolk, maintaining a beautiful, compact shape when cooked. Older eggs, on the other hand, have thinner, runnier whites that are prone to spreading out into wispy, unsightly tendrils in the water, making a perfectly shaped poached egg nearly impossible. To check for freshness, perform a simple float test: gently place the egg in a bowl of cold water. A very fresh egg will sink and lay on its side. A slightly older but still good egg will stand upright on its end. An egg that floats is too old to poach perfectly and should be discarded.
- White Vinegar (Your Insurance Policy): Just a splash of white vinegar in the poaching water is our little insurance policy against messy whites. As discussed, the acidity helps the egg whites set almost instantly upon hitting the hot water, encouraging them to stay together and form that beautiful, neat shape. Don’t worry about the taste – the small amount used means it either evaporates or dilutes, leaving no discernible vinegary flavor in your perfectly cooked egg. If you don’t have white vinegar, apple cider vinegar can be used, but white vinegar is typically preferred for its neutral taste.
- Water: While seemingly obvious, the quality and depth of your water matters more than you might think. Use enough water to fully submerge your eggs without them touching the bottom of the pan. About 4 inches deep is usually ideal for a standard saucepan. Filtered water can sometimes be beneficial if your tap water has a strong odor or taste, though generally, plain tap water is perfectly fine for poaching.
- Salt (Optional but Recommended): Although not strictly necessary for the poaching process itself, a pinch of salt (about ½ teaspoon per quart of water) in the poaching water can subtly enhance the flavor of the egg and is often used by professional chefs. However, be mindful that too much salt can sometimes affect the coagulation of the whites, so a small amount is key. Alternatively, you can always season your poached eggs generously with sea salt and freshly ground black pepper immediately after lifting them from the water.
Note: For precise measurements of ingredients for 4 servings and a structured recipe format, please refer to the Recipe Card below.
Mastering the Technique: Your Step-by-Step Poaching Guide
Ready to witness the magic unfold in your kitchen? This process is incredibly simple, and by following these steps precisely, you’ll achieve perfectly poached eggs every single time. Trust the process, and I promise you’ll be delighted by the most beautiful poached egg you’ve ever made. Let’s get started!
Essential Equipment for Poaching Success:
Having the right tools can make the process even smoother and more enjoyable:
- Deep Saucepan: A saucepan with at least an 8-inch diameter and high sides is ideal. This allows for sufficient water depth (at least 4 inches) and prevents overcrowding.
- Slotted Spoon: Essential for gently lifting the delicate poached eggs from the water without tearing their tender whites.
- Small Bowls or Ramekins: Crack each egg into its own small bowl or ramekin before adding to the water. This ensures a clean drop and allows you to inspect the egg quality.
- Fine-Mesh Sieve (Optional but Highly Recommended): My favorite chef’s secret! Using this tool before cracking the egg into a ramekin drains off the thin, watery part of the egg white, leaving only the firm white that will create a beautifully compact and perfectly shaped poached egg.
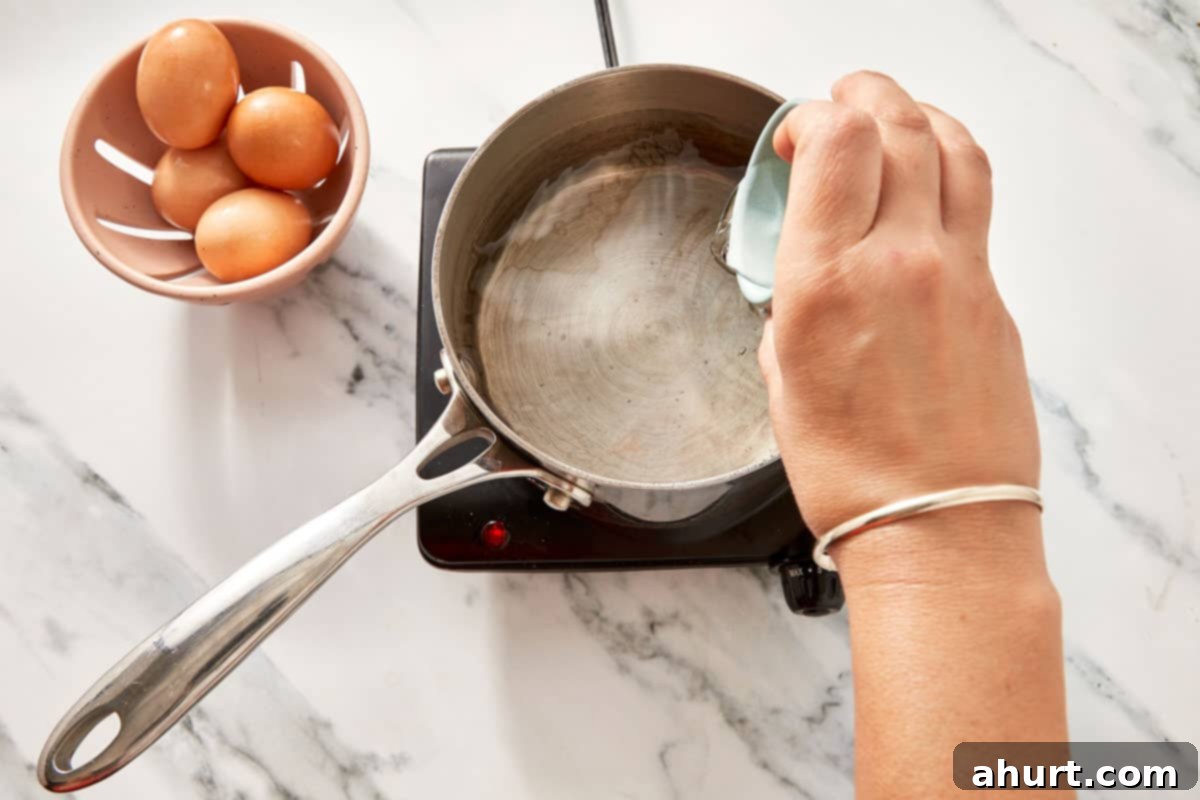
- Prepare the Water and Whirlpool. Begin by filling a medium-sized saucepan with at least 4 inches of water. Add 2 tablespoons of white vinegar (and a pinch of salt, if desired). Place the saucepan over medium heat and bring the water to a gentle simmer. This is crucial: you’re looking for small, consistent bubbles forming at the bottom of the pan, just barely breaking the surface, but absolutely no vigorous rolling boil. Once simmering, take a spoon and stir the water vigorously in one direction to create a soft but distinct whirlpool in the center of the pan. This spinning motion is essential for forming a tight, beautiful egg shape.
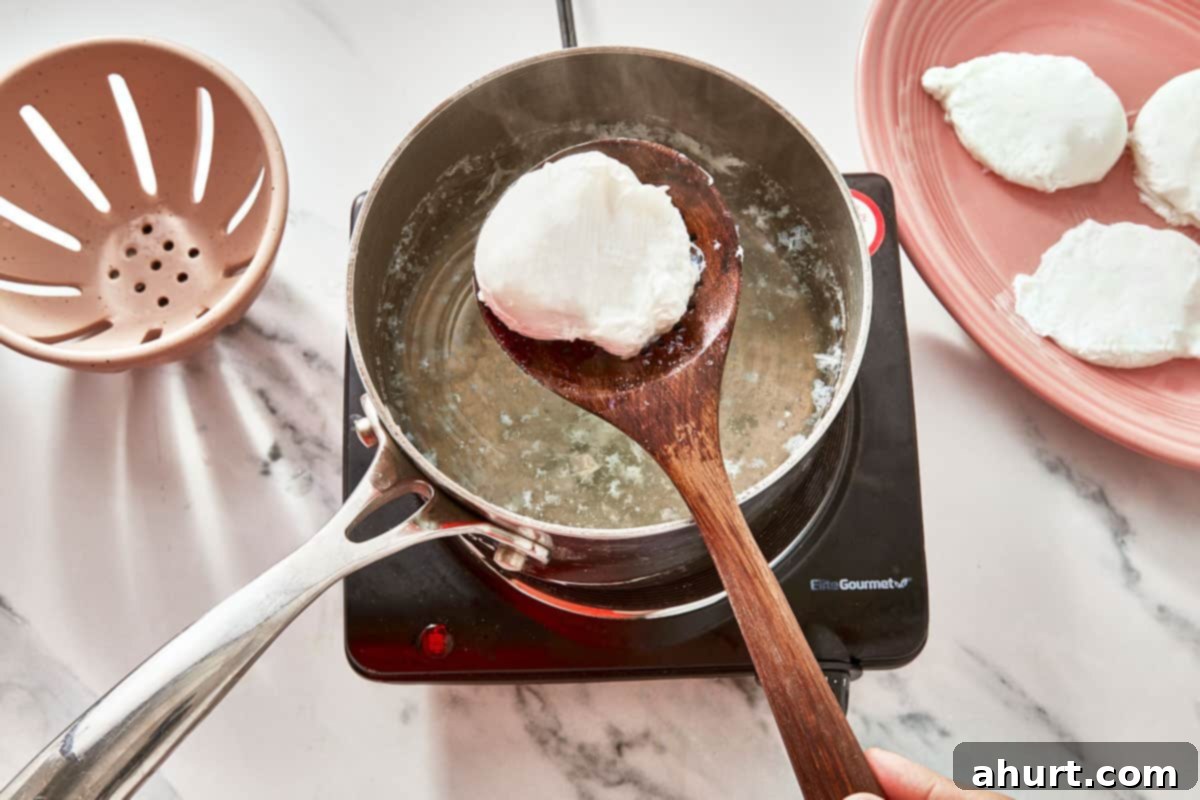
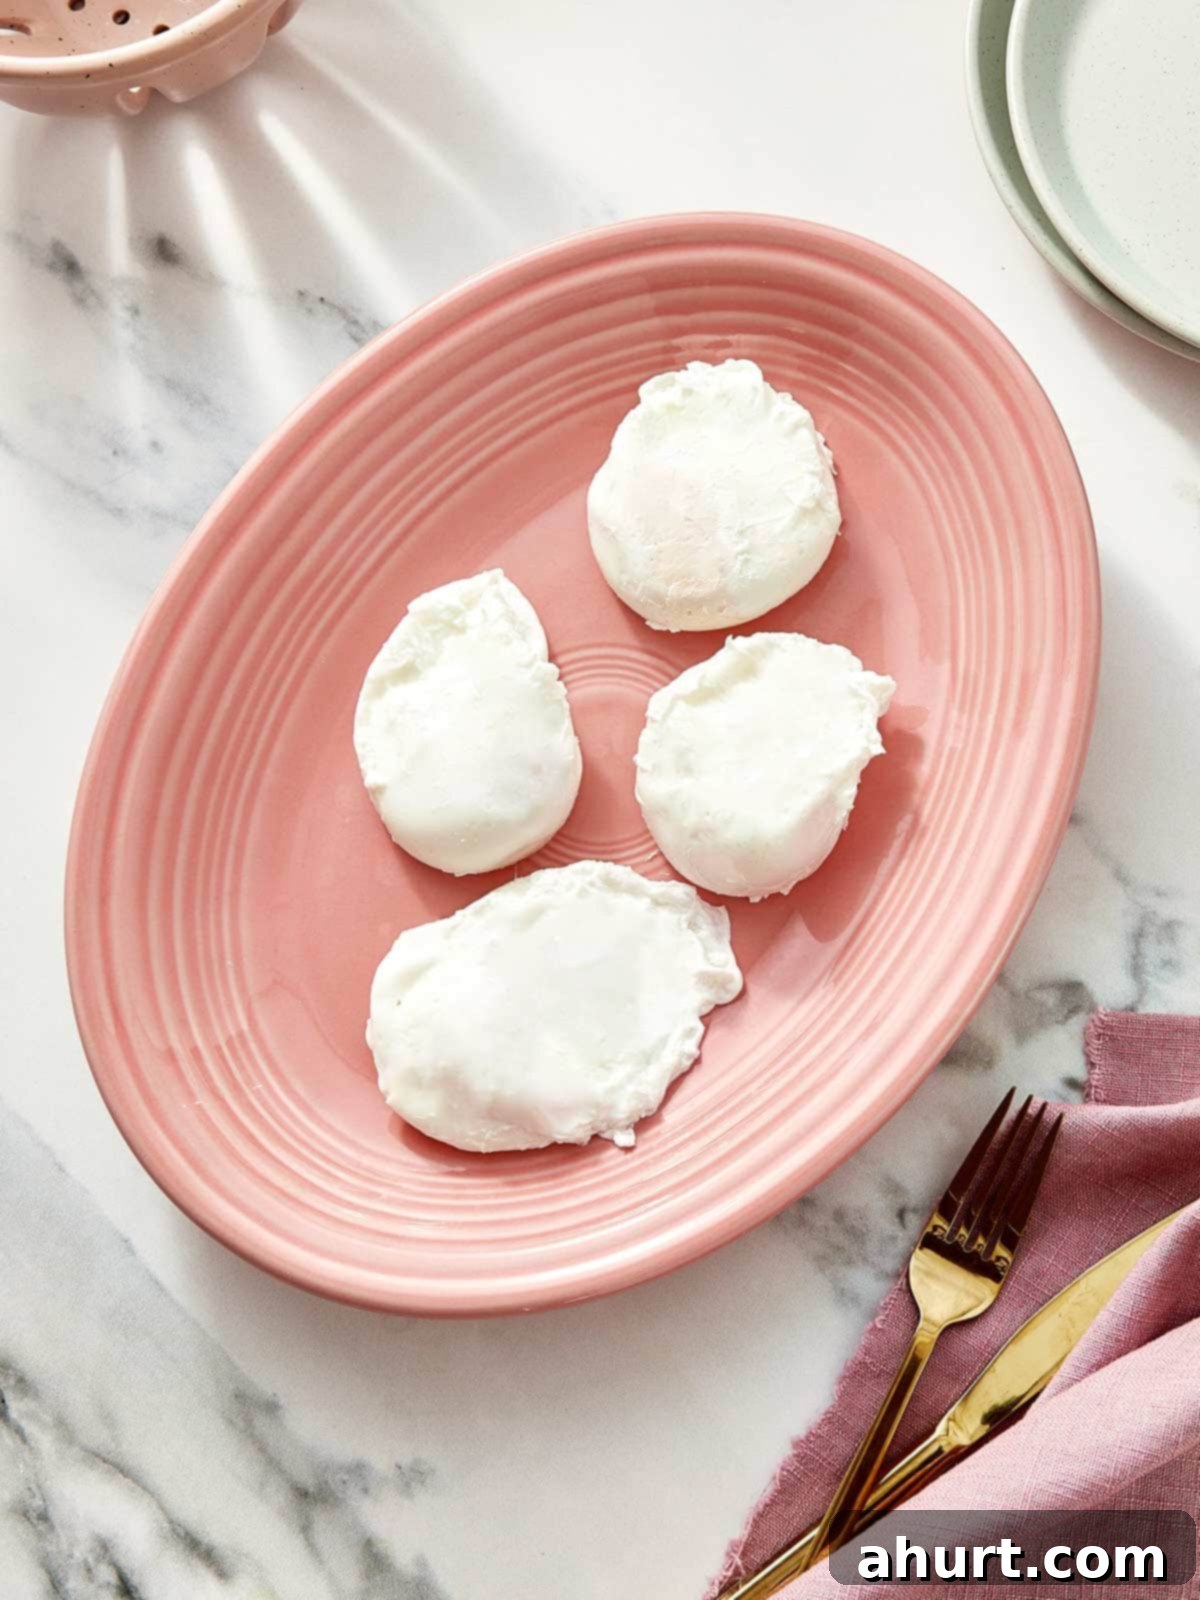
- Crack, Drop, and Lift to Perfection. While the whirlpool is still gently swirling, crack an egg into a small bowl or ramekin. (Optional: If using the “sieve trick” for the neatest results, gently drain the watery white through a fine-mesh sieve first, then transfer to a ramekin.) Now, carefully slide the egg into the very center of the whirlpool, as close to the water’s surface as possible. Allow it to cook undisturbed for exactly 3 minutes for a perfectly runny, liquid-gold yolk with a firm, set white. For a slightly softer yolk, cook for 2.5 minutes; for a firmer, jammy yolk, cook for 3.5-4 minutes. Once cooked, use a slotted spoon to gently lift the poached egg from the water, allowing any excess water to drain off thoroughly. Repeat this process for any additional eggs, making sure not to overcrowd the pan (ideally no more than 2-3 at a time to maintain consistent water temperature).
Now that you’ve mastered the Perfect Poached Eggs, get ready to elevate your breakfast, brunch, and even dinner game! These delicate culinary gems are incredibly versatile and can transform a simple meal into something extraordinary. Here are some of my favorite ways to enjoy them, each a testament to their delightful texture and flavor:
- Classic Eggs Benedict: The ultimate showcase for a perfectly poached egg! Layer a toasted English muffin with crispy bacon or Canadian ham, and then crown it with your flawless poached egg and a generous pour of my silky Hollandaise Sauce. This iconic combination is pure breakfast heaven.
- Luxurious Brunch Feast: Serve them alongside my fluffy Belgian Waffles for an irresistible sweet and savory contrast. The runny yolk beautifully mingles with the syrup and waffle, acting as a rich, natural sauce.
- Elegant Appetizer: For an impressive starter, consider crowning my Garlic Prawns and Avocado Crostini with a glistening poached egg. The combination of textures and flavors is sophisticated and incredibly satisfying.
- Elevated Salad: For a truly next-level lunch or light dinner, try crowning a fresh Skinny Chicken and Avocado Caesar Salad with a warm poached egg. Break the yolk, and it instantly transforms into a creamy, rich dressing that takes your salad to new heights.
- Hearty Toast Topper: A timeless, comforting classic! Place a perfectly poached egg on top of toasted sourdough or artisanal bread, spread with creamy mashed avocado, a sprinkle of chili flakes, and a dash of sea salt. Simple, yet profoundly satisfying and nourishing.
- Breakfast Bowls & Savory Grits: Add a poached egg to a savory breakfast bowl brimming with roasted vegetables, grains, or creamy grits for an extra boost of protein and velvety richness that ties all the flavors together.
- Soup & Ramen Enhancement: Drop a perfectly poached egg into a steaming bowl of hot ramen, pho, or a hearty vegetable soup just before serving. The soft yolk enriches the broth and adds a luxurious, comforting texture to every spoonful.
A perfect poached egg isn’t just an ingredient; it’s pure magic that effortlessly enhances every dish it touches. Embrace this new skill, experiment with different pairings, and enjoy your elevated culinary creations!
Frequently Asked Questions About Poaching Eggs
Even with a foolproof method, a few questions often pop up when aiming for poached egg perfection. Here are answers to some of the most common queries, ensuring you have all the knowledge to succeed:
This is almost always due to the egg not being fresh enough. As eggs age, their whites (albumen) become thinner and more watery. When older eggs hit the hot water, these thin whites are prone to spreading out into wispy, unsightly tendrils that disperse into the poaching liquid. The solution is simple and paramount: always use the absolute freshest eggs you can find. Our secret weapon, the splash of vinegar, is your second line of defense, as it helps even slightly less-than-perfect whites set faster and stay compact. For an extra safeguard, especially if egg freshness is questionable, absolutely try my “sieve trick” mentioned in the “Chef’s Notes” section – it drains away the watery part of the white before cooking.
For that coveted perfect runny yolk, 3 minutes is truly the magic number for a large egg poached in gently simmering water. The white should appear fully opaque, firm to the touch, and hold its shape beautifully when gently prodded with a slotted spoon. However, the yolk inside should still feel soft and yielding to the touch. If you prefer a slightly softer, very delicate yolk, reduce the cooking time to 2.5 minutes. For a firmer, jammy yolk that still has some give, extend to 3.5-4 minutes. Over time, practice makes perfect, and you’ll quickly learn to gauge doneness by sight and feel.
Yes, you absolutely can, but it’s crucial not to overcrowd the pan. I recommend poaching no more than two or three eggs at once in a standard-sized saucepan. Overcrowding can significantly lower the water temperature, leading to uneven cooking, and can also cause eggs to stick together or break. Ensure each egg has plenty of room to cook perfectly. If you need to make many poached eggs for a crowd or for meal prep, consider poaching them in batches or using the “make-ahead” method (see my chef’s notes below), which is a brilliant time-saver for entertaining!
While white vinegar is ideal due to its neutral flavor and high acidity, you can substitute it with apple cider vinegar if that’s all you have. However, be aware that apple cider vinegar might impart a very subtle fruity note to the egg, though it’s usually barely noticeable. Avoid darker, more flavorful vinegars like balsamic or red wine vinegar, as they can not only stain the egg white but also impart an undesirable strong flavor to your delicate poached egg.
If you’re making several eggs and want to serve them all warm at the same time, you have a couple of excellent options. The simplest is to gently transfer the cooked poached eggs with a slotted spoon to a bowl of warm (not hot, or they’ll continue to cook) salted water while you finish poaching the rest. Alternatively, for larger batches or advance preparation, use the “make-ahead” method described in detail in the “Chef’s Notes & Advanced Tips” section below. This involves cooling them in an ice bath and then briefly reheating them in simmering water just before serving.
Saved
Pin
Perfect Poached Eggs Recipe
Karina
2 minutes
10 minutes
12 minutes
4 Eggs
Ingredients
- 4 large eggs
- 2 tbsp white vinegar
- Optional: A pinch of salt
Instructions
-
1. Prepare the Poaching Liquid: Fill a saucepan with at least 4 inches of water. Add 2 tablespoons of white vinegar (and optionally, a pinch of salt). Bring the water to a gentle simmer over medium heat. Look for small, consistent bubbles at the bottom, but avoid a rolling boil.
-
2. Create the Whirlpool: Stir the simmering water vigorously in one direction with a spoon to create a gentle but distinct whirlpool in the center of the pan.
-
3. Prepare and Add the Egg: Crack an egg into a small bowl or ramekin. (For the neatest results, drain any watery white through a fine-mesh sieve first). Gently slide the egg into the very center of the swirling water, as close to the surface as possible.
-
4. Cook to Perfection: Cook for exactly 3 minutes for a runny yolk and firm white. For a softer yolk, aim for 2.5 minutes; for a firmer yolk, extend to 3.5-4 minutes. Maintain a gentle simmer throughout.
-
5. Remove and Drain: Using a slotted spoon, gently lift the poached egg from the water, allowing any excess water to drain off for a few seconds.
-
6. Repeat and Serve: Transfer the cooked egg to your dish. Season immediately with salt and pepper. Repeat for remaining eggs, poaching no more than 2-3 at a time to prevent overcrowding.
Chef’s Notes & Advanced Tips for Poaching Perfection
- Freshness is Everything (Reiterated): This is paramount. Always use the freshest eggs you can get your hands on. Older eggs have thinner whites that tend to spread out, making it harder to get that neat, compact shape. A simple float test (explained in the ingredients section) can help you determine freshness.
- The Sieve Trick (My Absolute Favorite Secret!): This is a game-changer, especially if your eggs aren’t farm-fresh or you want an even more pristine finish. Crack your egg into a small fine-mesh sieve set over a bowl. Let it sit for 30-60 seconds to drain away the thin, watery part of the egg white. What’s left is the thick, firm white that will wrap beautifully around the yolk, creating an incredibly tight, perfect sphere. Then, gently transfer the sieved egg to a ramekin before sliding it into the poaching water.
- Gentle Simmer, Never a Rolling Boil (Crucial!): This cannot be stressed enough. Look for those tiny, champagne-like bubbles just barely breaking the surface at the bottom of the pot. A raging, rolling boil is far too aggressive; it will tear your delicate egg whites apart, create a rubbery texture, and make it impossible to achieve a neat shape. Adjust your heat as needed to maintain a gentle simmer throughout the cooking process.
- The Best Brunch Hack Ever: Poach Ahead! Making poached eggs for a crowd or meal prep? You can absolutely poach them ahead of time! As soon as your eggs are cooked to your desired doneness, immediately transfer them into an ice bath (a bowl of ice water) to stop the cooking process. Once completely chilled, you can store them submerged in cold water in an airtight container in the refrigerator for up to 24-48 hours. When you’re ready to serve, simply transfer them to a slotted spoon and gently reheat them in a pot of simmering water for 30-60 seconds until warmed through. This trick ensures perfect poached eggs on demand, no last-minute stress!
- Season After Poaching: Always season your poached eggs with salt and freshly ground black pepper immediately after lifting them from the water. Adding salt to the poaching water itself can sometimes affect the coagulation of the whites, and it’s easier to control seasoning on the finished product.
- Use Sufficient Water: Ensure your saucepan contains enough water (at least 4 inches deep) so that the eggs are fully submerged and have ample space to cook without sticking to the bottom or each other.
Nutrition
Carbohydrates: 2g |
Protein: 25g |
Fat: 19g |
Saturated Fat: 6g |
Polyunsaturated Fat: 4g |
Monounsaturated Fat: 7g |
Trans Fat: 0.1g |
Cholesterol: 744mg |
Sodium: 286mg |
Potassium: 288mg |
Sugar: 1g |
Vitamin A: 1080IU |
Vitamin C: 0.1mg |
Calcium: 114mg |
Iron: 4mg
Nutrition information is automatically calculated, so should only be used as an approximation.
